


Views: 0 Author: Site Editor Publish Time: 2026-09-14 Origin: Site


Picture your garage. Shadows creep across your workbench. You strain to see fine details on your latest project. Frustration builds with every dark corner.
Hexagon LED lights solve this problem. These modular, honeycomb-shaped panels deliver bright, even illumination. Their popularity grows steadily in garages and workshops. Market data confirms this trend:
Year | Market Value |
|---|---|
$63.1 million | |
2031 | ~$94 million |
This guide explains the led hexagon garage lights custom order process. You will learn the basics, plan your layout, and purchase with confidence.
Follow these steps. Transform your workspace with hexagon led lights matched to your needs.
Hexagon LED lights give bright, shadow-free light for detailed work.
Measure your garage ceiling and plan the layout before ordering.
Choose the right brightness and color temperature for your tasks.
Installation takes a few hours; pre-assemble and test the panels first.
Keep the lights clean and check connections to ensure long life.
Hexagon LED lights are modular panels shaped like honeycomb cells. Each panel connects to its neighbors to form a continuous grid on your ceiling. This design creates one unified light surface rather than individual fixtures scattered across the room.
Each hexagon panel contains three essential parts. LED chips generate the light itself. A polycarbonate diffuser sits above the chips to spread light evenly and reduce harsh glare. An aluminum frame holds everything together securely.
The frame material matters more than you might expect. Professional installations specify extruded 6063 aluminum alloy for the housing. This alloy offers superior thermal conductivity while remaining lightweight. The aluminum acts as a heat sink, drawing heat away from the LED chips. Without proper heat dissipation, LEDs can experience color shifting, brightness reduction, or premature failure.
Injection-molded plastic housings present a cheaper alternative, but they trap heat. That trapped heat guarantees shorter lifespan and inconsistent color output. Aluminum frames solve heat dissipation through engineered geometry. The frame's shape and surface area work together to keep your LEDs cool, even in large arrays.
The system operates through simple connections. You mount panels to your ceiling using brackets. Each panel links to the next, and the entire array connects to a single power source. The result is one continuous lighting surface with no dark gaps between fixtures.
Color temperature control stands as a key feature. Most hexagon led lights offer adjustable settings, typically ranging from warm to cool white. For detailed garage work, lighting industry guides recommend a setting near 4,100K. This cool white value produces clean, focused light that enhances clarity. You see surface imperfections clearly, which matters for tasks like paint correction or engine work.
Dimming capabilities add another layer of control. You adjust brightness to suit different activities, from detailed inspection to general movement around the garage. LED technology also delivers strong optical performance while consuming minimal power. You get high light output with low energy draw, which keeps operating costs down over time.
The combination of adjustable color, dimming options, and efficient operation makes hexagon led lights a versatile choice. You customize the lighting environment to match your specific needs. Understanding these core features helps you make informed decisions when planning your custom order.
Standard single-bulb fixtures cast shadows across your work surface. Those shadows hide defects you need to see. You miss swirl marks, holograms, and coating high spots during paint correction. A multi-directional ceiling grid solves this problem completely. You inspect every angle without repositioning lights. Shadow-free lighting eliminates hidden flaws that single-point sources create.
You catch defects during the first inspection. You avoid discovering them later. This directly improves your accuracy. High CRI values above 85 and even light distribution are essential for this work. Low CRI makes dark paints appear uniform. Holograms stay invisible until you move the car outside. One Phoenix-area shop upgraded to a high-CRI shadow-free grid. Their redo-panel claims dropped from two per month to one in fourteen months. That demonstrates a measurable accuracy gain.
Technicians often slow down after a lighting upgrade. They see scratches they never noticed before. Workflow speeds up within a week. Defects appear on the first wipe-down. Over-polishing and under-polishing both decrease. Shadow-free light enhances precision for every detailed task.
Hexagon led lights deliver strong performance with minimal power consumption. Replacing eight fluorescent fixtures (640W total) with an eleven-panel hexagon led lights setup (~300W) saves roughly 340 watts. Operating ten hours per day for three hundred days saves 1,020 kWh annually. At twelve cents per kilowatt-hour, that equals about $122 in yearly energy savings.
The hexagon LED setup costs between $200 and $300. Simple payback arrives in 1.6 to 2.5 years before rebates. Utility rebates can drop payback under twelve months. This makes hexagon lights for shops a financially smart upgrade.
The aesthetic benefits matter too. Hexagon lights for gyms and shops create a clean, professional look. The honeycomb pattern transforms a basic garage into a modern space. Hexagon shop lights and hexagon gym lights provide both function and style. The uniform grid improves the room's overall appearance. Your garage becomes suitable for multiple uses. Home workouts feel more inviting. Workshop projects look more professional. The combination of performance and appearance makes hexagon lights for garages an excellent choice. You get better illumination and a better-looking space in one upgrade.
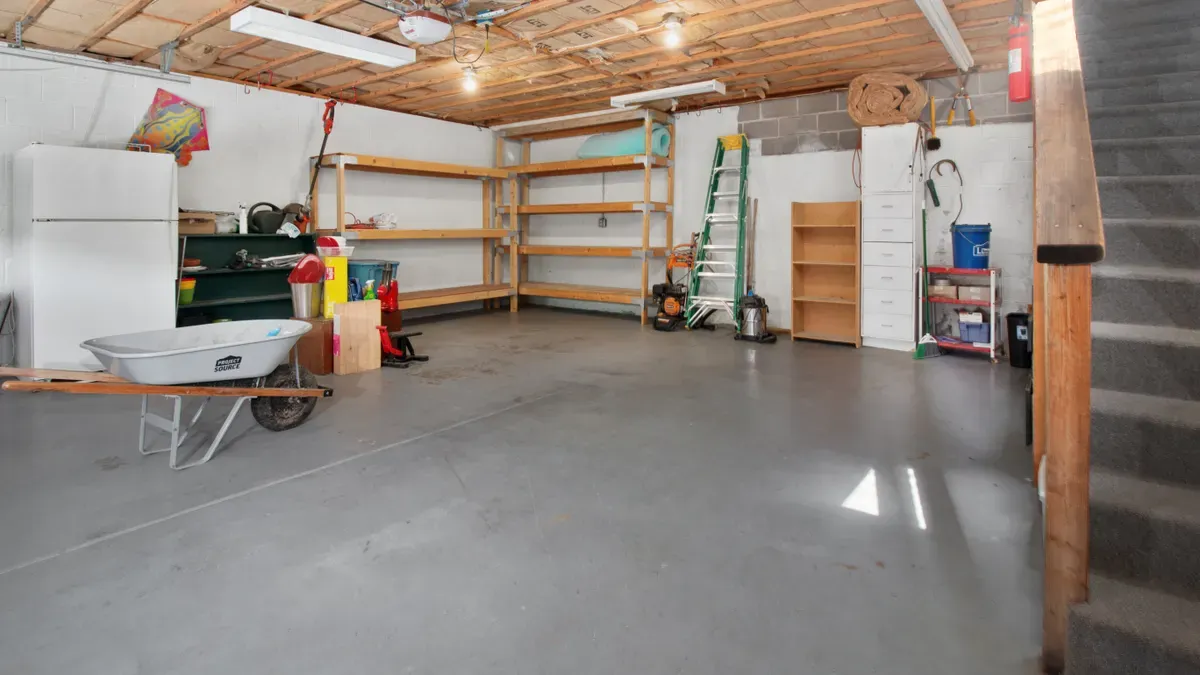
Image Source: pexels
Start with accurate measurements. Your ceiling dimensions determine everything that follows. Grab a laser measure or a long tape measure. Record the length and width of your garage ceiling in feet. Note any obstructions like garage door tracks, storage racks, or ceiling-mounted heaters. These obstacles affect where you can place panels.
Sketch your garage layout on graph paper. Mark the ceiling boundaries and obstructions. Decide whether you want full ceiling coverage or a partial arrangement. Many homeowners choose a central cluster above their workbench or vehicle. Others prefer covering the entire ceiling for maximum brightness. Your sketch guides the number of panels you need.
Measurement errors cause real problems. A study found that 15% of installations waste material due to measurement errors. A 5% measurement error on a 10m² installation can lead to $200–500 in extra material costs. Even a 2mm error per panel can compound across a large installation. This creates visible seams or requires 10–15% more labor for adjustments.
Wall irregularities complicate your measurements. A 2024 case study found that 40% of "rectangular" walls had 5–10mm deviations due to settling or construction flaws. Measure at multiple points along each wall. Use the smallest measurement as your baseline. This prevents panels from not fitting at the edges.
Thermal expansion matters too. Ignoring thermal expansion margins of 2–3mm per 10°C change leads to a 20% higher failure rate. Leave small gaps between panels to accommodate temperature shifts. Your sketch should include these expansion allowances.
Your lighting needs depend on how you use your garage. The Illuminating Engineering Society provides clear guidance. Use this table to match your activities with the right brightness:
Garage Use Case | Recommended Lumens per sq ft | IES Foot-candle Reference |
|---|---|---|
Parking and storage only | 50–75 | Service Garage 10–20 fc |
General DIY and home repair (workspace) | 90–130 | Repair Area 50–100 fc |
Home detailing, washing, basic paint care | 130–180 | Paint Fine Finishing 50–100 fc |
Professional detailing, paint correction, inspection | 200–360 | Final Assembly Inspection 200 fc |
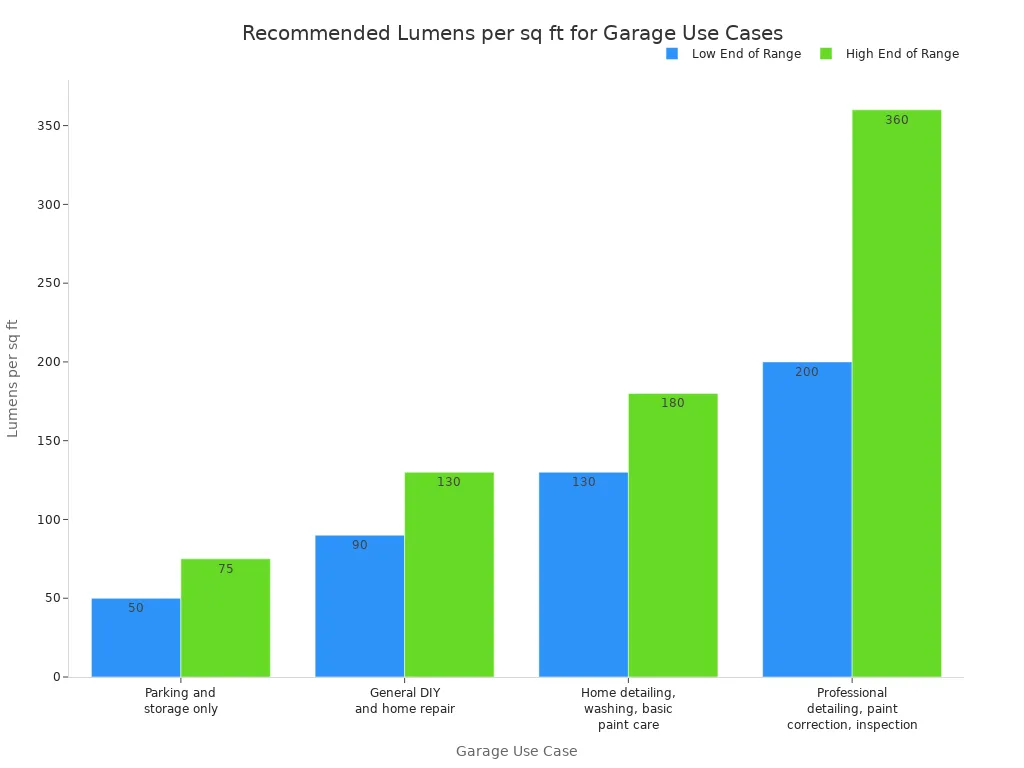
For a general DIY workspace, target 90 to 130 lumens per square foot. Multiply your garage square footage by your target lumens. This gives you the total light output needed. Divide that number by the lumens per panel. The result tells you how many panels to order.
Choose your color temperature next. Earlier we discussed the 4,100K recommendation for detailed work. Select a system with adjustable color temperature if you want flexibility. Dimming features add control for different tasks. Consider whether you need these options before ordering.
Panel size affects your layout. Larger panels cover more area with fewer connections. Smaller panels offer more design flexibility. Your sketch helps you decide which size fits your space best.
Now evaluate the performance of different systems. Compare lumen output, color accuracy, and heat management. Aluminum frames provide better thermal performance than plastic housings. This affects longevity and consistent light output.
Review the kit contents before purchasing. Confirm the package includes mounting brackets, connectors, and power supplies. Check the power supply requirements match your garage's electrical capacity. Verify the return policy protects you if something does not fit.
Warranty coverage provides peace of mind. According to the manufacturer's official FAQ page, Hex Garage provides a 60-month warranty on all of its lighting systems, effective from September 12, 2025. Look for similar warranty terms when comparing brands. A longer warranty signals confidence in product quality.
Your led hexagon garage lights custom order process ends with a final review. Double-check your measurements. Confirm your panel count. Verify your specifications match your needs. Then place your order with confidence. The custom hexagon lights you select will transform your workspace. Your careful planning ensures the hexagon led lights fit perfectly and perform exactly as needed.
Image Source: unsplash
The installation process follows a logical sequence. You mount brackets to your ceiling first. Then you connect panels together. Finally, you wire the array to a power source. Most homeowners complete this work in a single afternoon.
According to the official installation guide, a standard one-car garage hexagon LED light kit requires 2–4 hours from unboxing to power-on. This timeframe assumes you have basic tools and a helper for holding panels while you secure them. Working alone adds time because you must climb up and down your ladder repeatedly.
You should assess your comfort level with basic wiring before starting. The connection process involves matching wires from panel to panel and finally to your ceiling junction box. If you have never connected household wiring, consult a licensed electrician. They can handle the final power connection while you focus on mounting and connecting panels. This division of labor keeps the project safe and efficient.
Real-world installations rarely proceed without minor hiccups. User reviews of popular hexagon panel systems reveal several recurring challenges:
Adhesive failure: The included adhesive strips sometimes refuse to stick to textured or painted surfaces. Many users substitute their own heavy-duty Velcro or mounting screws.
Connector seating issues: Connectors occasionally fail to seat properly, leaving a single panel dark or out of sync with the rest of the array.
Confusing instructions: The recommended sequence for connecting panels to the control hub confuses many first-time installers. An initial test run often produces no light at all until you re-read the manual.
Physical strain: Repeatedly reaching overhead to connect and disconnect segments causes bruised fingers and aching arms.
Need for workarounds: Successful installation frequently requires creative solutions and sometimes guidance from someone with prior experience.
You can avoid most of these problems with preparation. Lay out all panels on the floor first. Connect them in the exact configuration shown in your manual. Test the full array before mounting anything to the ceiling. This pre-assembly step catches connector issues while everything sits at waist height. You also verify that your panel count matches your layout plan.
LED hexagon lights demand minimal maintenance. Their long lifespan makes them a low-maintenance investment compared to fluorescent or incandescent alternatives. A few simple habits keep your system performing at its best.
Dust accumulation reduces light output over time. Wipe each panel with a dry microfiber cloth every few months. Do not use abrasive cleaners or solvent-based sprays. These damage the polycarbonate diffuser and create cloudy spots that scatter light unevenly. For stubborn grime, dampen your cloth with plain water and dry the panel immediately afterward.
Check your connections periodically. Loose connectors cause intermittent flickering or complete panel failure. Inspect the junction points between panels every six months. Tighten any connection that feels loose. Also examine the mounting brackets to confirm they remain secure against your ceiling.
Your system's long-term performance depends on heat management. The aluminum frames draw heat away from the LED chips during operation. Keep the area above and around your panels free from insulation or stored items that could trap heat. Proper airflow preserves both light output and color accuracy over thousands of hours.
When you notice a panel dimming or shifting color, check the connector first. A poor connection often causes these symptoms. If the connector looks fine, test the panel in a different position within your array. This process isolates whether the problem follows the panel or stays with the connection point. Most issues trace back to seating rather than component failure.
Your careful installation and routine maintenance ensure years of reliable service. The time you invest in installing hexagon lights correctly pays dividends through consistent, shadow-free illumination. Your garage remains a bright, productive workspace without demanding constant attention.
You now understand how hexagon led lights transform your garage. They deliver shadow-free, energy-efficient illumination. The led hexagon garage lights custom order process becomes manageable with four clear steps. Measure your ceiling dimensions accurately. Plan your layout on paper. Select specifications matching your needs. Place your order with confidence. This investment delivers long-term value. Improved visibility and a modern workspace reward your effort. Precise lighting supports detailed tasks. Energy costs stay low each year. The sleek honeycomb design adds professional appeal. Take your first step today. Grab a tape measure and explore available configurations. These lighting solutions turn a dim garage into a bright, productive space. Your personalized setup awaits.
Multiply your garage square footage by your target lumens per square foot. Divide that total by the lumens each panel produces. This tells you how many panels to order.
Most homeowners finish installation in 2 to 4 hours with basic tools. Pre-assemble and test the array on the floor first. Consult a licensed electrician if you are unfamiliar with household wiring.
Lighting industry guides recommend a setting near 4,100K for detailed garage work. This cool white value produces clean, focused light. It enhances clarity for paint correction and engine work.
Replacing eight fluorescent fixtures with an eleven-panel hexagon setup saves roughly 340 watts. Operating ten hours daily for 300 days saves about $122 per year at twelve cents per kilowatt-hour.
Check the connector first. A poor connection often causes dimming or color shifts. Test the panel in a different position to isolate the issue. Most problems trace back to seating, not component failure.


