


Views: 0 Author: Site Editor Publish Time: 2026-09-17 Origin: Site


Professional paint correction demands a shadow-free environment. You cannot correct what you cannot see. While overhead fixtures handle the hood and roof, the lower third of a vehicle usually suffers from severe lighting deficits. Complex lower-body curves, aggressive fender flares, and deep wheel arches create massive blind spots. When you lean in to polish these intricate areas, your body blocks the overhead light. This lack of visibility directly compromises your quality control.
Inadequate lower-panel lighting inside a car detailing light tunnel leads to missed clear coat defects, uneven ceramic coating applications, and undiscovered sanding marks. Standard overhead illumination simply cannot penetrate the recessed angles of wheel wells. You need a multi-axis lighting strategy using purpose-built surface inspection luminaires. We will define the exact placement, beam angles, and fixture specifications required to illuminate wheel arches without causing operator glare or light washout.
Professional surface inspection demands rigorous lighting standards. The baseline requirements for an effective detailing light tunnel include a Color Rendering Index (CRI) exceeding 95. This high CRI ensures the light accurately reproduces the true color of the automotive paint. When you work on heavy metallic flakes or pearl coats, a low CRI light washes out the subtle color variations. A CRI above 95 reveals spotting color mismatches from previous bodywork and highlights the exact depth of clear coat scratches. Color temperature must remain strictly between 5000K and 6500K. This daylight-equivalent spectrum provides the stark contrast necessary to expose micro-marring, holograms, and residual polishing compounds.
Understanding visual adaptation principles dictates how you design a detailing studio. The human eye struggles with rapid transitions between extreme brightness and heavy shadows. When you look from a highly illuminated hood down to a dark wheel well, your retina requires time to adjust. If the lower panels lack adequate lighting, your pupils cannot dilate fast enough to spot fine scratches. Uniform brightness across all vehicle panels minimizes this adaptation lag. You reduce eye fatigue and improve defect recognition by keeping the ambient light levels consistent from the roofline down to the rocker panels.
Standard shop lights emit a diffused, scattered beam that merely brightens a room. Purpose-built surface inspection luminaires function differently. They utilize focused optics to create a distinct point-source reflection on the clear coat. This sharp reflection acts as a visual baseline. Any deviation, scratch, or swirl mark interrupts this reflection, making defects immediately obvious to the technician holding the polisher.
The geometry of a wheel arch presents a unique lighting challenge. These areas consist of recessed cavities, aggressive fender flares, and sharp inward curves. The vehicle's beltline often protrudes outward, casting a permanent downward shadow over the wheel well. This structural overhang blocks ambient light from reaching the critical lower edges where road tar, heavy grime, and clear coat damage accumulate most heavily.
Standard roof lights and flat wall-mounted fixtures fail at reaching the under-curve of the arch. Light travels in straight lines. If a light source sits higher than the fender lip and points straight down or straight across, the rays physically cannot strike the inner lip of the wheel arch. This geometric limitation leaves swirl marks, sanding pigtails, and buffer trails completely hidden until you pull the vehicle outside into direct sunlight.
The human element further complicates lower panel illumination. When you sit on a rolling stool to polish a rocker panel or wheel arch, your upper body naturally blocks whatever ambient overhead light exists. This human-cast shadow plunges the work area into darkness. Dedicated lower-level illumination bypasses the operator's shadow and puts photons directly onto the paint surface.
Determining the correct mounting height for lower panel lighting requires balancing visibility with operational durability. Floor-integrated lighting, positioned between 0 and 6 inches from the ground, offers excellent visibility for undercarriage work. This extreme low placement makes fixtures highly susceptible to water pooling, chemical runoff, and physical impact from rolling jacks or dropped tools. Floor lights require constant maintenance and cleaning to remain effective.
Lower-wall mounts positioned between 12 and 24 inches represent the optimal zone for wheel arch illumination. This specific height aligns perfectly with the hub center of most standard passenger vehicles, SUVs, and sports cars. By placing the light source at the horizontal centerline of the wheel, the beam washes over the entire arch without hitting the tire itself.
This 12-24 inch mounting height provides exceptional dual-purpose utility. It illuminates the outer wheel arch and lower rocker panels for paint correction. It also provides ambient lighting for detailers working under the car, applying wheel coatings, or detailing complex suspension components. The fixtures remain high enough to avoid minor floor flooding while low enough to strike the under-curves of the bodywork.
| Mounting Height | Primary Advantage | Primary Disadvantage | Best Application |
|---|---|---|---|
| 0 - 6 Inches (Floor Level) | Maximum undercarriage visibility for lift work | High risk of water damage, chemical pooling, and impact | Dedicated mechanical lift bays |
| 12 - 24 Inches (Mid-Level) | Perfect wheel arch and hub alignment for polishing | Requires precise upward angling to avoid glare | Detailing and paint correction tunnels |
| 36+ Inches (Beltline) | Safe from water runoff and rolling equipment | Casts heavy shadows over lower panels and rocker areas | General shop illumination and prep areas |
Mounting lights at the correct height only solves half the equation. The angle of incidence determines whether the light actually reveals defects. The physics of light reflection on clear coat dictates that defects become visible when the light source reflects directly back toward your eye. If a lower wall light points straight across the bay, the light skims past the curved wheel arch rather than reflecting off it.
To maximize light transmission onto the curved lip of the wheel arch, fixtures must feature a 15 to 30-degree upward tilt. This specific angle intercepts the inward roll of the fender. When the light strikes the clear coat at this upward trajectory, it illuminates the underside of the arch lip. You can look slightly downward from your stool and catch the specular reflection necessary for spotting fine polishing haze and high spots in ceramic coatings.
The overall width of the detailing bay dictates the required beam angle for lower panel fixtures. Distance alters light intensity and spread. If you park the vehicle too close to a narrow-beam light, it creates a harsh hot spot that blinds you and washes out the paint. If you park too far from a wide-beam light, the intensity drops below the threshold needed to spot micro-scratches.
Narrow bays, where the vehicle sits within three feet of the wall, require wider beam angles around 120 degrees. This wide dispersion prevents intense hot spots and provides a smooth wash of light over the wheel arch. Wider bays where the vehicle sits five or more feet from the wall require narrower, focused beams between 60 and 90 degrees. This tighter focus maintains the necessary lux intensity across the distance, ensuring the light hits the wheel arch with enough power to reveal defects.
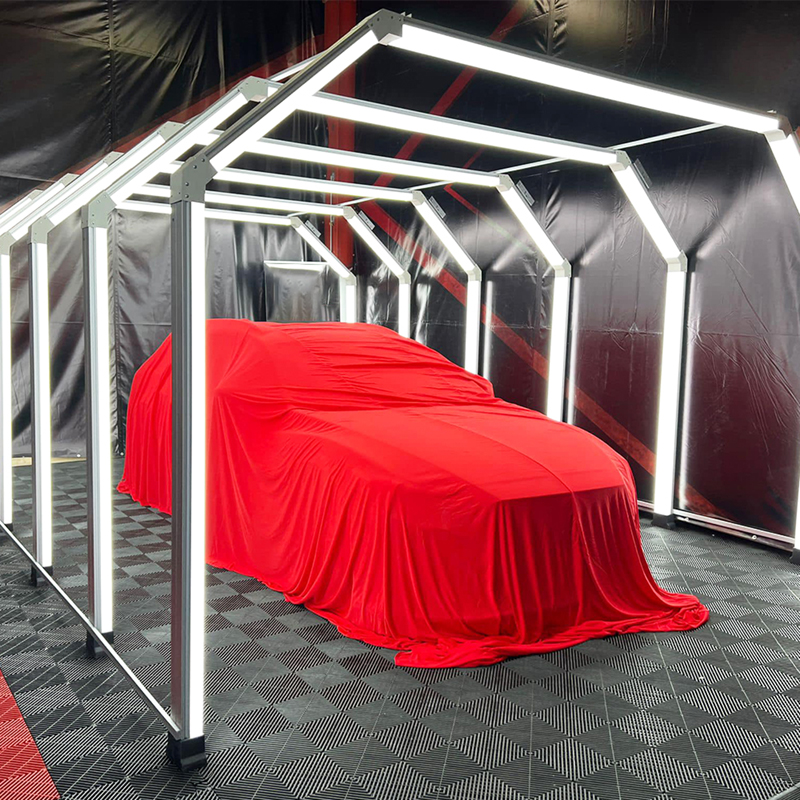
Selecting the right diode configuration impacts how defects render on the paint. Continuous LED strip lighting provides a very even, smooth wash of light. While excellent for general illumination and applying broad layers of ceramic coating, continuous strips lack the focused intensity required for heavy defect spotting. They blend light together, masking very fine micro-marring.
Matrix LED layouts utilize individual, high-powered diodes spaced apart within the fixture. This creates focused, point-source lighting. Point-source light highlights micro-scratches aggressively, as each individual diode creates a distinct reflection point on the curved wheel arch. Any scratch passing through these multiple reflection points becomes highly visible.
For a professional LED light tunnel, a hybrid approach yields the best results. Using matrix LED layouts for the lower tunnel sections ensures aggressive defect highlighting on heavily abused lower panels. Utilizing continuous diffusion on the upper walls provides the even brightness necessary for final finish inspections and wax leveling.
Positioning high-lumen lights at 12 to 24 inches introduces a severe risk of blinding the operator. When you sit on a creeper or low stool, your eyes rest directly on the same horizontal plane as the lower wall lights. Staring into bare LED diodes causes immediate eye fatigue, temporary blind spots, and severe headaches.
Proper glare shielding protects your vision. Evaluating spherical covers versus flat diffusers reveals a clear winner for lower-level applications. Flat diffusers scatter light harshly at extreme angles. Curved, high-transmittance spherical covers perform much better. The curved shape reduces the contact angle of light rays exiting the fixture at wider angles. This minimizes harsh lateral glare hitting your eyes while maintaining maximum forward lumen output toward the wheel arch.
Lower vehicle panels endure the harshest conditions, accumulating heavy road grime, tar, and iron fallout. These areas require aggressive wet sanding and heavy compounding. To evaluate the progress of this heavy correction, the lighting must possess a specific lumen density capable of cutting through compound dust and haze.
Fixtures must deliver high intensity without causing eye strain. A color temperature of 5000K provides a neutral white light that exposes sanding marks without the harsh, blue-tinted glare of 6500K fixtures. By maintaining high lumen output with a neutral temperature and proper spherical diffusion, you can stare at the illuminated wheel arch for hours while polishing without suffering from visual fatigue.
A highly effective detailing bay requires independent zoning for its lighting arrays. You must have the ability to isolate specific light sources based on the task at hand. Operating all lights simultaneously floods the bay with too much ambient light, reducing the contrast needed to spot ultra-fine holograms on lighter-colored vehicles.
Independent zoning allows you to turn off the overhead lights entirely. By using side lights exclusively, you create a high-contrast environment perfect for lateral defect inspection. This technique forces the light to rake across the wheel arches and rocker panels horizontally, casting microscopic shadows inside the scratches. This makes remaining defects stand out starkly against the darkened upper portions of the bay. Proper zoning turns car workshop tunnel lights into precision inspection tools rather than just bright room lights.
A professional shop handles a diverse range of vehicles, from low-slung sports cars with minimal wheel gap to lifted trucks and SUVs with massive wheel arches. A fixed lighting setup must accommodate these variable stances without requiring constant manual readjustment. Scalability dictates how efficiently you can move cars through the bay.
Adjustable articulating light arms offer flexibility but introduce mechanical failure points and require you to stop working to move the lights. Overlapping fixed vertical light bars provide a superior, passive solution. By installing vertical fixtures that span from 12 inches up to 36 inches, the system automatically covers variable wheel arch heights. The lower diodes illuminate the sports cars, while the upper diodes catch the suspension gaps of lifted trucks, ensuring comprehensive coverage regardless of the vehicle's stance.
The environmental reality of a wash and detailing bay is harsh. Lower-level lighting exists in the splash zone. These fixtures face daily bombardment from high-pressure wash wands, aggressive wheel acids, iron removers, and alkaline degreasers. Standard indoor lighting fixtures fail rapidly under these conditions, leading to electrical shorts and costly replacements.
Strict ingress protection prevents equipment failure. Any lighting placed below 36 inches must carry an IP65 or IP67 rating. An IP67 rating ensures the fixture is completely dust-tight and can withstand temporary submersion in water. This level of sealing protects the internal LED drivers and diodes from pressure washing overspray, winter snow melt dripping from wheel wells, and corrosive detailing chemicals.
Lower-level lights face constant physical threats. Hoses drag across them, rolling creepers bump into them, and heavy dual-action polishers accidentally swing into the lenses. A shattered light fixture poses a severe safety hazard in a wet environment.
Mitigating physical impact requires robust hardware. Luminaires must utilize impact-resistant polycarbonate housings rather than fragile glass or cheap acrylic. Utilizing recessed wall mounting techniques offers the best protection. By setting the light fixtures slightly back into the wall structure or behind protective steel bollards, you eliminate the risk of equipment snagging or smashing the lights during fast-paced detailing operations.
More light does not equal better visibility. There is a critical threshold where too many lumens flatten the appearance of the paint. This phenomenon, known as light washout, floods the clear coat with so much intensity that the contrast disappears. When washout occurs, holograms, light marring, and high spots become invisible to the naked eye.
To combat light washout on wheel arches and lower panels, dimmable drivers are an absolute necessity. Different paint colors react differently to light intensity. A solid black vehicle requires 100% output to reveal defects, while a metallic silver or pearl white car only needs 40% output to prevent blinding reflections. Dimmable lower-panel fixtures allow you to dial in the exact brightness required for the specific paint system sitting in the bay.
A: The optimal height for side lights targeting wheel arches and lower panels is between 12 and 24 inches from the floor. This placement aligns with the wheel hub center, allowing the light to penetrate the wheel well cavity and illuminate the rocker panels without being blocked by the vehicle's beltline.
A: Prevent glare by utilizing fixtures with high-transmittance spherical covers rather than flat diffusers. Spherical covers reduce the harsh contact angle of exiting light rays. Ensure your lower-level lights are equipped with dimmable drivers so you can reduce intensity when working up close on a rolling stool.
A: Yes. Any lighting installed below 36 inches in a detailing or wash bay must have an IP65 or IP67 rating. This ensures the fixtures are sealed against dust, heavy chemical overspray, and direct water jets from pressure washers used during the wheel cleaning process.
A: No. Overhead lights travel in straight lines and cannot bend around the vehicle's protruding beltline or fender flares. This creates heavy shadows inside the wheel arches. You must use dedicated lower-wall lighting angled upward to physically reach the recessed curves of the wheel well.
A: The ideal color temperature for paint correction is between 5000K and 6500K. This daylight-equivalent spectrum provides the high contrast necessary to expose micro-marring, holograms, and sanding marks without causing the eye strain associated with overly blue or overly yellow light.
A: Absolutely. Lower panel lights must be on an independent, dimmable circuit. This allows you to turn off the overhead lights and use only the side illumination to create a high-contrast environment, which is highly effective for spotting lateral defects and checking ceramic coating levels.
A: Visual adaptation is how the eye adjusts to different light levels. If a bay has bright overheads but dark lower panels, your eyes cannot adjust fast enough when looking down at a wheel arch, causing you to miss defects. Uniform lighting across all panels prevents this adaptation lag.


