


Views: 0 Author: Site Editor Publish Time: 2026-09-16 Origin: Site


Missed defects during Paint Protection Film (PPF), vinyl wrap, and window tint installations carry heavy financial and reputational costs. Material waste eats into profit margins when expensive film must be discarded. Labor hours multiply when technicians rip off and redo entire panels due to overlooked imperfections. Client dissatisfaction damages your brand. Traditional static overhead lighting and handheld inspection lamps fall short for full-vehicle film inspection. They create severe blind spots, cast heavy shadows across lower panels, and require constant manual repositioning. This slows down the workflow and increases the risk of missing low-angle defects before the adhesive sets. Upgrading your installation bay with a car detailing light tunnel solves this core operational problem. This environmental upgrade shifts quality control from a manual, time-consuming task to a passive, highly efficient, and continuous inspection process.
Standard shop lighting guarantees defects slip through. Overhead fluorescent or basic LED high-bay fixtures illuminate the floor, not vertical vehicle curves. These fixtures cast downward shadows. When a technician works on rocker panels, lower doors, or complex front bumpers, they work in the dark. The roof and hood might look flawless under direct overhead light. The sides remain hidden in shadows. This masks installation errors until the vehicle pulls outside into natural sunlight.
Many shops equip staff with premium handheld inspection lights. High-CRI color match lights handle localized spot-checking. They verify the removal of an isolated clear coat scratch. However, they fail for full-panel, continuous film inspection. The primary issue is the motion requirement. To reveal defects, the technician must constantly move the light source back and forth across the panel.
This motion requirement conflicts with the physical demands of applying PPF or vinyl wrap. Film installation requires both hands. A technician needs one hand to pull and stretch the material. The other hand aggressively squeegees the slip solution out. You cannot hold a flashlight while stretching a large sheet of polyurethane over a complex fender curve. By the time the technician puts down the squeegee to pick up the inspection light, the adhesive tacks. It becomes too late to lift the film and remove trapped debris.
Understanding the physics of film defects highlights the inadequacy of traditional lighting. PPF and vinyl defects have specific visual characteristics:
These defects remain invisible under flat, direct lighting. The highly reflective film surface bounces direct light back into the technician's eyes. This glare hides imperfections. To see these specific defects, you need raking light. Raking light travels parallel to the surface at a very low angle. It hits the tiny raised edge of a dust nib or the slight indentation of a stretch mark. This casts a micro-shadow. The contrast between highlight and shadow makes the defect visible. Handheld lights create raking light for a few square inches. A comprehensive lighting solution provides this low-angle illumination across the entire vehicle simultaneously.
Transitioning to a tunnel configuration changes how technicians interact with the vehicle. Instead of bringing the light to the car, the car drives into a continuous field of light. This setup eliminates blind spots. It provides overlapping light fields from the ceiling and side walls. When a technician moves around the vehicle, the lighting remains consistent. Dark corners and shadowed rocker panels disappear. This uniform lighting impacts how we evaluate the overall finish and tension of a full vehicle wrap. Installers step back and immediately see how the light reflects down the entire side. This ensures the film stretches evenly without distortions in the reflection.
Strategic placement of car workshop tunnel lights drives multi-angle defect detection. Effective setups involve installing long LED light bars slanted on the upper walls or angled from the ceiling. These run parallel to the car. These angled fixtures scrape the painted or filmed surface with light. The light source spans the entire length of the vehicle, creating continuous raking light. Raised imperfections like dust, trapped air, or lint highlight instantly across the entire panel. The technician addresses them immediately while the slip solution remains wet.
When designing a detailing light tunnel, operators must understand the differences between diffused and non-diffused LED fixtures. Diffused lights feature a frosted or milky cover over the LED diodes. This scatters the light, providing soft, even illumination. Diffused lighting works best for checking overall film smoothness. It verifies color consistency on vinyl wraps and ensures no broad high spots exist in ceramic coatings. It remains easy on the eyes and provides excellent general visibility.
Non-diffused LEDs feature a clear lens that exposes the raw diodes. This produces a sharp, harsh, and highly directional light. Many professional operators run non-diffused LED light bars horizontally along the lower side walls of the bay. This harsh light spots micro-marring, fine swirl marks, and microscopic adhesive lines beneath clear PPF. The sharp edges of the light beam catch the edges of defects that soft, diffused light washes out.
For comprehensive detailing and film inspection bays, a hybrid approach works best. Diffused overhead and upper-wall lighting provides comfortable, shadow-free working conditions. Non-diffused horizontal bars on the lower walls provide the harsh raking light necessary for critical defect detection.
A fully illuminated tunnel also serves as a professional visual aid for client education and sales enablement. When a customer walks into a standard garage, the car looks fine. When they walk into a brilliantly lit tunnel, every flaw in their factory paint stands out. The static, high-intensity environment makes it easy to point out pre-existing paint defects, swirl marks, and factory sanding marks before any film application. This sets accurate expectations regarding what the film covers. It facilitates paint correction upsells, increasing the average ticket price per vehicle.
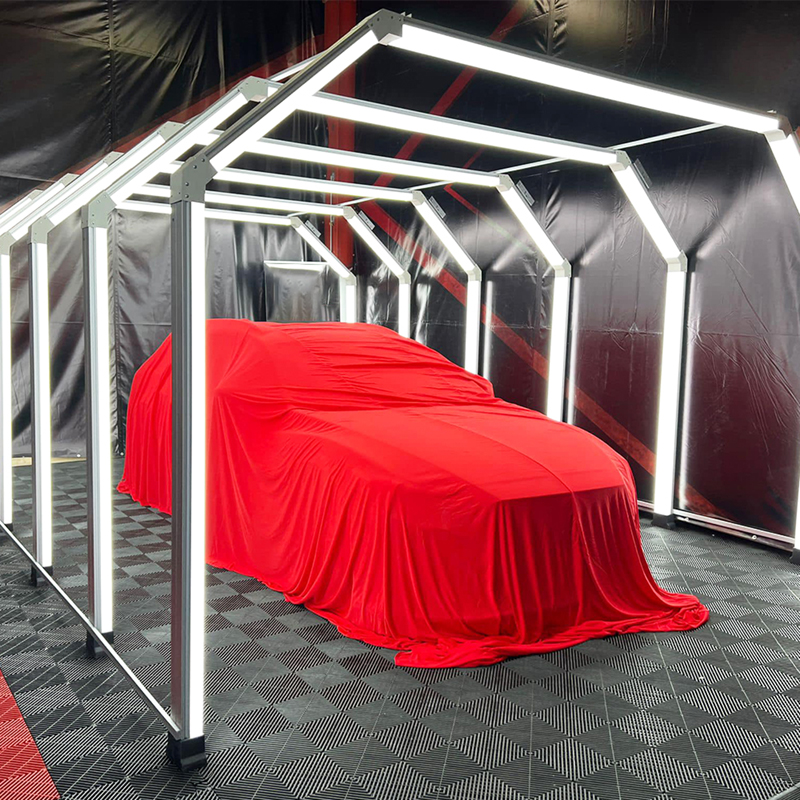
Selecting the right fixtures requires looking past basic wattage. You must focus on specific photometric properties. The first dimension is the combination of Lumen Output and the Color Rendering Index (CRI). CRI measures how accurately a light source reveals true colors compared to natural sunlight on a scale of 0 to 100. For advanced film inspection, establish a baseline CRI requirement of 95 or higher. High CRI remains non-negotiable for accurate color matching during vinyl wrap installations. It identifies subtle discoloration or yellowing in clear films.
Lumen output requires careful balancing. You need intense brightness to spot defects. However, excessive lumens cause blinding glare off the highly reflective surfaces of fresh PPF or polished clear coat. The goal is adequate brightness to illuminate the lowest panels without creating a mirror effect that forces technicians to squint. Dimmable drivers offer the best solution. The technician dials back the lumen output when working on highly reflective white or silver vehicles. They increase it for light-absorbing black or dark blue vehicles.
Color Temperature, measured in Kelvin (K), dictates the warmth or coolness of the light. Evaluate fixtures within the ideal color temperature range of 5000K to 6500K. This range accurately replicates natural daylight. Working under daylight-balanced lighting represents the environment where the vehicle will actually be seen. This specific temperature range spots high-spots or leveling issues in ceramic coatings applied over PPF. The cool white light sharply contrasts with the rainbow-like flashing of the coating solvents.
Energy efficiency and heat dissipation represent major operational factors. High-output lighting generates heat. LED thermal management relies on the quality of the aluminum heat sinks built into the fixtures. Low-heat emission keeps the film installation environment stable. If the ambient temperature in the bay rises significantly due to excessive heat from the lighting array, PPF and vinyl adhesives tack prematurely. When the adhesive bites into the clear coat too fast, technicians lose the ability to slide and position the film. This leads to stretch marks, adhesive lines, and ruined material. A high-quality LED light tunnel ensures maximum brightness with minimal thermal impact on the installation bay.
Another critical evaluation dimension often overlooked is the Ingress Protection (IP) rating of the fixtures. Film installation and auto detailing are inherently wet processes. Technicians constantly spray slip solutions, tack solutions, and water. Airborne moisture and accidental direct sprays are common. Standard indoor lighting fixtures will short out or corrode in this environment. You must select fixtures with a minimum rating of IP65. An IP65 rating ensures the light is completely dust-tight and protected against low-pressure water jets from any direction. This prevents moisture from penetrating the housing, protecting the internal LED drivers and extending the lifespan of the array.
| Bay Size (Sq. Ft.) | Recommended Total Lumens | Ideal CRI | Color Temperature |
|---|---|---|---|
| 300 - 400 (Single Bay) | 40,000 - 60,000 | 95+ | 5000K - 6500K |
| 400 - 600 (Oversized Bay) | 60,000 - 90,000 | 95+ | 5000K - 6500K |
| 600 - 800 (Double Bay) | 90,000 - 120,000 | 95+ | 5000K - 6500K |
Shop owners generally choose between purchasing a pre-fabricated system or designing a custom-built lighting array. Each category carries distinct advantages and operational challenges.
Pre-fabricated systems are engineered by manufacturers specifically for automotive applications. These often come in popular hexagonal grid patterns or large arching tunnel structures.
Custom-built lighting arrays involve sourcing individual LED battens, light bars, and drivers to construct a layout tailored precisely to the shop's unique architecture.
When executing a custom build, the choice of mounting hardware dictates the stability and adjustability of the array. Direct mounting to drywall using standard anchors is often insufficient due to the weight of commercial LED drivers. Professional installations utilize Unistrut metal framing systems bolted directly to the ceiling joists and wall studs. Unistrut allows you to slide fixtures along the channel to adjust spacing without drilling new holes. For high ceilings, suspending the overhead lights using adjustable aircraft cable drops allows you to bring the light source down to the optimal height, maximizing lumen delivery to the vehicle surface.
| Feature | Pre-Fabricated Systems | Custom-Built Arrays |
|---|---|---|
| Installation Speed | Fast (Plug-and-play connectors, standardized parts) | Slow (Requires individual mounting, wiring, and testing) |
| Light Uniformity | Guaranteed by manufacturer design | Requires manual adjustment to eliminate dead zones |
| Bay Adaptability | Low (Fixed dimensions may not fit all spaces) | High (Can be tailored to any ceiling height or width) |
| Fixture Mixing | Limited (Usually all diffused or all clear lens) | Unlimited (Can mix diffused overheads with clear side lights) |
| Risk of Glare | Low (Engineered to reduce harsh reflections) | High (Improper angles can easily blind technicians) |
Installing a massive array of high-output LEDs requires careful planning to mitigate spatial, ergonomic, and electrical risks.
Spatial requirements and bay dimensions dictate the success of the installation. You must identify the minimum clearance needed between the vehicle and the light fixtures. If the lights mount too close to the car, the technician's own body blocks the light. This casts heavy shadows over the panels they are trying to work on. Maintain at least three to four feet of clearance between the widest vehicle you service and the side-wall lighting fixtures. This provides ample room for technicians to maneuver, stretch film, and swing squeegees without obstructing the light path. For example, if you frequently wrap wide vehicles like Ford F-150s or Tesla Model Xs, your bay needs to be at least 14 to 16 feet wide to accommodate the vehicle, the technicians, and the lighting array properly.
Glare management and technician eye fatigue represent a serious occupational hazard. Working inside a high-output environment for 8 to 10 hours a day causes severe headaches, eye strain, and fatigue. This ultimately leads to a drop in installation quality. Mitigation strategies must be built into the design. Implement dimmable zones so technicians can lower the intensity during the bulk application phase. They only turn it up to maximum for final inspections. Utilize independent switching for ceiling versus wall lights. If a technician works on the roof, they turn off the side lights to reduce ambient glare. Utilizing diffused covers on any fixtures mounted directly at eye level significantly reduces harsh optical strain.
Electrical load and compliance standards require strict attention. A full tunnel setup draws a substantial amount of continuous power. Evaluate the shop's electrical panel capacity before purchasing any equipment. An older commercial unit may not have the available amperage on a single circuit to support dozens of high-output LED drivers simultaneously. Work strictly with certified commercial electricians. They ensure the continuous draw of the LED array is properly balanced across multiple breakers. They verify that the wiring gauge (such as 12 AWG for 20-amp circuits) is sufficient for the load. They guarantee the entire installation meets local commercial building and fire codes. Overloading a circuit with cheap, uncertified lighting fixtures poses a severe fire risk.
Maintenance and fixture degradation also pose long-term risks. In a busy shop, airborne dust, polishing compounds, and overspray from slip solutions accumulate on the light lenses. Over time, this thin film of grime significantly reduces the effective lumen output of the tunnel. Establish a strict maintenance protocol. Wipe down all accessible light bars weekly using a dedicated glass cleaner and microfiber towels. Avoid using aggressive all-purpose cleaners or degreasers, as these chemicals can degrade the polycarbonate lenses, causing them to yellow or become brittle over time.
A: The ideal color temperature ranges between 5000K and 6500K. This specific range accurately replicates natural daylight. It is necessary for precise color matching, spotting high spots in ceramic coatings, and ensuring the vehicle looks flawless when pulled outside into the sun.
A: No. A tunnel handles the vast majority of the work by eliminating blind spots and the need for constant motion during application. However, premium handheld lights remain necessary for inspecting tight crevices, deep recesses, and performing final, localized spot-checks.
A: A standard baseline for a professional detailing bay is between 100 to 150 lumens per square foot of workspace. This varies based on ceiling height and wall color. Extremely high ceilings or dark-painted walls require a higher lumen output to achieve the same surface brightness.
A: Modern LED fixtures generate significantly less heat than older halogen or fluorescent lights. Selecting high-quality LEDs with proper aluminum heat sinks keeps the ambient temperature increase in the bay minimal. This prevents the PPF adhesive from tacking prematurely.
A: Diffused lights have frosted covers that provide soft, even illumination, making them ideal for checking overall film tension and general visibility. Non-diffused lights have clear lenses that produce sharp, harsh light. This is superior for detecting fine swirl marks, micro-marring, and subtle adhesive lines.
A: Wall-mounted fixtures should be placed at least 3 to 4 feet away from the sides of the widest vehicle you service. This spacing prevents technicians from casting their own shadows onto the panels while working and ensures the light can properly rake across the surface.


