


Views: 0 Author: Site Editor Publish Time: 2026-10-05 Origin: Site


Raw LED strips glued directly to surfaces inevitably fail. The adhesive degrades over time. The diodes overheat. The resulting glare looks cheap and strains the eyes. How do you prevent this premature failure? The technical solution requires proper thermal housing. Utilizing an Aluminum LED Profile Light is not merely an aesthetic upgrade. It is a fundamental engineering requirement for thermal management and optical diffusion. Buying the extrusion is just the starting point. Selecting the exact mounting method determines the structural integrity and operational lifespan of the fixture. This guide breaks down the primary installation techniques from a field-engineering perspective, detailing where they work best and how to execute them flawlessly.
Surface Mounting: Highly versatile and accessible. This approach is strongly recommended for under-cabinet illumination and floating shelving. It requires minimal specialized tools.
Recessed Mounting: Delivers a flush architectural aesthetic. It demands advanced planning and routing tools. This method is ideal for drywall ceilings or custom woodwork.
Suspended Mounting: The definitive method for creating striking linear pendant lights. It is particularly effective in spaces with high ceilings, over kitchen islands, or within commercial office environments.
Corner Mounting: Utilizing a 45-degree angle casts directional light efficiently. This maximizes visibility in tight corners, wardrobes, and retail display cases.
Strategic Selection: Choosing the appropriate method depends entirely on specific spatial constraints. You must evaluate the desired level of light diffusion and the permanence of the installation.
Installing bare LED strips directly onto a wall or cabinet leads to suboptimal results. Without a protective barrier, delicate circuits remain highly vulnerable to environmental factors. More importantly, they produce an unrefined light. Transitioning to a dedicated extrusion system elevates the entire lighting experience.
During operation, LED diodes generate significant heat. When this thermal energy is trapped against a wooden cabinet or drywall, the junction temperature of the diode rapidly rises. Consequently, this leads to premature color shifting, reduced brightness, and complete burnout. Aluminum serves as an exceptional thermal conductor. High-quality extrusions are typically manufactured from 6063-T5 aluminum alloy. This specific metal profile acts as a highly efficient heat sink. It actively draws thermal energy away from the sensitive electronic components and disperses it safely into the surrounding air. Proper thermal management is the single most critical factor in ensuring your lighting reaches its rated lifespan of 50,000 hours.
Basic silicone-coated LED strips remain susceptible to physical damage. In a grease-prone kitchen environment, airborne cooking oils quickly coat the exposed diodes and dim their output. In a steamy bathroom, high humidity levels easily trigger electrical shorts. An aluminum housing paired with a durable polycarbonate cover provides a rigid physical barrier. This setup protects the circuitry from accidental impacts, settling dust, and moisture ingress. Routine maintenance becomes as simple as wiping the rigid plastic cover with a damp microfiber cloth.
Bare LEDs create notorious hotspots. These harsh individual dots of intense brightness reflect terribly on glossy surfaces like granite countertops or glass tiles. To combat this optical flaw, plastic diffusers snap securely into the aluminum channels to scatter the directional light rays. This diffusion seamlessly blends the individual points of light into a continuous professional glow.
Mounting Method | Best Application | Installation Difficulty | Key Engineering Advantage |
|---|---|---|---|
Surface | Under-cabinets, bookshelves, bias lighting | Low | Non-invasive, rapid deployment, excellent airflow. |
Recessed | Drywall ceilings, custom flooring, millwork | High | Zero protrusion, seamless architectural integration. |
Suspended | High ceilings, kitchen islands, tech offices | Medium | Brings illumination closer to task areas, high thermal dissipation. |
Corner | Retail displays, wardrobes, ceiling perimeters | Low | Optimized 45-degree beam angle eliminates wasted light. |
Moving from general benefits to specific applications, surface mounting offers the path of least resistance. Because it requires absolutely no structural modifications to your walls or furniture, surface mounting remains the most adaptable installation technique. It involves attaching the lighting channel directly onto an existing flat plane.
The physical mechanics of surface mounting are straightforward. Standard U-shaped aluminum profiles are secured to the substrate using mechanical fasteners or industrial-grade adhesives. Standard installations utilize steel mounting clips screwed directly into the surface. The aluminum channel then simply snaps into these clips. Alternatively, for lightweight profiles mounted on smooth non-porous surfaces like glass or tile, heavy-duty double-sided tape provides a highly secure bond.
Thanks to its non-invasive nature, this method adapts to almost any room. It is the gold standard for under-cabinet kitchen lighting. The metallic profile can be cleverly hidden behind a slight cabinet lip. Furthermore, it highlights wooden stair treads for nighttime safety and creates immersive bias lighting behind large computer monitors.
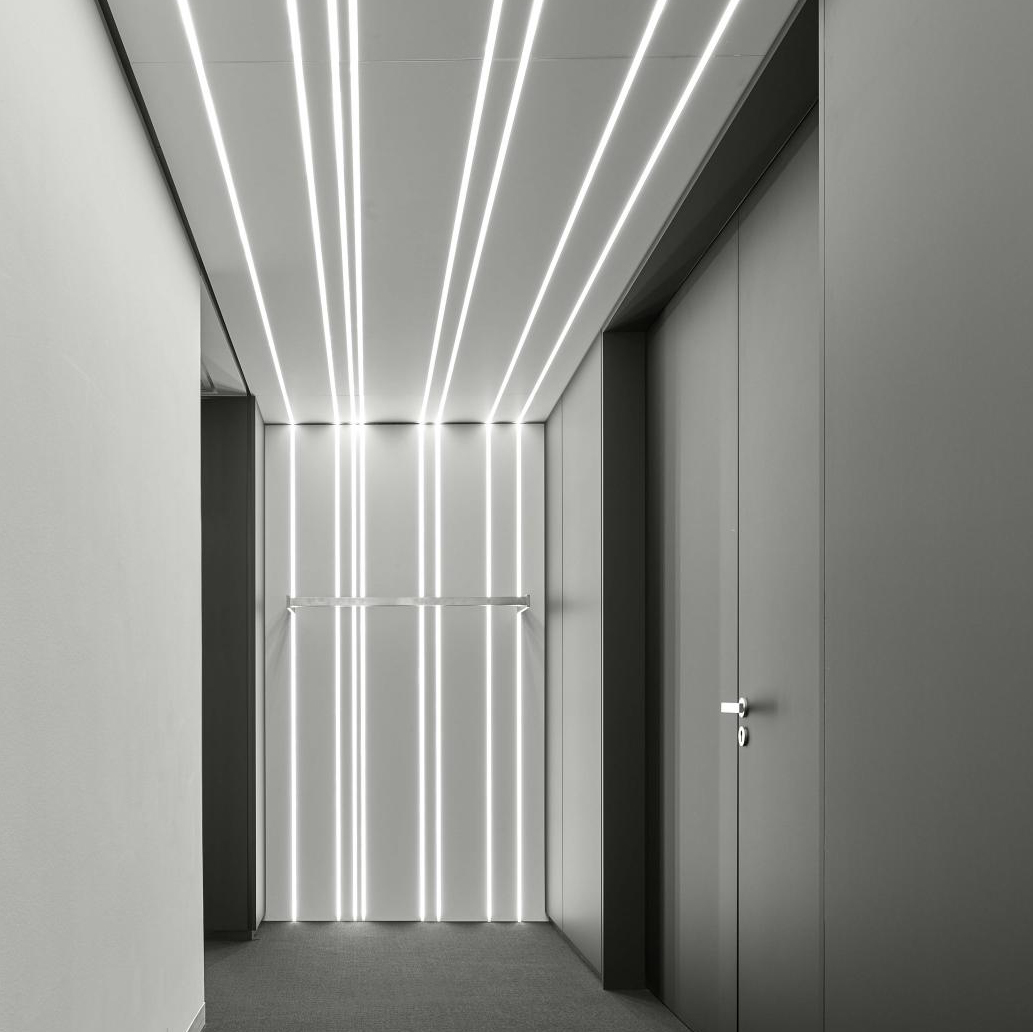
For designers seeking a luxurious architectural finish, recessed mounting is undeniably the premier choice. By embedding the lighting directly into the surface material, this method results in a completely flush profile. The light source essentially disappears when turned off.
Recessed mounting requires specialized flanged profiles. These unique extrusions feature a standard internal channel for the LED strip but include extended wings on either side. During the installation process, a precise groove is routed into the mounting surface. Once the recessed Aluminum LED Profile Light is inserted into this groove, the flanges sit flat against the exterior surface. This elegantly hides the rough cut edges of the wood or drywall.
Unlike surface mounting, the recessed approach demands absolute precision. It requires meticulous measurements and specialized tools like a wood router. The depth and width of the routed groove must match the exact dimensions of the profile to prevent wobbling. Moreover, installers must carefully plan the routing of low-voltage power cables deep within the cabinetry long before the final installation occurs. Due to these inherent complexities, recessed mounting is best planned during the initial construction phase.
While surface and recessed methods actively attempt to hide the physical light source, suspended mounting intentionally turns the fixture into a prominent architectural focal point.
Suspended mounting utilizes significantly wider and deeper aluminum extrusions engineered to hang freely from the ceiling. These robust profiles are suspended using adjustable high-tensile stainless steel wire kits. By hanging the lights, you bring the vital illumination closer to the work surface. The deep housing accommodates multiple rows of high-output strips for increased brightness. It also ensures absolute perfect light diffusion without a single visible hotspot.
The primary technical hurdle with suspended mounting is maintaining an uncluttered aesthetic. Power must be seamlessly delivered to the LEDs without creating a messy web of wires. Professional installers solve this by utilizing advanced suspension cables that double as low-voltage power conductors. In addition, the bulky LED power driver must be completely hidden. It is typically tucked away inside a ceiling canopy or mounted remotely in a utility closet.
Standard flat profiles project light straight forward. This is fine for flat walls. However, complex spatial layouts require light to be cast at a specific angle. Corner mounting brilliantly solves this geometric challenge.
This technique relies exclusively on V-shaped extrusions. These specific profiles are engineered with a 90-degree rear angle that fits snugly into the corner where two distinct surfaces meet. The front face holding the frosted diffuser is angled perfectly at 45 degrees. This clever geometry directs the light beam outward and downward. It washes the usable space with illumination rather than uselessly trapping the light against a parallel wall.
Not all lighting projects involve expansive commercial ceilings. Frequently, the most dramatic lighting effects are achieved in the tightest confined spaces. This reality requires very specific profile selections.
When dealing with painfully narrow gaps under floating bathroom vanities or thin glass shelving, standard aluminum profiles are simply too bulky. The industry solution is to utilize micro aluminum profiles. These specialized channels are engineered to be extremely shallow. Some measure a mere 7mm in depth. While they slide effortlessly into tight spaces, shallower profiles require high-density COB LED strips. This prevents visible pixelation since the diffuser sits dangerously close to the light source.
Small spaces often involve sharp turns. Bending a rigid metal channel is impossible without destroying it. To navigate tight corners, installers have two distinct choices. The first is to use a miter saw equipped with a non-ferrous metal blade to cut the profiles at precise 45-degree angles. The second option is to purchase pre-fabricated 90-degree corner connector modules. These small pieces connect straight profiles together effortlessly.
Analyzing current architectural design movements reveals a massive shift toward invisible integrated light sources. The days of relying solely on bulky protruding fixtures are fading. Today's engineering trends emphasize spatial geometry and minimalism. This demand drives the development of ultra-shallow recessed channels and trimless mud-in profiles.
Furthermore, as smart home ecosystems become standard, the demand for suspended mounting in high-end residential spaces is surging. These larger suspended extrusions easily conceal the complex wiring required for tunable white and RGBW systems. The overarching consensus among lighting professionals is clear. Integrating an architectural LED profile system directly into the blueprints is a foundational element of modern spatial planning. Builders are achieving a level of seamless illumination that was previously only seen in luxury commercial spaces.
Even if you select the perfect mounting method, the physical execution dictates the final quality. Frustrating issues like drooping fixtures and misaligned diffusers can be entirely avoided by adhering to professional field protocols.
Almost every project requires cutting the extrusions down to custom lengths. For factory-like results, avoid using standard woodworking blades. Use a miter saw with an 80-tooth non-ferrous metal blade. The most crucial pro tip is to always snap the plastic diffuser cover into the aluminum channel before making the cut. Slicing through the metal and the plastic simultaneously ensures both pieces are exactly the same length. Afterward, use a metal file to smooth away any sharp burrs.
A frequent complaint in lighting installations is fixtures detaching after a few weeks. The choice between chemical adhesives and mechanical fasteners must be based strictly on the substrate. Use double-sided tape only on surfaces that are perfectly smooth and meticulously cleaned with isopropyl alcohol. In contrast, screws are absolutely mandatory for any overhead installation due to the constant pull of gravity.
Understanding the material science behind linear lighting clarifies why specific methods are recommended. Beyond physical protection, the primary function of these extrusions is thermal management. If the localized heat generated by high-output strips is not efficiently drawn away, the diodes suffer from accelerated lumen depreciation.
When specifying premium LED profile solutions, verify the aluminum mass. High-quality extrusions are manufactured from anodized 6063 aluminum alloy. This specific alloy offers a stellar thermal conductivity rating. Consider the ambient environment carefully. If a profile is recessed entirely into a heavily insulated ceiling, its ability to dissipate heat into the air is severely reduced. In insulated recessed applications, it is wise to opt for wider deep channels that possess more metal mass to act as a larger heat sink.
Physical installations present unforeseen variables. Addressing these issues systematically prevents costly damage to your hardware.
Never force a polycarbonate cover into a channel. Applying excessive pressure creates micro-fractures in the plastic. Inspect the interior instead. Often a slightly misaligned LED strip or a twisted power wire obstructs the seating groove. Furthermore, when joining multiple profiles to span a long wall, light can leak through the microscopic gaps where the aluminum ends meet. To fix this light bleed, stagger the joints. Ensure the plastic diffuser covering that section spans continuously over the aluminum joint. This staggered overlap locks the channels together rigidly and eliminates visible light gaps.
Selecting the correct mounting method separates a messy amateur project from a flawless professional lighting installation. Whether you utilize the versatile surface mount, the seamless recessed approach, the bold suspended style, or the directional corner method, rigorous planning is essential. Housing your delicate strips inside an aluminum extrusion protects your investment from daily wear while drastically extending the life of the LEDs through superior heat dissipation.
Always ensure you match your mounting hardware to your specific surface type to prevent accidental drops. By exploring high-quality profile options and following these expert installation techniques, you guarantee a highly functional aesthetic for any space. Ready to elevate your next lighting project? Evaluate your spatial constraints and select the exact architectural extrusion designed for your needs from Contation LED to ensure flawless execution.
Yes. For lightweight surface-mounted profiles placed on incredibly smooth non-porous surfaces like bathroom tile or glass shelves, heavy-duty double-sided mounting tape is highly effective. However, for overhead ceiling installations or textured surfaces like painted drywall, mechanical fasteners are strictly required to prevent the fixture from falling.
For outdoor applications, surface or recessed mounting using specialized IP65-rated waterproof aluminum profiles is strictly required. It is critical to use anti-corrosive stainless steel mounting clips. The end caps must be thoroughly sealed with outdoor-grade silicone to prevent water ingress.
The choice depends on your optical requirements and physical space constraints. Deep profiles allow the light rays to diffuse fully before hitting the polycarbonate cover. This creates a completely spotless neon look. Shallow profiles are necessary for restrictive spaces but may show faint LED dots. Pairing shallow profiles with high-density COB strips is the standard engineering workaround.
The most precise method utilizes a power miter saw equipped with a fine-tooth non-ferrous metal blade. Always leave the polycarbonate diffuser snapped into the aluminum channel during the cutting process. This prevents the brittle plastic from cracking and ensures perfectly flush ends.
This depends entirely on the voltage of the LED strip housed inside the profile. Standard 12V systems typically experience voltage drop after 5 meters, resulting in dimming at the far end. Upgrading to a 24V system allows for continuous runs up to 10 meters. For architectural suspended runs exceeding this length, power must be injected at both ends of the fixture.


