


Views: 0 Author: Site Editor Publish Time: 2026-09-06 Origin: Site


Positioning a ceiling panel light in a car wash requires a strict, zone-specific layout. Facility illumination directly dictates service quality and customer perception. A poorly lit wash bay hides vehicle surface defects. It also increases the risk of wet-environment electrical failures and drives up energy consumption. Improper lighting placement creates operational hazards. Shadows on lower vehicle panels lead to missed dirt. Glare blinds technicians during detailed paint correction. You need a calculated approach to position your lighting system. This maximizes visibility across all vehicle profiles. It ensures IP-rated compliance in harsh wet zones. It also optimizes long-term facility performance without relying on guesswork.
You must establish clear operational goals before mounting any fixtures. The primary objective is eliminating shadows on lower vehicle panels. You also need to ensure employee safety in wet conditions and reduce maintenance overhead. Lighting a car wash is not just about raw brightness. It requires targeted illumination that reaches every curve of a vehicle, from the roofline down to the rocker panels.
We measure this targeted illumination using foot-candles (fc) and lux. General wash bays typically require 75 to 100 foot-candles. Detailing and paint correction zones demand 150 to 200 foot-candles. Achieving these specific lux requirements guarantees even and consistent illumination throughout the facility. You must calculate the light spread at the floor level, not just at the ceiling source. This ensures technicians can see clearly without straining their eyes during long shifts.
Using a digital light meter helps establish this baseline. Take readings at multiple elevations. Measure at the floor, at 36 inches (average hood height), and at 72 inches (average roof height). Ambient light from open bay doors changes throughout the day, so you must design the overhead lighting to compensate for overcast conditions and night operations.
| Facility Zone | Target Foot-Candles (fc) | Primary Lighting Objective |
|---|---|---|
| Automated Wash Tunnel | 75 - 100 fc | General visibility, safety, equipment monitoring |
| Manual Prep / Wash Bay | 100 - 120 fc | Shadow elimination, dirt identification |
| Paint Correction | 150 - 200 fc | Defect spotting, true color rendering |
| Ceramic Coating | 120 - 150 fc | High-spot detection, streak identification |
| Customer Handover | 50 - 75 fc | Ambient transition, aesthetic presentation |
Car wash environments destroy standard commercial lighting. Humidity, atomized water, and harsh cleaning chemicals constantly attack fixture housings. Highly alkaline pre-soaks and acidic wheel cleaners vaporize into the air. This chemical vapor settles on ceiling fixtures and eats away at standard metals and plastics. Hydrofluoric acid, commonly found in heavy-duty aluminum brighteners, will etch and cloud cheap plastic lenses within weeks.
You must evaluate environmental resilience and engineering features over initial fixture cost. A cheap fixture fails within months in a wash tunnel. Water ingress shorts out the internal drivers. Chemical exposure yellows standard plastic lenses, reducing lumen output by up to 40 percent. You need fixtures built specifically for these hazards. Look for sealed housings, marine-grade coatings, and chemical-resistant gaskets. This upfront engineering prevents constant replacement cycles and keeps your wash bays operational.
Temperature fluctuations also play a role. Wash bays experience rapid temperature shifts, especially in winter when hot water hits freezing air. This creates heavy condensation. Fixtures without proper pressure-equalizing vents will suck moisture past their seals as they cool down, leading to internal corrosion and premature diode failure.
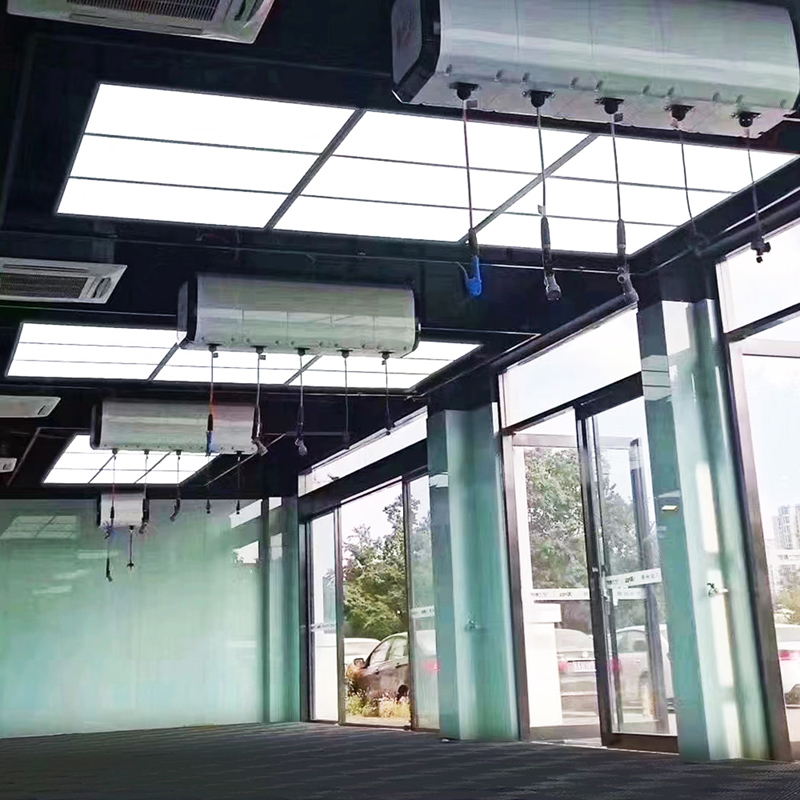
Position fixtures in wash bays to create overlapping beam angles. This placement logic eliminates dark spots between the ceiling and the vehicle belt. Space the fixtures 8 to 10 feet apart down the center line of the tunnel. You want the light to flood downward and outward. This ensures the top and sides of the vehicle receive equal illumination as it moves through the automated track.
Ceiling fixtures cannot work alone in a wash tunnel. You must integrate them with low-angle wall lights. Mount wall fixtures at 24 to 36 inches above the floor. The overhead lights illuminate the hood, roof, and trunk. The wall lights illuminate the rocker panels, wheels, and undercarriage. This wall-to-ceiling integration guarantees 360-degree visibility for both automated sensors and manual prep staff.
In automated tunnels, you must also consider the vision systems of the wash equipment. Modern arches use optical sensors to profile the vehicle. Uneven lighting or harsh shadows can confuse these sensors, causing the equipment to retract too early or apply chemicals unevenly. Consistent, overlapping light distribution prevents these equipment faults.
Paint correction demands absolute precision. Center your fixtures directly above the primary workstation. Utilize a tight grid pattern, typically 4x4 or 6x6 feet apart. This layout exposes swirl marks, holograms, and clear coat scratches. You want the light to hit the vehicle from multiple overhead angles. This prevents a single light source from washing out fine paint defects.
Fixture selection here is critical. You must deploy high-CRI car detailing shop lights in these specific zones. A Color Rendering Index (CRI) of 90 or higher ensures accurate color representation. Technicians need to see the true color of the paint to match touch-ups and spot microscopic imperfections. Standard low-CRI lights make dark blue and black paint look identical, leading to poor correction results.
When polishing, technicians look for dual-action sanding marks and rotary buffer trails. These defects only appear under specific lighting angles. By utilizing a tight overhead grid combined with mobile inspection lights, the technician can view the clear coat from every necessary angle, ensuring a flawless finish before applying any sealants.
Ceramic coating requires a different visual environment. Utilize a continuous or closely spaced layout to create a "light tunnel" effect. Mount fixtures end-to-end along the length of the bay. This creates long, unbroken reflections on the vehicle's surface. Technicians use these reflection lines to spot high spots or streaks in the ceramic coating before it cures.
Deploy an LED detailing light panel for final inspections. These panels provide diffused, glare-free illumination. They highlight high-gloss finishes without blinding your technicians. A frosted diffuser spreads the light evenly. This softens the harsh glare that typically bounces off freshly polished clear coat, reducing eye fatigue during long finishing sessions.
The flashing process of a ceramic coating involves solvents evaporating, leaving a temporary rainbow effect on the paint. If the lighting is too harsh or pinpointed, the technician cannot see this flashing process accurately. Diffused panel lighting provides the exact soft reflection needed to wipe off the coating at the perfect moment.
You can use lighting to organize your facility. Use distinct lighting layouts and form factors to visually separate workflow stages. Install square panels for prep areas. Use continuous linear strips for ceramic coating bays. Deploy softer ambient panels for done and pickup areas. This creates a visual map for both employees and customers.
This strategy guides vehicle flow naturally. It sets clear visual boundaries for technicians without requiring physical walls or barriers. Drivers know exactly where to pull their vehicles based on the ceiling light patterns. It streamlines operations and gives the facility a high-end, organized aesthetic.
Different color temperatures can also aid in this visual zoning. While the active work bays should remain at 5000K, the customer handover area can drop to 4000K. This slightly warmer light makes the freshly cleaned vehicle look glossy and inviting, enhancing the final customer presentation.
Customer zones require a different approach. Space fixtures wider apart for ambient lighting. Focus on facility aesthetics, consistent transition lighting, and safe navigation. You do not need task-specific detailing brightness here. Space fixtures 12 to 15 feet apart.
Transition lighting helps drivers adjust their eyes. Moving from bright daylight into a dark wash tunnel causes temporary blindness. Step down the lumen output gradually from the entrance to the wash bay. Do the same at the exit. This keeps drivers safe and comfortable as they navigate the property.
For outdoor vacuum stations, ensure the lighting extends past the canopy. Customers need to see inside their vehicles while vacuuming. Position the overhead canopy lights slightly offset from the parking stall center. This casts light directly into the open car doors rather than just illuminating the roof.
High ceilings present a major challenge. Many commercial wash facilities feature ceilings 15 to 20 feet high. You must drop or suspend fixtures to maintain optimal foot-candle ratings at the vehicle surface. Light intensity drops exponentially as distance increases due to the inverse square law. Mounting fixtures flush on a 20-foot ceiling wastes energy and leaves the floor dangerously dim.
You must establish absolute minimum hanging height rules. This prevents collisions with tall vehicles. Lifted trucks, transit vans, and automated wash equipment require significant clearance. Hang fixtures no lower than 10 to 12 feet from the floor. This balances maximum surface illumination with strict clearance safety.
Open bay areas benefit greatly from a square LED ceiling light. Square fixtures provide broad, multidirectional light distribution. They push light out evenly in all four directions. This fills the bay with uniform illumination, reducing the harsh shadows created by single-directional linear lights.
Spacing calculations prevent over-illumination and under-illumination. Hot spots cause blinding glare on wet floors. Dead zones hide dirt. For a standard 150W square fixture suspended at 12 feet, space them on a 10x10 foot grid. This overlaps the beam angles perfectly. It creates a seamless blanket of light across the entire shop floor.
When laying out the grid, always start from the center of the bay and work outward. This ensures the primary work area receives the most direct light. The edges of the beam spread will naturally illuminate the walkways and tool carts along the walls.
Water and electricity do not mix. IP66 is the absolute minimum rating for wash bays. An IP66 rating guarantees protection against heavy seas and powerful jets of water. Wash tunnel fixtures face direct spray from pressure washers daily. Anything less than IP66 will fail rapidly.
Understand the differences between IP ratings and NEMA enclosures. IP67 allows for temporary submersion, which is rarely needed on a ceiling. IP68 is for continuous underwater use. For extreme chemical corrosion resistance, look for NEMA 4X enclosures. NEMA 4X adds a specific layer of protection against corrosive agents like acidic wheel cleaners and alkaline soaps.
| Rating Standard | Water Resistance Level | Chemical & Corrosion Resistance | Best Use Case in Car Wash |
|---|---|---|---|
| IP65 | Low-pressure water jets | None specified | Dry vacuum areas, customer lobbies |
| IP66 | High-pressure water jets | None specified | Standard automated wash tunnels |
| IP67 | Temporary submersion | None specified | Lower wall-mounted wash bay lights |
| NEMA 4X | Hosedown & splashing water | High (corrosion resistant) | Chemical prep zones, harsh soap arches |
Correlated Color Temperature (CCT) dictates how your technicians see the vehicle. We recommend 5000K to 6000K for crisp, daylight-equivalent visibility. This temperature range provides a stark, white light. It highlights dirt, soap residue, and water spots perfectly. Avoid warm temperatures like 3000K, which cast a yellow hue and hide surface contaminants.
Evaluate the lumen-per-watt (lm/W) efficacy. High efficacy scales well for large facilities. A fixture delivering 130 lm/W produces more light while pulling less electricity. This efficiency matters when you run 50 to 100 fixtures for 12 hours a day. Focus on fixtures that deliver high lumen output without excessive wattage draw.
Do not confuse total lumens with usable light. A fixture might output 20,000 lumens, but if the beam angle is too narrow, it creates a harsh hot spot on the floor while leaving the surrounding area dark. Look for fixtures with a 120-degree beam angle to maximize floor coverage.
Lens material impacts both safety and longevity. Polycarbonate lenses offer extreme shatter resistance. They comply with strict safety regulations in commercial bays. However, polycarbonate can yellow over time if exposed to harsh chemicals. Glass lenses offer superior chemical resistance and will not yellow. But glass shatters upon impact, making it risky in active wash tunnels. Tempered glass provides a solid middle ground, offering chemical resistance with added impact strength.
Thermal management dictates LED lifespan. A sealed LED ceiling panel light traps heat internally. You must evaluate the fixture's sealed aluminum housings and advanced heat sinks. The heat sink pulls thermal energy away from the LED diodes. This ensures longevity in enclosed, non-ventilated wet spaces. Always verify that all exposed metal components feature anti-corrosion coatings to prevent rust.
Look for fixtures with separated driver compartments. Heat rises, and the driver is the most heat-sensitive component in the fixture. By physically separating the driver housing from the LED diode board, the fixture runs cooler and lasts significantly longer in a hot, humid wash bay.
Wiring a wet environment carries severe risks. Improper wiring leads to shorts, fires, and electrocution hazards. You must use sealed conduits and waterproof junction boxes. Failing to meet local NEC (National Electrical Code) standards for wet environments results in failed inspections and facility shutdowns.
Mitigate this by hiring certified commercial electricians familiar with wet location codes. Use liquid-tight flexible metal conduit (LFMC) for all ceiling drops. Ensure every connection point features a silicone-sealed gasket. Never leave exposed wire nuts in a wash bay ceiling space. Apply dielectric grease to all wire connections inside the junction boxes to prevent moisture corrosion.
Install condensation loops in your wiring. Water travels down wires via gravity. By creating a small dip or loop in the wire before it enters the fixture, condensation drips off the bottom of the loop rather than running directly into the fixture housing.
High-lumen fixtures cause intense eye strain. Technicians working 8-hour shifts under harsh lighting suffer from fatigue and headaches. Glare bouncing off wet hoods and windshields makes it difficult to focus on detailed tasks.
You can manage this risk through strategic angling. Tilt fixtures slightly away from the primary line of sight. Utilize frosted or diffused lenses on your detailing panels. A frosted lens scatters the light, softening the harsh pinpoint glare of raw LED diodes while maintaining overall bay brightness.
Position the lights slightly behind the technician's normal standing position. If the light is directly in front of them, it reflects off the wet vehicle straight into their eyes. Placing the light behind them casts the illumination over their shoulder and onto the work surface.
Reaching a broken fixture over an active wash pit is dangerous and difficult. Long-term maintenance risks increase when fixtures are mounted directly over automated tracks or deep drainage trenches. You cannot easily position a scissor lift in these areas.
Implement standardized mounting hardware to speed up replacements. Select fixtures with modular, easily replaceable drivers. If a driver fails, a technician can swap it out in minutes without removing the entire fixture housing. Plan your layout so fixtures align with solid concrete walkways rather than open pits.
Consider remote-mounted drivers for extremely hard-to-reach areas. You can mount the LED panel over the wash pit and run low-voltage wiring to the driver mounted on an accessible side wall. This keeps the sensitive electronics away from the heaviest water spray and makes future maintenance simple.
A: IP66 is the absolute baseline for wash bays. It provides necessary resistance against high-pressure water jets and dust. IP65 is insufficient because it cannot withstand the direct, powerful spray from pressure washers used daily in these environments.
A: Optimal suspension heights typically range from 9 to 12 feet. This height balances maximum lumen delivery at the vehicle surface with safe clearance for tall vehicles, such as lifted trucks and transit vans.
A: No. Standard commercial fixtures fail rapidly in a wash bay. They must feature completely sealed housings, anti-corrosion coatings, and be specifically rated for wet locations to survive constant humidity and chemical exposure.
A: We recommend 5000K to 6000K. This temperature range mimics natural daylight, providing the stark, crisp visibility required for accurate paint correction, color matching, and defect spotting.
A: You must integrate overhead ceiling panel lights with angled wall-mounted fixtures. Placing wall lights 24 to 36 inches off the floor ensures 360-degree, even coverage across rocker panels and wheels.
A: It depends on the zone. Polycarbonate offers superior shatter resistance and safety compliance for active wash tunnels. Glass provides superior chemical resistance and prevents yellowing, making it ideal for harsh chemical prep areas.


