


Views: 0 Author: Site Editor Publish Time: 2026-09-26 Origin: Site


Replacing standard fluorescent tubes with modular LED systems transforms functional spaces into highly customized environments. Buyers often purchase these kits without a predefined layout strategy. This leads to mismatched dimensions, inadequate power distribution, structural sagging, and poor light dispersion. To maximize the return on your installation, you must evaluate room dimensions, ceiling infrastructure, and primary use cases before selecting a layout. A well-planned configuration ensures uniform brightness and structural stability. This guide breaks down the technical requirements, essential tools, and optimal configurations for implementing RGB hexagon ceiling lights. We cover everything from mapping the grid to managing voltage drop across large arrays.
Mapping standard kit dimensions against your actual room footprint is the first critical step. A common mistake involves centering a standard 16-foot by 8-foot grid inside a room with irregular dimensions. This mismatch creates uneven borders and awkward lighting zones. You must measure the total usable ceiling space and subtract any obstructions like HVAC vents, garage door tracks, or existing light fixtures. Measure the diagonals of the room to ensure the walls are square before planning your grid lines.
Apply the 10-15% edge clearance rule when planning your layout. The outer edge of your lighting grid should sit comfortably away from the walls. Pushing the lights flush against the wall crowds the space and creates harsh, downward shadows. Maintaining a perimeter gap allows the light to wash down the walls evenly. This enhances the perceived size of the room and provides balanced ambient illumination.
Ceiling height directly impacts how light blends and reaches the floor. Standard 8 to 10-foot ceilings offer optimal dispersion for flush-mounted color changing hexagon lights. At this height, the beam angle naturally overlaps. This overlapping eliminates dark spots between the fixtures and the floor. The color blending appears smooth, and the overall brightness remains intense enough for detailed tasks like paint correction or mechanical work.
Rooms with ceilings exceeding 12 feet require a different approach. The inverse square law of light dictates that as the distance from the light source doubles, the intensity of the light drops to one-quarter. Flush mounting a grid at 14 feet significantly reduces the foot-candles reaching the working surface below. In these environments, you must use suspension cables to lower the grid to an optimal 9 or 10-foot height. Suspending the grid also allows light to escape upward, creating a halo effect on the ceiling above while maintaining functional brightness below.
The material of your ceiling dictates your mounting hardware and structural limits. Standard modular frames carry weight that multiplies quickly as you expand the grid. You cannot rely on basic drywall screws for a large installation.
When dealing with drywall, you cannot simply drive screws into the gypsum board and expect the grid to hold. A massive layout weighs enough to pull standard screws straight out of the ceiling over time. You must locate the ceiling joists using a high-quality magnetic stud finder. Mark these joists with a pencil. If your grid nodes do not align with the joist spacing, you must use heavy-duty toggle bolts for the unsupported nodes. Toggle bolts distribute the weight across a larger surface area on the backside of the drywall.
For concrete ceilings, the process requires heavier tools. You need a rotary hammer drill equipped with a masonry bit. You will drill pilot holes and drive Tapcon concrete anchors into the slab. Because you cannot hide wiring inside a concrete slab, you must plan for surface-mounted conduit or wire raceways to route power to the grid.
Drop ceilings present a unique challenge. The acoustic tiles cannot support any weight. You must attach specialized grid clips directly to the metal T-bar framing. Before hanging a large LED array, verify the weight capacity of the suspended ceiling grid. You may need to add additional support wires from the true ceiling down to the T-bar frame to handle the extra load.
Executing a flawless installation requires specific tools. A laser level establishes perfectly straight reference lines across large ceilings. A high-quality magnetic stud finder ensures you hit structural joists for maximum support. Wire strippers, a multimeter, and Wago 221 lever nuts streamline the hardwiring process and ensure safe electrical connections.
Implement the floor map strategy before drilling a single hole. Assemble your customizable RGB hexagon lights entirely on the floor directly beneath the intended installation spot.
This process allows you to verify the exact physical dimensions and confirm that all snap-fit connectors are seated properly. Powering the grid on the floor prevents you from discovering a faulty tube after it is already bolted to a 12-foot ceiling.
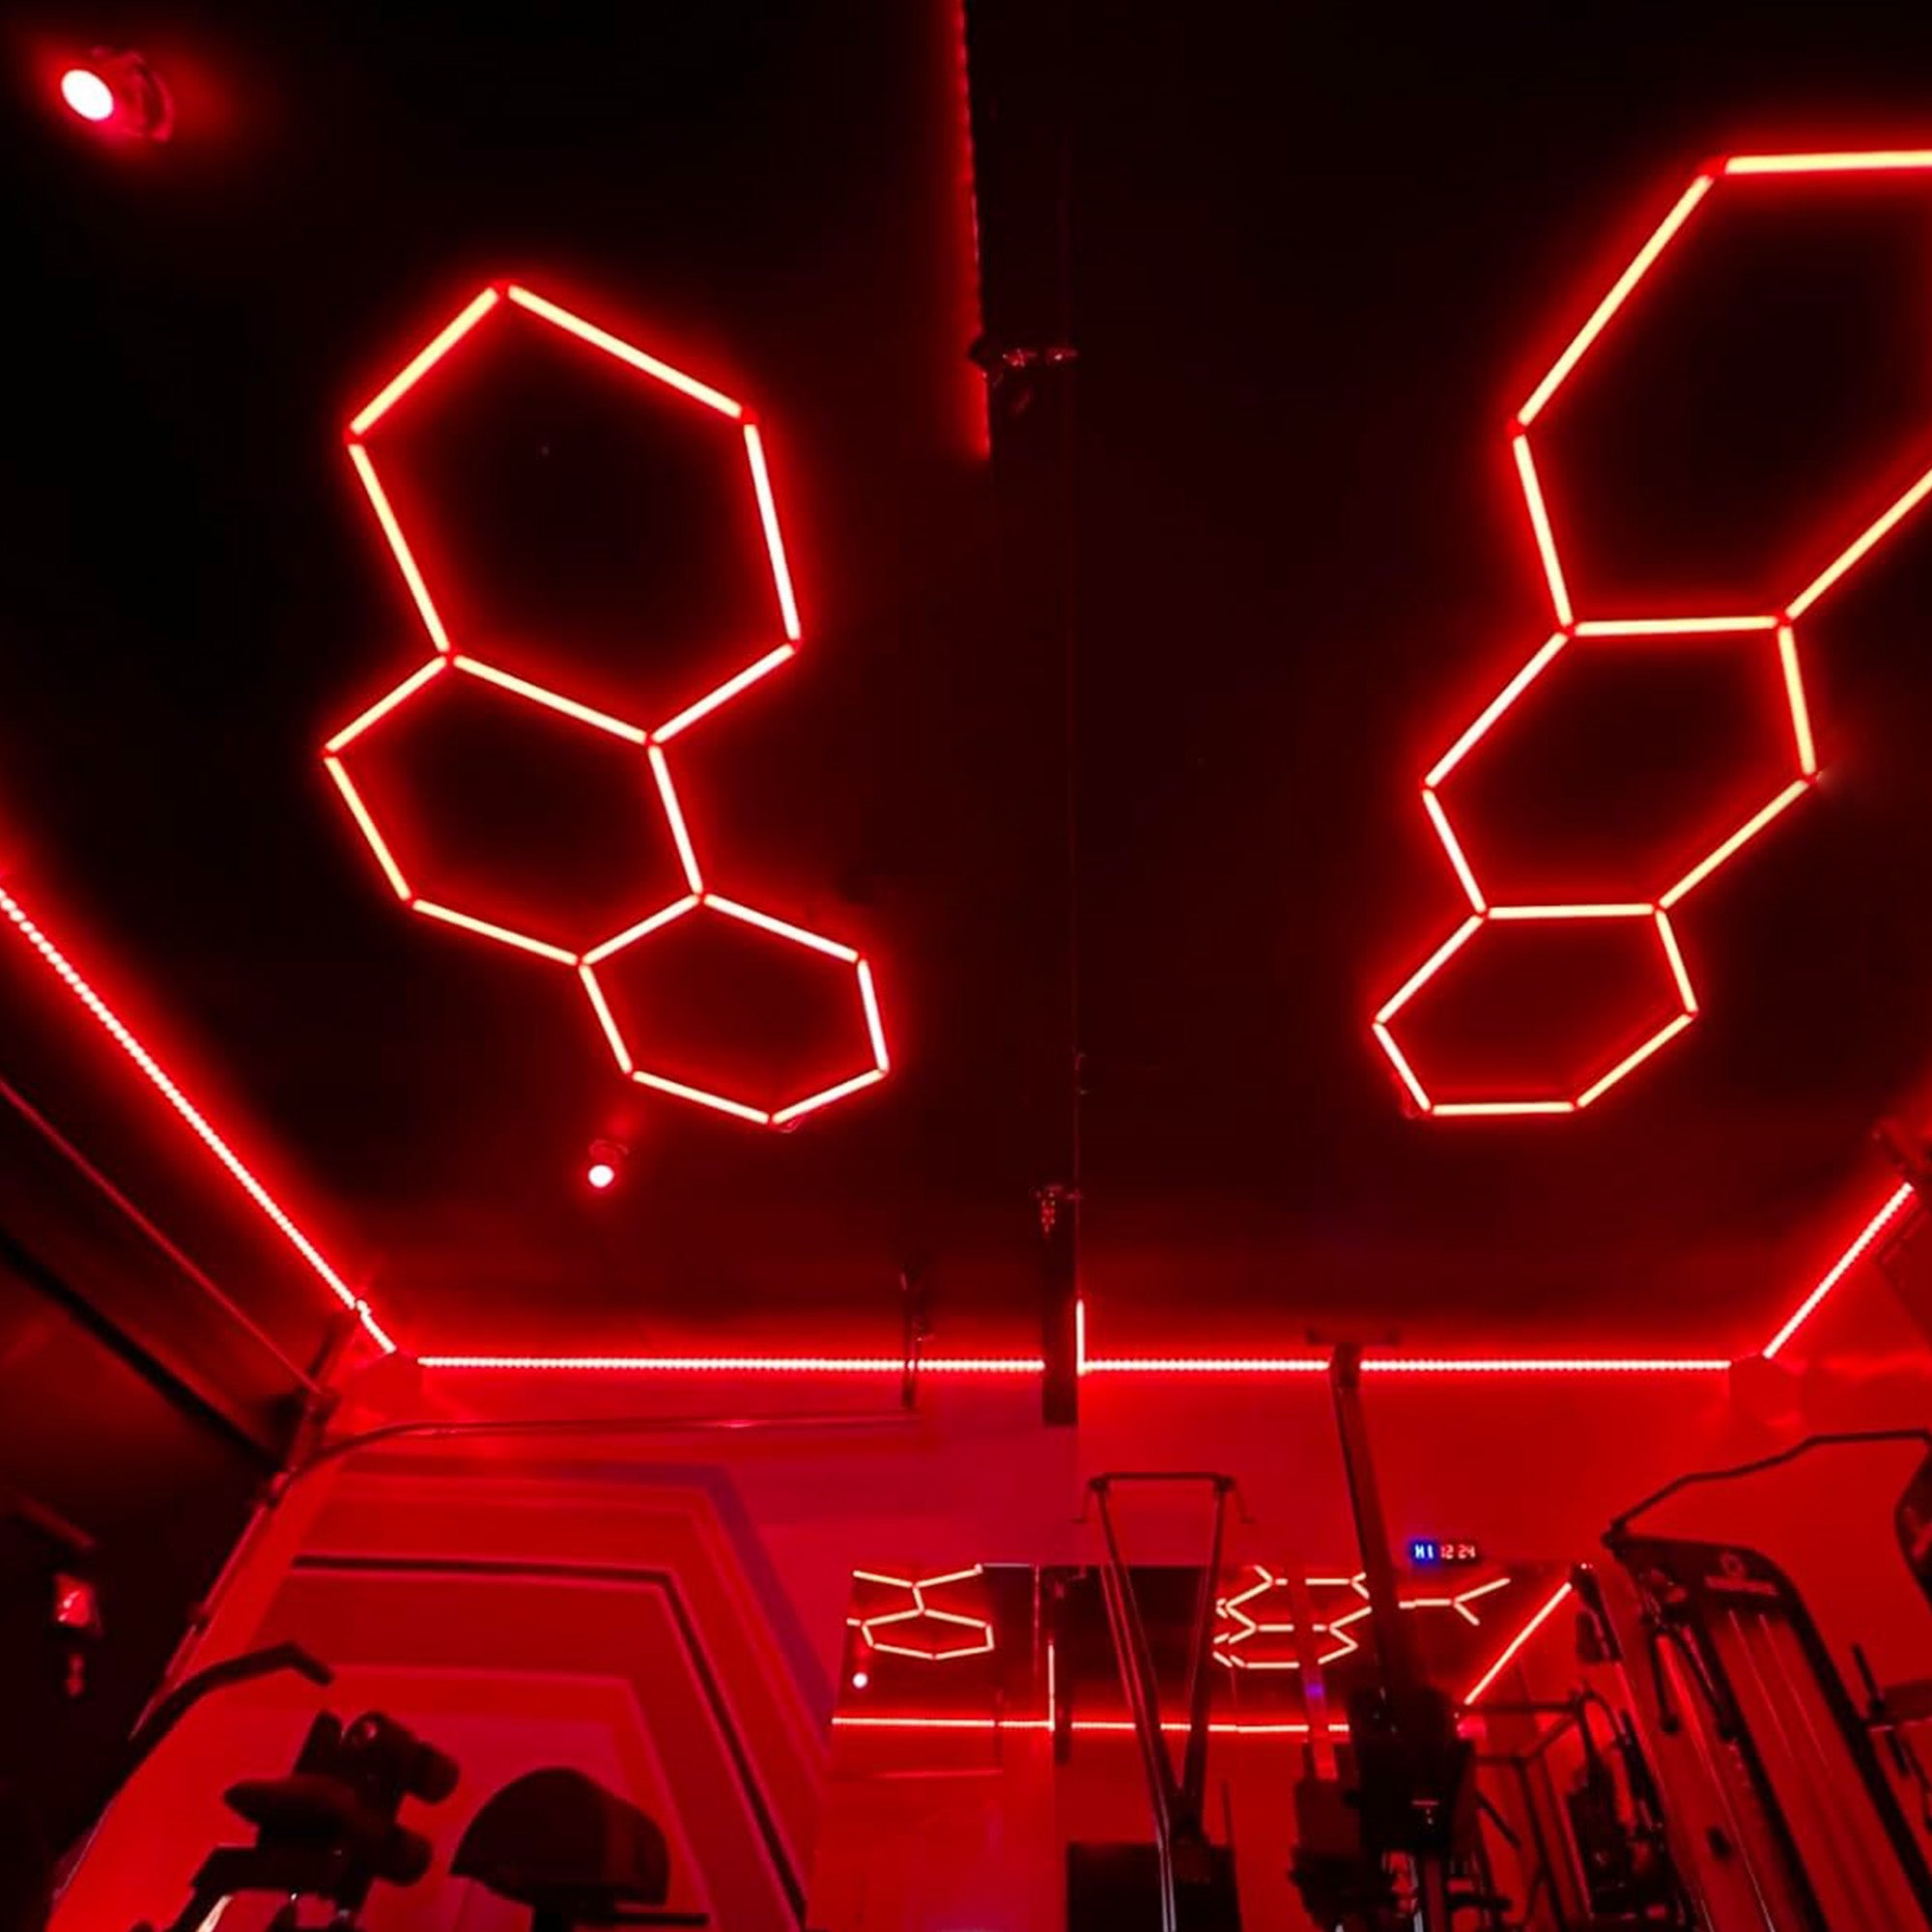
The continuous multi-hex layout delivers maximum lumen output and superior shadow reduction. By interlocking dozens of geometric shapes into a massive, unified grid, you create a massive overhead light bank. This configuration floods the space with light from multiple angles, virtually eliminating shadows cast by tools, vehicles, or gym equipment.
This layout excels in automotive detailing bays, commercial showrooms, home gyms, and large workshops. The uniform light distribution is ideal for identifying paint imperfections or highlighting the contours of a vehicle. However, the trade-offs include a high power draw. A massive grid will easily exceed the capacity of a standard 15-amp lighting circuit. You will likely need to pull a dedicated 20-amp circuit to handle the load. The installation process demands multiple sets of hands to lift and secure the large sections, and the rigid dimensional requirements leave little room for error.
A clustered, centralized layout focuses the visual impact directly over a specific focal point. Instead of covering the entire ceiling, you assemble 5 to 7 interconnected hexagons to form a floating island. You position this cluster precisely over a gaming desk, a bed, or a home theater seating area.
This approach dominates residential spaces, streaming setups, and smaller rooms where atmospheric lighting takes precedence over raw brightness. It provides a striking visual element without overwhelming the room. The primary trade-off is lower overall ambient light. You must center the grid perfectly over your focal point. You cannot simply eyeball the placement. You must measure off the parallel walls, find the exact center of the room or the desk below, and plumb a line up to the ceiling. A misalignment of even a few inches becomes visually jarring.
Non-traditional layouts break away from the standard honeycomb pattern. You can build Y-shapes, staggered linear paths, or incomplete honeycomb structures that follow the architectural lines of a room. These designs wrap around corners, trace the perimeter of a dropped soffit, or guide foot traffic down a hallway.
Creative studios, modern retail spaces, and rooms with irregular footprints benefit heavily from asymmetrical designs. They allow you to navigate around ceiling obstacles like exposed ductwork, sprinkler heads, or structural pillars while maintaining a cohesive aesthetic. This flexibility makes modular lighting highly adaptable to challenging architectural spaces. You can terminate a run of lights exactly where you need to, rather than being forced to complete a full geometric shape.
Building a layout that flows from the ceiling down the wall creates a highly immersive environment. This requires integrating the overhead array with RGB hexagon wall lights. You achieve this using specialized 90-degree inside corner connectors. The transition must be structurally sound and visually seamless.
The primary mechanical challenge involves routing power cables across the 90-degree angle. You must avoid pinching the low-voltage wires between the connector and the drywall. Installers often cut a small channel or drill a relief hole in the drywall right at the corner joint to give the wires room to bend safely.
You must anchor the transition nodes securely to both the wall stud and the ceiling joist. The corner joint bears the pulling force of gravity from both directions. If you rely on drywall anchors here, the joint will eventually pull away from the corner, creating an ugly gap. Careful measurement is required to ensure the wall grid aligns perfectly with the ceiling grid. If the ceiling grid is slightly out of square, the error will multiply as the pattern travels down the wall.
Voltage drop is the enemy of any large-scale LED installation. Direct current loses voltage as it travels through long runs of wire and multiple connection points. If you daisy-chain 50 tubes together on a single power feed, the tubes at the beginning of the run will receive the full voltage. The tubes at the far end will receive significantly less. This voltage drop causes the LEDs to dim. In RGB systems, voltage drop also causes severe color shifting. A command for pure white light might look crisp at the power source but turn muddy yellow or pink at the end of the grid.
To prevent this, you must calculate your total wattage and plan for power injection. Check the wattage rating per tube. If a single tube draws 8 watts, and your layout uses 60 tubes, your total load is 480 watts. Never run a power supply at 100% capacity. Apply the 80% rule: divide your total load by 0.8 to find the minimum power supply rating. In this case, you need a 600-watt power supply.
Instead of feeding power into just one end of the grid, run parallel low-voltage wires from the power supply to multiple injection points across the layout. Injecting power every 15 to 20 tubes guarantees uniform brightness and accurate color rendering across the entire installation.
The control mechanism dictates how you interact with the lighting environment. Smartphone apps utilizing Wi-Fi offer the most flexibility. They allow you to select specific hex codes, set timers, and create custom animations. Note that most smart controllers require a 2.4GHz Wi-Fi network; they will not connect to a 5GHz band. RF remote controls provide immediate, tactile control without relying on a local network, making them highly reliable for quick adjustments in a garage environment.
For commercial setups or advanced home theaters, DMX controllers offer professional-grade synchronization. DMX allows you to map individual nodes and integrate the ceiling grid with other stage or room lighting across multiple DMX universes. When evaluating music sync features, look for controllers with built-in, high-sensitivity microphones. Relying solely on a smartphone's microphone introduces latency and poor reaction times to bass frequencies.
Dimmable drivers are essential for multi-use spaces. A full-coverage grid running at 100% brightness is perfect for automotive detailing or heavy workshop tasks. However, if that same space transitions into an entertainment area or a home gym in the evening, maximum brightness becomes blinding and uncomfortable.
Integrating a high-quality dimmable power supply allows you to scale the lumen output from a functional task light down to a soft, ambient glow. Ensure your chosen controller supports smooth, flicker-free dimming across the entire 1-100% range. Cheaper controllers often exhibit visible PWM flicker at lower brightness levels. This flicker causes eye strain and ruins video recordings, which is a major issue for content creators and streamers.
The structural material of the LED housing determines both the lifespan of the diodes and the rigidity of the grid. Standard kits use polycarbonate tubes. While lightweight and easy to snap together, polycarbonate acts as an insulator. It traps the heat generated by the LEDs. Over time, excessive heat degrades the diodes, leading to premature failure or color shifting.
Premium kits utilize aluminum housings. Aluminum acts as a highly efficient heat sink, drawing thermal energy away from the LED strips and dissipating it into the air. Furthermore, aluminum frames provide superior structural rigidity. They prevent the long spans of a massive grid from bowing or twisting under their own weight.
| Feature | Aluminum Frames | Polycarbonate Frames |
|---|---|---|
| Thermal Management | Excellent heat dissipation; extends LED lifespan. | Traps heat; may lead to faster diode degradation. |
| Structural Rigidity | High; resists bowing in large, continuous grids. | Moderate; prone to sagging over long unsupported spans. |
| Weight | Heavier; requires robust ceiling anchors and joist mounting. | Lightweight; easier to handle during solo installations. |
| Best Use Case | Massive commercial grids, high-brightness continuous use. | Smaller residential clusters, floating islands, accent lighting. |
Choosing between flush mounting and suspension alters the aesthetic and the thermal dynamics of the installation. Flush mounting secures the RGB hexagon lights directly against the drywall. This creates a clean, integrated look that maximizes overhead clearance. It is the preferred method for garages with low ceilings or spaces where vehicle lifts operate. However, flush mounting restricts airflow around the back of the fixtures. The LEDs generate heat, and without airflow, that heat gets trapped against the ceiling.
Suspension mounting utilizes steel aircraft cables to drop the grid below the ceiling plane. This method provides excellent 360-degree airflow, keeping the power supplies and LED strips cool. It also allows you to bypass ceiling obstacles like HVAC ducts, surface-mounted pipes, or uneven joists. The trade-off is a highly complex leveling process. You must adjust the tension on dozens of individual cable grippers to ensure the grid sits perfectly flat. A laser level is mandatory for this process. You shoot a horizontal laser line across the room and adjust each suspension point until the entire grid aligns with the beam.
Exposed wiring instantly ruins the futuristic aesthetic of a geometric lighting grid. Planning your cable routes before mounting is critical. In open-joist ceilings, you can easily staple Romex wire along the sides of the wood framing, keeping it out of sight. You can also mount the controller boxes and power supplies high up between the joists, ensuring they remain accessible for future maintenance.
Finished drywall ceilings present a greater challenge. If you cannot access the attic space above to hide the power supplies, you must use surface-mounted wire raceways. Paint the raceways to match the ceiling color to minimize their visual impact. Position the main power injection points near existing wall outlets or ceiling junction boxes to keep cable runs as short as possible. Always ensure your wiring methods comply with local electrical codes, utilizing proper junction boxes for all splices.
Expansive layouts face significant risks of sagging. A small 6-pack expansion might hold its shape perfectly, but a 30-hexagon grid will bow in the center if only supported at the perimeter. The snap-fit connectors are designed for electrical continuity and basic alignment. They are not designed for load-bearing structural support.
You must implement strict reinforcement intervals. Anchor the grid to the ceiling every two to three connection nodes. If your ceiling joists do not align with the required anchor points, you must install furring strips or unistrut across the ceiling first, and then mount the lighting grid to that framework. Use a laser level continuously during the mounting process to ensure the center nodes are pulled tight against the ceiling and match the elevation of the perimeter nodes. Skipping anchor points to save time inevitably results in a wavy, unprofessional finish.
The optimal layout for geometric ceiling lighting depends entirely on the intersection of your room dimensions, primary use case, and ceiling infrastructure. A massive, flush-mounted grid serves high-detail environments perfectly, while a suspended, centralized cluster elevates the atmosphere of a gaming room or home theater. Proper planning prevents voltage drop, eliminates structural sagging, and ensures a seamless installation.
Buyers should prioritize modular kits that offer clear wattage ratings, robust corner connectors, scalable power supplies, and durable materials like aluminum for larger builds. Understanding the limitations of your ceiling material and electrical capacity allows you to build a reliable, high-impact lighting environment.
Take the following next steps to initiate your project:
A: Ceiling mounting requires basic DIY skills. You need a stud finder, a drill, and a laser level to ensure a straight layout. Hardwiring power supplies requires electrical knowledge, though many kits offer simple plug-and-play AC adapters. If you are uncomfortable working with electricity, hire a licensed electrician.
A: It depends entirely on the wattage of the power supply and the draw per tube. A standard baseline is typically 10 to 15 tubes per AC adapter. Always refer to the manufacturer's specifications. Calculate your total wattage and leave a 20% buffer to avoid overloading the driver.
A: No. The individual LED tubes and corner connectors are manufactured to fixed lengths. You cannot cut or modify them. You must plan your entire layout using the fixed dimensions of the modular pieces provided in your specific kit.
A: Yes. You have two installation options for vaulted ceilings. You can use adjustable suspension cables to hang the grid perfectly level with the floor. Alternatively, you can use articulating connectors to flush-mount the grid so it follows the exact angle of the vault.
A: The industry-standard 16-foot by 8-foot full-coverage grid is optimal for a standard 2-car garage. This configuration provides balanced, shadow-free illumination across both vehicle bays. It delivers excellent overhead lighting for general parking, mechanical work, and automotive detailing.


