


Views: 0 Author: Site Editor Publish Time: 2026-09-12 Origin: Site


The hidden cost of inadequate bay lighting hits your bottom line directly. You deal with missed micro-marring, unlevelled ceramic coating high spots, and angry client comebacks. Standard garage lighting creates harsh shadows across lower door panels. It washes out clear coat defects with excessive glare. It completely fails to expose the true condition of vehicle surfaces during the heavy compounding and fine polishing stages. You simply cannot correct what you cannot see. Engineering a professional, shadowless paint correction bay requires a strict, calculated approach. You must evaluate, select, and position purpose-built fixtures based on exact optical metrics. We will break down how to transform your workspace using a dedicated LED detailing light panel setup. You will learn the exact placement geometry, critical color rendering metrics, and how to avoid common electrical layout mistakes. Proper illumination acts as your primary diagnostic tool on the shop floor.
Raw lumen output without optical control works against you. Pumping 100,000 lumens into a bay means nothing if the light scatters. Intense, uncontrolled light hits a polished hood and creates blinding glare. This glare physically hides fine swirls and DA haze. Many shop owners think a brighter bay equals better visibility. That is false. Excessive, unfocused brightness causes rapid eye fatigue. During a multi-stage paint correction, your eyes constantly adjust to extreme contrast. You stare at highly reflective clear coat for eight hours straight. Constant pupil dilation causes physical strain, leading to headaches and lost focus. By hour six, you start missing shallow scratches. You fail to see faint compounding haze left by your wool pad. When you run a rotary buffer with a heavy compound, you generate fine micro-marring. If your bay is flooded with uncontrolled, scattered light, those marks disappear into the glare. You wipe the panel down, think it looks perfect, and move on. The next day, the customer parks in direct sunlight and sees a mess of holograms. This happens because the shop lighting failed to mimic the directional intensity of the sun. Proper detailing requires controlled, directional illumination. You need light that penetrates the clear coat to reveal the primer level. Uncontrolled lumens just bounce aggressively off the top layer, destroying the contrast needed to identify defects.
Mixing warm 3000K and cool 7000K lights in the same workspace ruins your diagnostic ability. Inconsistent color temperatures confuse the human eye. They mask holograms and create false representations of the paint finish. A fender might look flawless under a warm wall light. That same fender will show heavy micro-marring under a cool overhead light. You must standardize the lighting environment. When light sources clash, they create overlapping spectrums on the paint surface. This overlapping effect neutralizes the visibility of fine scratches. Imagine trying to wet sand a scratch on a metallic grey hood. The wall lights cast a yellow 3000K glow, while the ceiling lights cast a blue 7000K beam. The metallic flakes reflect both colors, creating a muddy, confusing visual field. You lose the ability to see exactly how deep your sanding marks are going. You risk striking through the clear coat simply because your eyes could not accurately gauge the surface depth. Your eyes constantly try to white-balance the room. This biological adjustment wastes mental energy. Every single fixture in your bay must emit the exact same color temperature. This uniformity guarantees that what you see on the front bumper matches what you see on the rear quarter panel.
Legacy halogen work lights generate extreme heat at the bulb level. They bake the workspace. They dry out polishing compounds prematurely on the panel. This heat causes your foam pads to glaze over and fail quickly. It forces you to use more product and swap pads constantly. Halogens also pull massive amounts of electricity. Modern car detailing shop lights run cool and drastically reduce power consumption. Fluorescent tubes present different operational failures. They degrade rapidly over time. This degradation causes imperceptible color shifting and poor CRI. A fluorescent bulb might start at 5000K but shift to a sickly green hue after eight months. You will not notice this shift day by day. However, your correction quality will slowly drop. Stable LED technology maintains consistent output and color accuracy for tens of thousands of hours. Upgrading eliminates the heat issues and the slow degradation of light quality.
CRI measures how accurately a light source reveals true colors compared to natural sunlight. In automotive paint correction, high CRI is mandatory. It allows you to evaluate metallic flake pop accurately. It ensures perfect color matching for rock chip repairs. It dictates your ability to gauge defect visibility. A baseline requirement of 95+ CRI is the standard for professional-grade detailing environments. Anything lower will mute subtle paint nuances. Low CRI lights make deep reds look muddy. They make bright whites look yellow. They hide shallow scratches within the clear coat. When you polish under a low CRI light, you are guessing at the finish quality. You will pull the car out into the sun and immediately see remaining defects. High CRI lighting bridges the gap between indoor bay lighting and natural outdoor sunlight. It gives you total confidence in your correction work before the vehicle ever leaves the shop floor.
The ideal range for detailing applications sits firmly between 5000K and 6500K. You must match every paint correction light across the entire bay within this range. There are specific trade-offs within this spectrum. A 5000K fixture provides true daylight simulation. It is easy on the eyes and excellent for general correction work. It provides a neutral white light that does not distort base coat colors. Pushing closer to 6500K introduces blue-light distortion. This cooler spectrum can actually hide certain micro-scratches on lighter-colored vehicles like silver or white. However, 6500K is exceptionally good at revealing defects on solid black paint. You must choose a temperature and stick with it. Do not mix 5000K overheads with 6500K wall lights. This mixing creates color confusion. Pick a temperature based on your primary clientele. If you work on a wide variety of colors, 5000K is the safest and most effective baseline.
A frosted or diffused LED ceiling panel light plays a specific role in the detailing bay. Raw LED diodes create harsh, pinpoint reflections on the paint. These sharp reflections blind you and hide the paint surrounding the reflection. Diffused light spreads the beam evenly across a wider surface area. This soft illumination is mandatory for leveling ceramic coatings. It allows you to check for high spots and streaks without blinding the technician. The smooth reflection of a diffused panel on the paint surface highlights coating imperfections instantly. You can see the coating sweat and flash with perfect clarity. Without diffusion, the intense glare washes out the subtle rainbow effect of a flashing ceramic coating. You will miss high spots. Those high spots will cure hard. You will then have to machine polish them off and reapply the coating. Diffusion saves you from this costly rework.
| Lighting Metric | Minimum Requirement | Optimal Range | Impact on Paint Correction |
|---|---|---|---|
| Color Rendering Index (CRI) | 90+ | 95+ | Determines true color accuracy and prevents outdoor sunlight surprises. |
| Color Temperature (Kelvin) | 4000K | 5000K - 6000K | Affects contrast of defects; prevents eye strain and color distortion. |
| Lens Type | Clear (Spot only) | Frosted / Diffused | Manages glare; essential for spotting ceramic coating high spots. |
| Beam Angle | 90 Degrees | 110 - 120 Degrees | Ensures overlapping light coverage to eliminate dark zones between fixtures. |
Lighting a vehicle from straight above creates dark shadows on the sides. The 45-degree lighting angle solves this geometric problem. You mount lights at the intersection of the wall and ceiling, angled downward at exactly 45 degrees. This geometry illuminates vertical panels like doors, fenders, and rocker panels. It ensures the light hits the paint directly without casting shadows from your own body. Most detailers spend 60 percent of their time working on the sides of the vehicle. Doors, quarter panels, and bumpers require intense focus. If your only light source is directly above the car, the roof blocks the light from reaching the lower doors. You end up polishing in a shadow. By installing lights at a 45-degree angle where the wall meets the ceiling, you blast light directly onto those vertical surfaces. This completely eliminates the shadow cast by the vehicle's roofline and your own body. This setup requires specific mounting brackets. You cannot simply hang flat panels on the wall. You must angle them to direct the beam toward the center of the bay. This creates a tunnel of light that wraps around the vehicle.
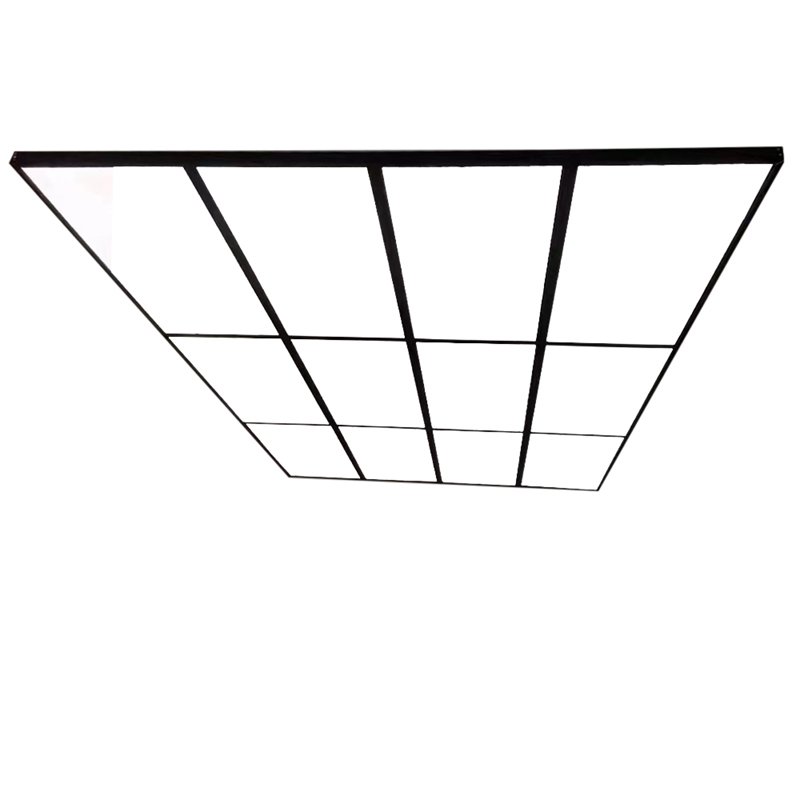
Overhead illumination requires strict spacing to ensure uniform, overlapping light coverage. You want seamless light across the hood, roof, and trunk. When planning a grid with a square LED ceiling light, you must factor in your exact ceiling height. High Bay ceilings over 15 feet need narrow beam angles and higher lumen output. This pushes the light down to the vehicle surface without losing intensity. Low Bay ceilings under 12 feet require wider beam angles. This spreads the light and prevents intense hot spots on the vehicle roof. You should space your overhead panels so their beam angles overlap by at least 20 percent. This overlapping eliminates dark zones between the fixtures. A standard two-car bay typically requires a grid of six to eight overhead panels. You must center this grid directly over the primary parking footprint of the vehicle.
Fixed architectural lighting cannot reach every angle of a vehicle. You must supplement fixed wall and ceiling panels with mobile, stand-mounted LED inspection cans. Mobile stands provide low-angle illumination. They light up lower rocker panels and complex bumper geometries. Even with a perfect 45-degree wall setup, the lowest parts of the car remain difficult to see. Rocker panels and lower bumper lips curve inward, hiding from fixed lights. A mobile stand light drops down to floor level. You can aim it upward to catch the underside of a bumper or rake it horizontally across a door. This horizontal beam acts like a setting sun, casting long shadows across any remaining high spots or scratches. It is the ultimate quality control check before applying a ceramic coating. When you polish a lower door panel, overhead light bounces away from your eyes. A stand light positioned at knee height bounces light directly back to you. This allows you to inspect your work without lying on the floor. Mobile lights also allow you to adjust the distance to the paint. You can pull the light back for a broad wash or push it close for intense defect spotting. They are an indispensable part of a complete lighting system.
A professional bay uses a hybrid lighting approach. You pair diffused ambient panels with focused, high-intensity spot lights. Diffused panels handle overall leveling, coating application, and finishing. Focused inspection beams handle deep scratch and swirl identification. You should toggle between these sources during different stages of the process. Turn off the ambient wash lights and use a single focused beam to check your heavy compounding work. A dark room with a single intense spot light is the ultimate test for swirl removal. Once the correction is verified, turn the ambient lights back on. Use the diffused panels for final wipe-downs and ceramic coating application. Relying solely on one type of light guarantees you will miss defects. You need both soft wash light and hard inspection light to achieve a flawless finish.
Surface-mounted fixtures attach directly to the ceiling structure or drywall. They are easier to install and require no ceiling cutouts. You simply screw the mounting bracket to the joist and attach the panel. However, they accumulate dust on top of the fixture. In a dusty shop environment, this requires regular cleaning to maintain a professional appearance. Flush-mounted fixtures sit recessed in a drop ceiling or cut into drywall. They offer a clean, integrated aesthetic and zero dust accumulation. Flush mounting requires adequate ceiling clearance above the drywall. It also requires more complex structural mounting and precision cutting. If you have a drop ceiling grid, flush-mounted panels drop right in. If you have finished drywall, surface mounting is significantly cheaper and faster. You must weigh the installation cost against the long-term maintenance of the fixtures.
Hexagon lighting grids are currently very popular in the detailing industry. They offer high aesthetic appeal for marketing and social media content. They look fantastic in promotional photos. However, you must critically assess their practical value for paint correction. A standard ceiling panel light provides uniform, predictable light distribution. Overly complex geometric light shapes create severe light clutter on the vehicle surface. The reflection of a busy hexagon grid on a curved hood distracts the eye. It makes it much harder to spot subtle paint defects between the lines of light. The intersecting lines create confusing reflections. If your primary goal is high-end paint correction, stick to large, continuous rectangular or square panels. If your primary goal is shop aesthetics and vinyl wrapping, hexagon lights are acceptable. Function must always precede form in a correction bay.
A fully outfitted detailing bay draws significant electrical power. You must calculate the total amperage draw of all fixtures before purchasing. Heavy machine polishers also pull high amps, especially on startup. Running two polishers, a shop vac, and high-output lighting simultaneously on a single circuit will trip breakers. You must install dedicated circuits specifically for your lighting grid. Do not share the lighting circuit with your wall outlets. Ensure all wiring meets commercial electrical code compliance. This handles continuous, long-duration loads safely. Upgrading to LED reduces the overall load compared to halogens, but a 10-panel grid still requires proper planning. Consult a licensed commercial electrician. Have them evaluate your breaker panel capacity. Running undersized wire to high-output LEDs creates a fire hazard and reduces the lifespan of the drivers.
Cheap LED drivers often cause micro-flickering. This flicker is sometimes imperceptible to the naked eye but registers in the human brain. Over an 8-hour polishing session, this leads to severe headaches, nausea, and reduced focus. You can verify driver quality by recording the light in slow motion on your smartphone camera. If you see dark banding or strobing on the screen, the driver is low quality. Invest strictly in flicker-free drivers. High-quality drivers provide a constant, smooth flow of direct current to the diodes. This eliminates the strobe effect. Your technicians will be more productive and experience far less fatigue. Never cut costs on the internal electronics of the light panel. The external housing might look identical between a cheap light and a premium light, but the driver dictates the actual performance.
High-output LED fixtures generate heat at the diode level, even if they feel cool to the touch. Poor thermal management traps this heat inside the fixture housing. This trapped heat leads to premature diode degradation. It causes color shifting over time, ruining your carefully selected Kelvin rating. It also raises the ambient temperature of enclosed detailing bays, making the environment uncomfortable during summer months. Select fixtures built with robust, extruded aluminum heat sinks. Good heat dissipation ensures the lights maintain their rated lifespan and color accuracy. Avoid fixtures with cheap plastic housings that lack ventilation. If a light panel feels excessively hot on the back after one hour of use, its thermal management is failing. Proper cooling protects your lighting investment over the next decade.
A: The ideal color temperature for paint correction is between 5000K and 6000K. This range simulates natural daylight, providing a neutral white light. It prevents color distortion on the base coat and offers the best contrast for identifying swirls and micro-marring without causing severe eye strain.
A: A high Color Rendering Index (CRI of 95+) ensures the light accurately reveals true paint colors. Low CRI lights mute subtle defects and distort colors. High CRI guarantees that the flawless finish you see inside the bay will look exactly the same outside in natural sunlight.
A: A standard two-car bay typically requires six to eight overhead panels. The exact number depends on your ceiling height and the beam angle of the fixtures. You must space them to allow a 20 percent overlap in light spread, eliminating any dark zones across the vehicle.
A: Standard garage LEDs focus on raw brightness and basic illumination. Detailing shop lights are engineered diagnostic tools. They feature high CRI diodes, specific Kelvin ratings, flicker-free drivers, and specialized diffusers designed to reveal paint defects and ceramic coating high spots without blinding the user.
A: Diffused panels spread the light evenly, creating a soft, continuous reflection on the paint. This soft reflection allows you to clearly see the coating flash or sweat. It prevents the harsh glare of raw diodes, making it easy to spot and level high spots safely.
A: The 45-degree rule involves mounting lights at the intersection of the wall and ceiling, angled downward at 45 degrees. This setup illuminates the vertical panels of the vehicle directly. It prevents overhead lights from casting shadows from your body while you polish.


