


Views: 0 Author: Site Editor Publish Time: 2026-09-29 Origin: Site


Precision tasks require precision visibility. Most workbenches and detailing bays suffer from harsh glare, deep shadows, and uneven lux distribution. Traditional single-point fixtures or linear shop lights create intense hotspots directly beneath the fixture. They leave peripheral work zones in the dark, leading to eye strain and compromised quality control. The geometric structure of hexagonal LED lights fundamentally alters how light is cast. It shifts from a localized beam to a distributed, multi-directional grid. This eliminates shadowing and standardizes surface-level illumination. Beyond pure functionality, these systems emulate high-end automotive design language. They instantly elevate a standard garage or commercial workspace into a professional-grade showroom.
Point-source lighting dominates most older shops and garages. Standard incandescent bulbs, compact fluorescents, and modern UFO high bays all push massive lumens from a single concentrated origin. This setup works fine for lighting a large warehouse floor where you just need to see forklift lanes. It fails miserably at the workbench level.
The inverse-square law of light dictates how these fixtures perform. Light intensity drops rapidly as you move away from the source. You get a blinding hotspot right under the high bay. Move three feet left or right, and you are suddenly working in shadows. Your eyes constantly dilate and constrict as you look across the bench. This rapid adjustment causes severe visual fatigue during a long shift.
Linear shop lights attempt to fix this by stretching the light across a 4-foot or 8-foot tube. We see these everywhere in commercial spaces. They cast light straight down in a unidirectional path. When you lean over a fender or a workbench to inspect a part, your head and shoulders block that light path. We call this the eclipse effect in the field. You create a dark blind spot exactly where your hands are working. You end up grabbing a handheld flashlight just to see the wiring harness you are trying to solder.
| Lighting Type | Light Distribution | Shadow Profile | Best Application |
|---|---|---|---|
| UFO High Bay | Single-point, concentrated downward beam | Harsh, distinct shadows at the periphery | High-ceiling warehouse storage |
| Linear LED Tubes | Unidirectional, straight downward path | Creates the "eclipse effect" when blocked | General walkways and basic storage |
| Hexagonal Grid | Multi-directional, overlapping angles | Neutralizes shadows from 360 degrees | Precision workbenches and detailing bays |
A hexagonal lighting grid changes the architecture of the room's illumination. Each individual strut within the grid features a wide beam angle, usually 120 degrees or more. Because you connect these struts in a geometric pattern, the light from one strut intersects directly with the light from the adjacent struts. You build a continuous pool of light. You do not get isolated, directional beams.
This honeycomb layout is the ultimate fix for shadow reduction. Light hits your target object from 360 degrees. If you reach your arm over a circuit board, you block the light coming from the strut directly above your hand. However, the hexagonal structure surrounds your workspace. The light from the opposing struts instantly fills in the shadow your arm just cast. The shadow disappears before it hits the work surface. Intricate details and deep recesses remain fully visible.
You must understand the difference between total lumen output and usable lux. Lumens measure the total visible light emitted by the fixture. Lux measures the intensity of light as it actually hits your workbench. A single 60,000-lumen high-bay fixture sounds powerful. But if that light concentrates in a tight five-foot radius, the usable lux at the edges of your shop is terrible. Spreading that same 60,000 lumens across a 10x15 foot grid changes everything. The light spreads evenly. You get higher perceived brightness across the entire room. This distributed lux eliminates harsh glare and creates a comfortable environment for sustained focus.
You can also mount these modular grids on walls. Ceiling installations are standard, but vertical mounting provides critical side-illumination. Detailers know that ceiling lights alone leave lower door panels and rocker panels in the dark. Installing a supplementary grid on the wall gives you full-body vehicle illumination. You catch lower-panel defects with the same precision as you do on the hood.
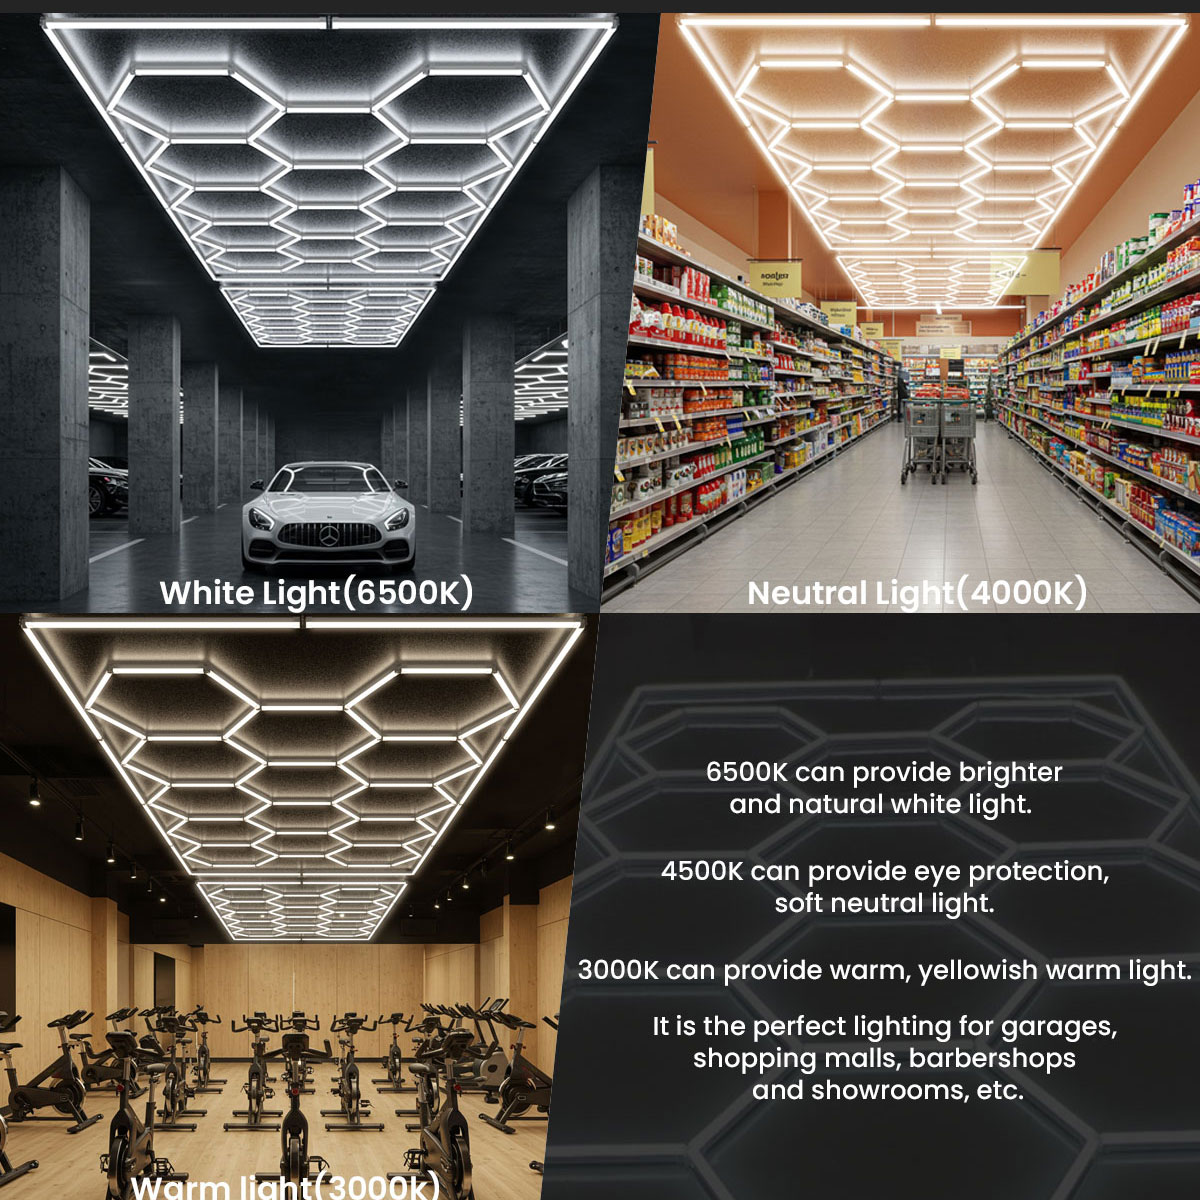
You cannot just buy any geometric light and expect professional results. You must scrutinize the technical metrics of the diodes. The Color Rendering Index (CRI) is your most important metric. CRI measures how well a light source reveals true colors compared to natural sunlight. Precision work demands a minimum CRI of 90. Lower CRI ratings wash out reds, distort blues, and hide subtle color variations. High-CRI honeycomb LED lights ensure the color depth you see in the shop matches what your customer sees out in the sun.
Color temperature matters just as much. Keep your Kelvin (K) range between 5000K and 6500K. A 5000K output gives you a crisp, neutral white. This works perfectly for general mechanical repair and assembly. It offers high contrast without causing blue-light fatigue. Pushing up to 6500K replicates overcast daylight. This specific temperature excels at highlighting surface defects. Do not exceed 6500K. Anything higher introduces a harsh blue tint that distorts your color perception and burns out your eyes during a long shift.
Your specific tasks dictate your lux requirements. General assembly, woodworking, or mechanical repair need about 500 to 750 lux at the bench surface. Specialized tasks demand more power. High-end car detailing lights must deliver 1000 to 1500 lux uniformly across the vehicle. Paint correction requires intense, uniform light to expose microscopic clear coat scratches. The geometric reflection of the hex grid acts as a diagnostic tool. As you move around the car, the straight lines of the reflected grid bend over dents, high spots, and swirl marks. Surface imperfections become obvious instantly.
Pay attention to the diffuser housing the LED diodes. The diffuser protects the LED strip and controls how the light scatters. Cheap, transparent plastic covers let the raw intensity of the diodes pierce through. This causes micro-glare. The glare reflects harshly off glossy surfaces and creates blinding spots. Commercial-grade fixtures use high-quality frosted polycarbonate diffusers. These frosted covers soften the diode output and scatter the light evenly across the 120-degree beam angle. Good diffusers turn a blinding light into a usable tool.
Plan the physical footprint of your installation before you order anything. Decide if you need a localized centerpiece grid or a comprehensive wall-to-wall setup. A centerpiece setup targets specific task lighting. Suspending a 5-hex by 3-hex grid directly over your primary workbench puts maximum lux exactly where you do your intricate work. The rest of the shop can run on standard ambient lighting. Commercial detailing studios usually need full coverage. Spanning the grid across the entire ceiling ensures consistent lux distribution no matter where you park the vehicle.
Match the physical dimensions of the kit to your ceiling height. The height-to-spread ratio dictates your success. Standard 8-foot to 10-foot ceilings allow the light to reach the floor with minimal diffusion. You can use a grid that roughly matches the footprint of your work zone. Facilities with 14-foot or 16-foot ceilings present a challenge. The light travels a longer distance. To maintain usable lux at the workbench, you must install a larger hexagonal light grid with a higher total lumen output. Mounting a small grid on a 16-foot ceiling wastes your money. The light dissipates before it ever reaches your hands.
Modular connectors drive the architecture of these systems. You do not hardwire dozens of individual fixtures. You construct the grid using standardized Y-connectors, V-connectors, and straight pins. These connectors route the physical structure and the electrical current from one strut to the next. This plug-and-play scalability lets you customize the shape. You can easily navigate around existing HVAC ducts, garage door openers, or structural beams. This system cuts installation time and labor costs drastically compared to running new conduit for traditional commercial lighting.
You must plan your circuit loads properly. LEDs run efficiently, but massive wall-to-wall grids draw serious wattage. A standard 15-amp commercial circuit safely handles a continuous load of 1440 watts. A 20-amp circuit handles 1920 watts continuously. If your large hexagonal kit draws 800 watts, you can run one kit on a dedicated 15-amp circuit. Adding a second kit to that same circuit will trip the breaker. Extensive installations covering thousands of square feet require multiple power drops or dedicated circuits to distribute the electrical load safely.
Structural planning dictates how you mount the grid. Your ceiling architecture determines your installation method. Direct flush mounting to drywall or wood studs provides the most secure hold. You run standard anchors and screws right through the connector joints. Facilities with high, exposed-beam ceilings require suspension mounting. You use aircraft cable to lower the grid to the optimal 8-to-10-foot height. Lightweight systems can also anchor directly to drop-ceiling grids using specialized T-bar clips.
Follow these steps to ensure a secure, sag-free installation:
Structural sagging ruins the look and function of the grid. The grid uses dozens of interconnected lightweight aluminum or plastic struts. If you fail to distribute the anchor points evenly, the center of the grid will bow downward over time. Support the grid at every major intersection or at least every three feet. The modular assembly serves as a great non-permanent installation. Renters leasing commercial shop space can disassemble the grid, pack it flat, and relocate without leaving massive electrical scars on the building.
Factor long-term maintenance and diode degradation into your plans. High-quality LEDs rate for 50,000 hours of continuous use. However, their lifespan depends entirely on thermal management. LEDs generate heat at the diode base. If you do not dissipate that heat, the diodes burn out prematurely or shift in color temperature. Commercial-grade fixtures use extruded aluminum housings. Aluminum acts as a highly efficient heat sink. It pulls thermal energy away from the diodes. Cheap consumer-grade kits use PVC or thin plastic housings. Plastic traps heat, degrades the diodes rapidly, warps the struts, and kills the fixture.
Vet your suppliers strictly to avoid cheap imitations. Look for clear indicators of commercial quality. Avoid kits with proprietary, non-replaceable connectors. If one connector fails, you should not have to replace the whole grid. Demand legitimate UL, ETL, or CE safety certifications. These guarantee the internal wiring meets strict fire safety standards. Inspect the housing material and diffuser quality. Flimsy plastic housings and clear diffusers prove the system is built for social media photos, not rigorous technical work.
A: They often share similar total lumen counts, but they distribute light evenly. This creates higher perceived brightness and eliminates dark spots. Spreading the light source across a wide geometric footprint removes the intense hotspots and dim edges found with standard linear or point-source shop lights.
A: Mount the grid 8 to 10 feet from the floor, or 5 to 7 feet directly above the work surface. This height maximizes overlapping beam angles without causing glare. Mounting higher diffuses the light too much. Mounting lower creates harsh geometric reflections on glossy surfaces.
A: Yes, if they feature a CRI of 90 or higher. The geometric reflection helps detailers spot paint imperfections, swirl marks, and uneven ceramic coatings. You can also wall-mount these grids to supplement ceiling lights, ensuring full-body illumination for lower-panel paint correction.
A: Most kits use plug-and-play connectors that allow for quick DIY assembly. This makes them great for non-permanent setups. However, you should hire a licensed electrician to hardwire the primary power source to your building's electrical system to ensure compliance with local fire codes.
A: Commercial-grade modular systems let you unclip and replace individual LED tubes without dismantling the ceiling grid. Disconnect the power, unpin the faulty strut from its adjacent connectors, and snap a replacement tube directly into the existing framework.


