


Views: 0 Author: Site Editor Publish Time: 2026-09-05 Origin: Site


Unmitigated glare at workstations directly correlates with increased visual fatigue, higher error rates, and measurable drops in employee productivity. Traditional overhead fixtures—particularly older fluorescent tubes or bunched, high-intensity point sources—create harsh directional lighting. This results in direct glare from the fixture itself and indirect glare reflecting off computer monitors, glossy desks, or specialized work surfaces. Mitigating this requires shifting from localized, high-intensity light sources to broad, diffused illumination. This guide evaluates how upgrading to a modern ceiling panel light addresses the structural causes of glare, the technical specifications required for different environments, and the implementation realities of retrofitting your workspace.
Workstation glare manifests in two distinct forms: direct and indirect. Direct glare occurs when a high-intensity light source enters your visual field directly. You look up from a desk, and a bare bulb or unshielded diode hits your eyes, causing immediate discomfort and a squinting reflex. Indirect glare happens when light bounces off reflective surfaces in the room. Computer screens, glass partitions, glossy desks, and highly reflective wall paint act as secondary light sources. They bounce harsh illumination directly into the user's eyes. This constant reflection forces the human eye to continuously readjust between the bright reflection and the darker text on a monitor. This rapid adjustment cycle leads directly to ciliary muscle fatigue and tension headaches.
Traditional lighting fixtures suffer from the point source problem. They concentrate massive lumen output into a very small physical surface area. A bare T8 fluorescent tube or a recessed can light emits intense radiation from a narrow aperture. This creates severe contrast ratios between the blinding light source and the relatively dark surrounding ceiling tiles. The human eye struggles to process this extreme contrast. We interpret that localized brightness as painful glare. When you measure the candelas per square meter of a bare tube, the number spikes violently compared to the ambient room measurements.
Facility designs often exacerbate this issue through overexposure and bunching. Older lighting layouts frequently cluster too many intensive ceiling lights in one specific area just to meet generic foot-candle requirements on the floor. A common legacy design drops a 2x4 troffer every eight feet on center. This approach overexposes specific workstations situated directly underneath the clusters. It blasts the desk with 70 or 80 foot-candles, creating severe glare zones, while leaving adjacent areas in distracting shadow. The resulting uneven light distribution forces workers to navigate a visually chaotic environment, severely impacting focus and task accuracy.
| Lighting Type | Light Distribution | Glare Potential | Shadow Quality |
|---|---|---|---|
| Bare Fluorescent Tube | Omnidirectional, uncontrolled | Extremely High (Direct & Indirect) | Harsh, distinct edges |
| Recessed Can Light | Narrow downward beam | High (Direct contrast) | Deep, dark shadows |
| Parabolic Troffer | Downward, baffled | Moderate (Cave effect on ceilings) | Moderate |
| Modern Flat Panel | Wide, volumetric diffusion | Low (When UGR <19) | Soft, blended edges |
Modern flat panels utilize sophisticated internal geometry to manage light distribution. Edge-lit panels position SMD LED chips along the inner perimeter of the aluminum frame. These chips inject light laterally into a Light Guide Plate (LGP). The LGP features a microscopic laser-etched matrix that catches the lateral light and redirects it downwards. This process completely obscures the individual LED diodes. It creates an ultra-thin fixture—often less than half an inch thick—that delivers perfectly uniform, soft illumination across its entire surface. When specifying edge-lit panels, you must verify the LGP material. PMMA (polymethyl methacrylate) will not yellow over time, whereas cheaper PS (polystyrene) plates will yellow under UV and heat exposure, ruining the light distribution.
Back-lit panels take a different structural approach. They arrange LED chips in a grid directly on the backplate of the fixture, projecting light straight downward through a diffusion layer. Because the light travels directly toward the work surface, back-lit panels require a deeper physical profile—usually 1.5 to 2 inches—to allow the light to mix before hitting the diffuser. While back-lit designs often achieve higher overall efficacy (lumens per watt) because the light doesn't have to travel through an LGP, they require high-quality, thicker diffusers. If the diffuser is too thin, the individual LED chips show through as bright hot spots, instantly reintroducing direct glare.
| Feature | Edge-Lit Panels | Back-Lit Panels |
|---|---|---|
| Fixture Depth | Ultra-thin (< 0.5 inches) | Thicker (1.5 - 2.0 inches) |
| Light Source Location | Perimeter frame | Rear backplate |
| Efficacy (Lumens/Watt) | Standard (100-110 lm/W) | High (120-150 lm/W) |
| Plenum Clearance Needed | Minimal | Moderate to High |
| Risk of Hot Spots | Very Low | Moderate (Depends on diffuser quality) |
The outer layer of the panel dictates how light interacts with the room. Opal or milky diffusers provide maximum diffusion. They scatter light in all directions, creating a very soft visual appearance on the fixture itself. However, this omnidirectional scattering pushes light out at high angles. Light exiting the fixture at 70 or 80 degrees enters a worker's peripheral vision and causes discomfort in large, open-plan rooms. Heavy opal diffusers also trap light inside the housing, reducing overall light transmission and lowering the fixture's efficiency.
Micro-prismatic diffusers offer superior optical control for glare-sensitive environments. Instead of simply scattering light, these diffusers feature thousands of microscopic geometric prisms molded into the acrylic or polycarbonate surface. These prisms act as tiny lenses, engineered to direct light strictly downward toward the workstation. They actively suppress light emission at angles above 65 degrees. By cutting off wide-angle light, micro-prismatic diffusers strictly limit the light that can strike computer screens or enter peripheral vision. This mechanical cutoff is the primary method manufacturers use to achieve strict anti-glare ratings.
A broad surface area changes the physical behavior of light in a space. Traditional point sources cast hard-edged, distinct shadows. If you lean over a desk to read a document, a point source behind you projects a dark, sharp shadow over your task. A wide panel light wraps light around objects. Because the illumination originates from a large 2x2 or 2x4 foot area, light hits the task from multiple micro-angles simultaneously.
This multi-directional emission washes out harsh shadows. It creates volumetric lighting, where the entire volume of the space feels evenly illuminated, rather than just the floor surface. This maintains visual clarity across the workstation. It prevents the distracting contrast between bright task areas and dark shadows common with recessed can lights or bare bulbs, reducing the workload on the eye's iris as you look around the desk.
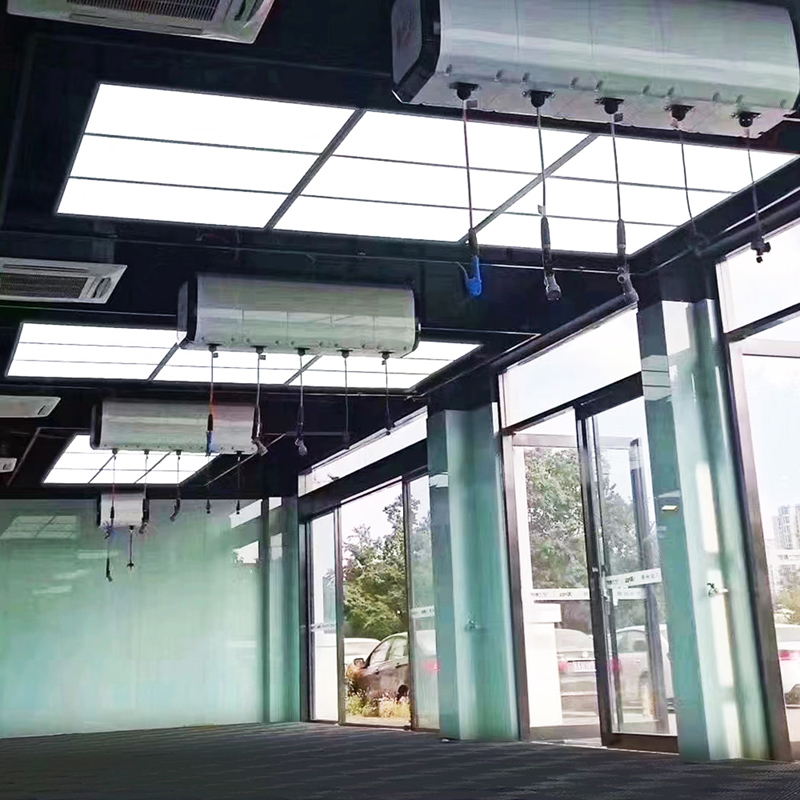
In standard office settings, the primary success criterion is eliminating veiling reflections on monitors. Veiling reflections occur when a bright light source reflects off a screen, washing out the contrast of the text or images. To combat this, an LED ceiling panel light must prioritize a UGR rating strictly below 19. This ensures the fixture's surface luminance remains low enough to prevent screen washout, even when the monitor is tilted slightly upward.
Color temperature dictates the psychological feel of the office. A 4000K color temperature provides a crisp, neutral white light that promotes alertness without the harsh, blue-leaning sterility of 5000K sources. Modern panels should also integrate with natural light sources. Implementing daylight harvesting sensors allows panels near windows to automatically dim when sunlight is abundant. This maintains a consistent 30 to 50 foot-candles on the desk surface throughout the day, preventing over-illumination when the sun is at its peak.
High-acuity tasks demand entirely different optical parameters. In automotive detailing, technicians must identify micro-marring, swirl marks, and subtle paint defects. Standard diffused office lighting fails here; it is too soft and washes out the surface, making fine scratches invisible. Conversely, bare bulbs create blinding reflections off the clear coat, causing severe technician fatigue and making it impossible to look at the paint for extended periods.
Effective car detailing shop lights strike a precise balance. They utilize directional output to highlight defects but incorporate specialized anti-glare frosted covers to prevent harsh, blinding reflections on polished surfaces. An LED detailing light panel requires a Color Rendering Index (CRI) greater than 90. This high CRI accurately displays paint hues and reveals color-matching discrepancies during touch-ups. Adjustable color temperatures allow technicians to inspect paint under warm (3000K) and cool (6000K) conditions, simulating both sunset and midday sun to ensure a flawless finish under any lighting scenario.
Retrofitting existing spaces requires evaluating physical compatibility before ordering fixtures. The primary success criterion for a square LED ceiling light is seamless integration into standard drop-ceiling grids without requiring extensive ceiling modification or custom trim kits.
You must assess the structural weight and dimensions. Standard imperial grids require a 24x24 inch (609x609mm) fixture, while metric grids require a 600x600mm fixture. Mixing these up results in panels that either fall through the grid or refuse to sit flat. Driver compatibility and plenum space dictate the fixture style. Shallow plenums crowded with HVAC ductwork or plumbing lines necessitate ultra-thin edge-lit panels. Deeper back-lit fixtures simply will not clear the obstructions above the grid, forcing installers to bend the T-bar or abandon the location.
The Unified Glare Rating is a mathematical calculation evaluating the luminance of a lighting fixture against the background luminance of the room. It predicts the psychological discomfort caused by the lighting layout. When sourcing panels, reject generic "UGR compliant" marketing claims. Compliance means nothing without numerical verification based on your specific room dimensions and reflectance values.
Demand verifiable photometric data, specifically IES files, from the manufacturer. You load these files into lighting design software like AGi32 or DIALux. The software runs simulations proving the layout achieves a UGR of less than 19 for office environments or less than 22 for general industrial tasks. Without this simulation, you are guessing at the final glare levels.
| UGR Value | Glare Perception | Recommended Application |
|---|---|---|
| < 16 | Imperceptible | Technical drawing, highly critical visual tasks |
| < 19 | Barely perceptible | Standard offices, reading, computer workstations |
| < 22 | Noticeable but acceptable | Light industrial, retail, reception areas |
| < 25 | Uncomfortable | Heavy industrial, warehouses, corridors |
| > 28 | Intolerable | Not recommended for prolonged occupancy |
Static lighting cannot adapt to changing environmental conditions or varying user sensitivities. Dimmability is a strict requirement for modern workstations. Specify panels equipped with 0-10V dimming drivers or DALI (Digital Addressable Lighting Interface) systems. 0-10V requires pulling separate low-voltage control wires (typically purple and pink) alongside the line voltage, providing smooth dimming down to 10% output.
Localized dimming empowers employees to adjust their immediate environment. A 25-year-old worker requires significantly less light to read a document than a 60-year-old worker. Dimmable panels work in tandem with complementary physical interventions. Adjusting window blinds to filter harsh afternoon sunlight, applying anti-glare screen films, and dimming the overhead panels collectively create a fully optimized visual workspace tailored to the individual.
Glare is not the only cause of visual discomfort. Low-quality LED drivers manage current through Pulse Width Modulation (PWM), rapidly turning the LEDs on and off to simulate dimming. Cheap drivers cycle at 120Hz. While this flicker is often invisible to the naked eye, the human brain still processes the rapid modulation.
This invisible flicker directly causes neurological fatigue, eye strain, and severe headaches. Workers frequently misdiagnose these symptoms as glare-related eye strain, complaining that the lights are "too bright" when the actual issue is the strobe effect. Prioritize panels with IEEE 1789 compliant flicker-free drivers. These drivers provide a constant direct current to the LED chips, ensuring smooth, continuous light output that eliminates the neurological stress associated with cheap electronics.
Procuring panels without verifying physical dimensions introduces severe installation risks. A common failure point is the mismatch between ceiling grid types. Standard T-bar grids use a 15/16-inch face, while architectural narrow-slot grids use a 9/16-inch face. Some panel frames feature stepped edges designed specifically for one type of grid. Installing the wrong panel results in uneven ceiling planes and light leaks around the edges.
Mitigate this by conducting a strict physical audit of the existing T-bar grid. Measure the exact opening sizes and note the T-bar width. Verify local building codes regarding seismic tie-offs. Most jurisdictions require independent suspension wires attached directly to the panel frame, bypassing the grid entirely. Ensure the panels you order include integrated seismic clips on the backplate to accommodate these wires.
Lighting interacts directly with the room's surfaces. Installing high-efficacy, highly diffused panels in a room dominated by highly reflective surfaces—such as wall-to-wall mirrors, high-gloss paint, or polished stone floors—inadvertently reintroduces indirect glare. The soft light bounces off the gloss, turning the entire wall or floor into a secondary glare source.
Pair lighting upgrades with appropriate interior design adjustments. Specify matte surface finishes for desks and cabinetry. Utilize lighter, non-glossy color patterns on walls. Target a Light Reflectance Value (LRV) between 50% and 70% for walls, and 20% to 40% for floors. This approach maximizes ambient light distribution and creates a bright, airy feel without generating harsh, distracting reflections.
Modern LED panels are significantly more efficient than legacy fluorescent troffers. Replacing old 3-tube fluorescent fixtures 1-for-1 with high-efficacy LED panels often results in a sterile, overly bright environment commonly referred to as the "hospital effect." Even with excellent micro-prismatic diffusers, sheer volume of light reintroduces glare through brute force.
Before ordering, calculate the required foot-candles for the specific space. A standard office requires roughly 30 to 50 foot-candles on the desk surface. If the new panels output 5000 lumens each, a 1-for-1 swap in an 8x8 grid will blast the room with 80 foot-candles. You must reduce the total fixture count during the redesign. Alternatively, utilize the control system to set a high-end trim, permanently capping the maximum output of the panels at 70% or 80%. This reserves the extra capacity for lumen maintenance later in the fixture's life.
Unlike fluorescent fixtures where maintenance involves simply swapping a tube, LED panels are integrated units. When the diodes fail or the driver burns out, the entire fixture usually requires replacement. Evaluate the L70 lifespan of the panels. An L70 rating of 50,000 hours means the panel will retain at least 70% of its initial lumen output after 50,000 hours of continuous operation.
Select panels with robust aluminum frames that act as effective heat sinks. Heat is the primary enemy of LED longevity. Proper thermal management prevents the acrylic light guide plates from warping or yellowing over time. A yellowed LGP degrades the light quality, shifts the color temperature toward a dirty green, and destroys the fixture's ability to control glare.
A: A UGR (Unified Glare Rating) of 19 or lower is the industry standard for office environments to prevent screen glare and visual discomfort. Ratings above 19 introduce noticeable glare that causes eye strain during prolonged computer use.
A: Low-quality LEDs with visible flicker, poor color rendering, or high glare cause significant eye strain. High-quality, edge-lit panels equipped with micro-prismatic diffusers and flicker-free drivers actively reduce eye strain by providing soft, uniform illumination.
A: Edge-lit panels inject light laterally into a light guide plate for ultra-thin, highly uniform diffusion. Back-lit panels project light directly downward through a diffuser, requiring a thicker fixture profile but yielding slightly higher lumen efficiency.
A: General office work requires approximately 300 to 500 lux (30 to 50 foot-candles) at the desk surface. Detailed inspection tasks, such as drafting or electrical assembly, require 750 to 1000 lux for optimal visibility.
A: Yes, they fit standard grids, but you must verify exact dimensions. An imperial 2x2 grid requires a 609x609mm fixture, while metric grids require 600x600mm panels. Mismatched sizes will not seat properly in the T-bar frame.
A: Detailing requires high CRI (>90) to accurately judge paint color and specific directional output to spot micro-scratches. Specialized panels use diffused output to highlight defects without creating blinding reflections on glossy clear coats.


