


Views: 0 Author: Site Editor Publish Time: 2026-09-08 Origin: Site


High-performance workshops and detailing studios require lighting that bridges the gap between clinical precision and premium brand aesthetics. Inadequate light distribution, low Color Rendering Index (CRI), and outdated fixture designs compromise defect detection in automotive workspaces. These poor lighting conditions mask paint imperfections, making it nearly impossible for technicians to execute flawless paint correction. Outdated lighting also diminishes the perceived value of the shop environment, leaving clients underwhelmed when they drop off high-end vehicles. Upgrading to a square LED ceiling light architecture addresses both the technical requirements of precision work and the geometric, modern aesthetic demanded by high-end commercial spaces. This specific fixture geometry delivers the sharp, directional illumination needed to expose micro-marring and holograms on vehicle surfaces while transforming the ceiling into a sleek architectural feature.
Modern automotive workspaces demand more than basic illumination. The baseline requirements for effective car detailing shop lights include high lumen output, absolute minimal glare, and completely shadow-free zones. Technicians spend hours staring at highly reflective surfaces. If the light source creates excessive glare, eye fatigue sets in rapidly, reducing work quality and slowing down turnaround times. Shadow-free zones are equally necessary. When a technician leans over a fender to polish a side panel, the lighting layout must ensure secondary fixtures fill in the shadows created by their body.
Beyond utility, a minimalist, geometric ceiling design elevates the customer's perception of the workspace. When a client walks into a detailing studio, the environment must communicate cleanliness, precision, and professionalism. Sharp, straight lines created by square fixtures align perfectly with the modern architectural language of premium garages. The ceiling becomes a visual extension of the high-end service being provided.
Fixture finishes play a significant role in complementing the overall shop design. Matte black housings provide striking visual accents when installed against open-joist or dark-painted industrial ceilings. They create a rugged, mechanical feel that suits automotive environments. Seamless white trims blend flawlessly into drop ceilings or finished drywall, creating an ultra-clean, clinical laboratory aesthetic. Choosing the right finish integrates the lighting into the room rather than treating it as an afterthought.
When applying a ceramic coating, technicians rely on ambient lighting to spot high spots or flashing. If the lighting is uneven, the coating cures improperly, leading to costly rework. Proper fixture placement ensures uniform coverage across the entire vehicle footprint, from the hood to the lower rocker panels. This level of utility separates professional setups from standard garage lighting.
Understanding the physics of light distribution is necessary before finalizing a ceiling layout. Square edges influence beam angles differently than the naturally conical, even spread of round fixtures. A round downlight pushes light out in a smooth, overlapping circle. This makes round fixtures highly forgiving during installation. If the spacing is slightly off, the circular beam patterns blend smoothly, masking minor layout errors.
Square fixtures behave differently. The sharp corners of the fixture create distinct directional edges in the light throw. While the center of the beam remains intense, the light falls off differently at the corners compared to the flat sides. This geometric reality means square lights demand stricter layout planning. You cannot simply place them randomly and expect uniform coverage.
To achieve uniform lux levels across work surfaces with square fixtures, you must utilize calculated grid spacing. Installers must map out overlapping beam angles precisely. The goal is to ensure the edges of one fixture's light spread perfectly intersect with the adjacent fixture's spread. When executed correctly, this creates a flawless blanket of light across the vehicle. It eliminates the dark spots that can hide swirl marks during the final inspection phase.
| Feature | Square LED Fixtures | Round LED Downlights |
|---|---|---|
| Beam Shape | Directional with distinct geometric edges | Conical with smooth, circular overlapping |
| Installation Tolerance | Strict. Requires perfect parallel alignment | Forgiving. Rotational alignment is irrelevant |
| Aesthetic Impact | Modern, architectural, aligns with straight walls | Traditional, blends into the ceiling background |
| Layout Planning | Requires precise grid mapping to avoid dark spots | Easier to space out evenly without strict grids |
Precision automotive work requires exceptional color accuracy. A 90+ CRI (Color Rendering Index) is non-negotiable for paint correction and detailing. Standard commercial lights often hover around 80 CRI, which washes out subtle color variations and hides light scratches. High CRI lighting ensures that reds look truly red and blues look truly blue. The R9 value, which specifically measures the rendering of deep reds, is a major factor when working on warm-toned vehicles. Without high CRI, a technician might think a panel is perfectly polished, only to see remaining defects when the car is pulled out into natural sunlight.
Color temperature also dictates defect resolution. Typically, a range of 5000K to 6000K is ideal for detailing. This daylight-balanced spectrum provides the stark, crisp contrast needed to spot clear coat scratches. Integrating tunable white technology offers a massive advantage. Tunable systems allow technicians to shift color temperatures dynamically. A 6000K setting might be perfect for spotting swirls on a black car, but a warmer 4000K setting might expose metallic flake inconsistencies on a silver or white vehicle much better.
The physical shape of the fixture also aids in defect resolution. A flat ceiling panel light provides a broad, even source of illumination. Unlike small, intense point sources, a wide flat panel reduces micro-shadowing on curved automotive surfaces. When the light hits the complex curves of a modern vehicle shoulder line, the broad panel ensures the reflection is smooth and continuous, making any break in the clear coat instantly visible.
Staring into bright LEDs all day causes severe eye strain. Glare management is a primary concern for shop owners prioritizing technician health. The role of frosted or micro-prismatic diffusers in an LED ceiling panel light is to scatter the intense light generated by the diodes. Frosted diffusers provide a smooth, milky appearance that softens the light output beautifully. Micro-prismatic diffusers take this a step further by using tiny geometric patterns to direct the light downward, drastically reducing side glare when viewed from an angle.
The internal construction of the panel also affects glare and light quality. Edge-lit square panels place the LED strips around the perimeter of the frame, firing light inward into a light guide plate that pushes it down. This creates an ultra-thin profile and a very uniform surface luminance, making it impossible to see individual diodes. Back-lit panels place the LEDs directly behind the diffuser. While slightly thicker, back-lit panels are often more energy-efficient and less prone to the yellowing that can sometimes affect edge-lit light guide plates over time.
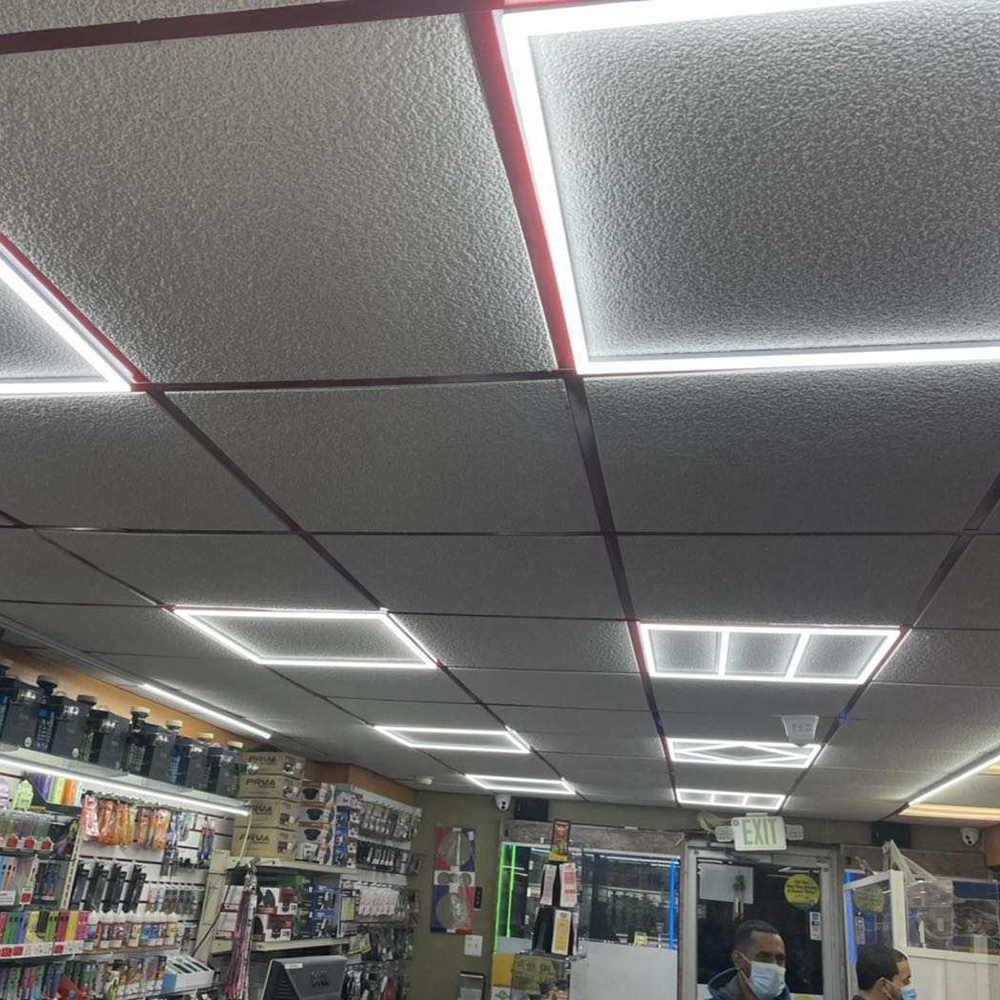
Selecting the right mounting style depends entirely on the workshop's ceiling architecture. Recessed square lights are ideal for low-clearance ceilings where overhead space is at a premium. By sitting flush with the drywall or drop ceiling grid, recessed fixtures create an ultra-clean, unobtrusive aesthetic. They prevent the workspace from feeling cramped and eliminate the risk of tall vehicles or equipment striking the light housings.
Surface-mounted or suspended square panels are necessary for high-bay workshops or open-joist industrial ceilings where recessed installation is impossible. Surface mounts attach directly to the ceiling substrate, housing the driver and wiring within a finished metal box. Suspended setups use aircraft cables to drop the lights down to the optimal working height. This is particularly useful in warehouses with 20-foot ceilings, allowing you to bring the light source down to 10 feet for maximum intensity on the vehicle surface.
When installing recessed fixtures in a hard drywall ceiling, contractors must frame out the exact square dimensions during the rough-in phase. Flangeless mud-in trims offer the most seamless look but require a highly skilled drywall finisher to blend the fixture edge into the ceiling perfectly. Surface mounts are much faster to install but require heavy-duty toggle bolts or direct anchoring into ceiling joists to support the weight of the metal housing.
Standalone panels are excellent for general ambient lighting, but precision detailing often benefits from modular grid systems. These systems allow you to interconnect multiple square LED panels to create continuous geometric light tunnels or "halo" grids directly over specific work bays. A halo grid surrounds the vehicle with light from all top angles, ensuring that the sides, hood, and trunk receive equal illumination without casting shadows from the technician's body.
Assembling a multi-head or grid configuration requires specific mechanical components. Installers use precision corner connectors to lock the aluminum frames together at perfect 90-degree angles. Integrated wiring harnesses allow power to daisy-chain from one panel to the next, reducing the number of hardwired electrical drops required from the ceiling. This plug-and-play connectivity speeds up installation significantly.
Suspending heavy, multi-panel detailing configurations safely requires robust structural planning. A large LED detailing light panel grid can weigh significantly more than standalone fixtures. Installers must anchor suspension cables directly into structural ceiling joists or steel I-beams, rather than relying on drywall anchors. Adjustable grippers on the suspension cables allow for fine-tuning the height and leveling the entire grid perfectly horizontal.
| Fixture Type | Best Application | Installation Complexity | Visual Aesthetic |
|---|---|---|---|
| Recessed Square Panels | Low ceilings, finished drywall, drop grids | High (requires precise cutting and clearance) | Flush, seamless, clinical |
| Surface-Mount Panels | Concrete ceilings, solid substrates | Medium (requires direct anchoring) | Industrial, functional, slightly protruding |
| Suspended Modular Grids | High-bay warehouses, dedicated detailing bays | High (requires structural rigging and leveling) | Premium, geometric, "halo" effect |
The primary installation risk with square fixtures is visual alignment. Square fixtures have distinct directional edges. They must be installed perfectly parallel to the walls and perfectly parallel to each other. Because the human eye is exceptionally good at detecting geometric inconsistencies, even a 2-degree deviation in a square fixture is highly visible and visually disruptive. If a row of square lights is slightly crooked, it ruins the premium aesthetic of the entire workshop.
Mitigating this risk requires strict layout protocols during installation. Installers should never rely solely on tape measures. Utilizing cross-line laser levels is mandatory to establish perfectly straight grid lines across the ceiling before any cutting or mounting begins. For suspended systems, using rigid mounting tracks instead of individual cable drops can force the fixtures into perfect alignment. Adjustable suspension cables with threaded micro-adjustments allow installers to dial in the exact level of each corner, ensuring the final array is flawlessly flat and square.
A 360-degree green laser level provides the most visible reference lines in a bright workshop environment. Installers project the grid onto the ceiling, mark the exact corner points for each fixture, and secure the mounting brackets directly on the laser line. This eliminates the compounding errors that occur when measuring from one fixture to the next.
Heat is the enemy of LED longevity. How a fixture handles heat dissipation directly impacts the lifespan of the entire lighting system. When LEDs run hot, they suffer from premature lumen depreciation, meaning they lose their brightness much faster than their rated lifespan. They can also experience color shift, where a crisp 5000K white light slowly degrades into a sickly greenish or purplish hue over a few years.
Proper thermal management relies on robust aluminum heat sinks built into the back of the fixture. Aluminum pulls heat away from the diode junction and dissipates it into the surrounding air. Driver placement also matters. The LED driver generates its own heat. Premium fixtures isolate the driver from the LED board, ensuring the heat from the power supply does not compound the heat generated by the diodes. Ensuring adequate airflow around surface-mounted or recessed fixtures is vital to maintaining these thermal dynamics.
In suspended grid systems, drivers are often mounted remotely or housed in a separate ventilated compartment above the light panel. Remote mounting keeps the heat source completely away from the sensitive diodes and makes future driver replacements much easier, as technicians do not need to disassemble the entire light grid to access the power supply.
Detailing requires adaptable lighting. Reviewing compatibility requirements for 0-10V or DALI dimming systems is a critical step in the planning phase. Dimming allows technicians to adjust lux levels based on the task at hand. Heavy compounding work might require 100% output to see deep scratches. During final ceramic coating inspections, dimming the lights to 50% can actually make it easier to spot high spots or flashing in the coating, as extreme brightness can sometimes wash out these subtle chemical reactions.
Commercial building code compliance must guide your purchasing decisions. Workshop environments expose fixtures to airborne dust from polishing compounds and occasional moisture from wash bays. Selecting fixtures with appropriate IP ratings protects the internal electronics. An IP54 or IP65 rating is often recommended for automotive environments. Ensure all fixtures carry valid UL or ETL certifications. Installing non-certified electrical equipment can void commercial insurance policies and fail local fire marshal inspections.
Daisy-chaining multiple high-output panels requires careful load calculation. A standard 15-amp or 20-amp commercial circuit can only handle a specific number of fixtures before tripping the breaker. Electricians must calculate the total wattage of the grid system and divide it across multiple dedicated circuits to ensure stable, flicker-free operation.
Comparing the initial procurement costs of premium lighting against standard commercial troffers reveals a distinct price gap. High-CRI, modular square panels require a larger upfront capital expenditure. Standard office lights are cheap, but they lack the color accuracy, thermal management, and geometric precision required for professional automotive work. Viewing this purely as an expense ignores the operational returns.
The projected energy savings provide a rapid return on investment. Modern LEDs offer exceptionally high efficacy, often producing over 130 lumens per watt. Replacing outdated fluorescent tubes or metal halide high-bays with LED panels slashes monthly electrical bills. Because LEDs emit significantly less ambient heat than legacy lighting, they reduce the HVAC load. Your air conditioning system works less to cool the shop during summer months, compounding the monthly operational savings.
Better lighting directly increases shop throughput. When technicians can see defects clearly the first time, they spend less time re-polishing panels or pulling cars outside into the sun for inspection. This reduction in rework allows the shop to process more vehicles per week, driving up revenue and offsetting the initial lighting investment rapidly.
The true cost of cheap lighting reveals itself during maintenance cycles. Driver failure and diode burnout in complex grid systems cause massive operational headaches. If one panel in a continuous halo grid fails, it creates an ugly dark spot that ruins the aesthetic and hinders workflow. Replacing a panel requires a scissor lift, technician downtime, and the cost of the replacement part.
Establishing strict criteria for evaluating manufacturer warranties protects your investment. Look for a 5-year minimum warranty on commercial fixtures. Read the fine print to ensure the warranty covers color shift over time, not just total failure. Verify the availability of replacement modular parts. If a driver fails in year four, you need to know the manufacturer still produces that specific driver, preventing you from having to replace the entire fixture network due to component obsolescence.
Modular systems offer a distinct maintenance advantage. If a single panel gets damaged by a rogue ladder or equipment strike, you can unbolt and replace just that one section. Standalone fixtures or custom-built continuous extrusions often require replacing the entire run, which is highly disruptive to shop operations.
A square LED ceiling light system is the optimal choice for workshops prioritizing a high-end, geometric aesthetic alongside clinical-grade illumination. While these fixtures demand meticulous installation planning to overcome alignment and light spread challenges, the resulting shadow-free, high-CRI environment drastically improves defect detection and elevates the customer experience. Decision-makers should prioritize fixtures based on CRI (>90), tunable color options, diffuser quality, rigid mounting hardware, and proven thermal management.
A: The ideal range is between 5000K and 6000K. This daylight-balanced spectrum provides the stark contrast necessary for replicating natural sunlight. It allows technicians to clearly spot clear coat scratches, swirl marks, and holograms that warmer lights tend to hide.
A: Yes. Tunable white LEDs allow technicians to adjust the color temperature dynamically. While 6000K is great for dark cars, shifting to a warmer 4000K can help expose specific defects and metallic flake inconsistencies on silver, white, or highly metallic paint finishes.
A: Yes. Square fixtures have straight edges that require exact parallel alignment to the walls and adjacent lights. Even a slight rotational deviation is highly visible. Round downlights are omnidirectional, making them much more forgiving if the spacing or alignment is slightly imperfect.
A: Standard office panels usually have a low CRI (around 80) and lack the intensity needed for detailing. Professional paint correction requires high-CRI (>90) detailing panels to accurately render paint colors and expose micro-defects without washing out the surface details.
A: For precision automotive work, aim for 75 to 100 foot-candles (roughly 750 to 1000 lux) at the vehicle's surface. The exact lumen output required depends on ceiling height and fixture spacing, which is why a photometric layout is recommended.
A: Edge-lit panels have LEDs around the frame firing inward, creating an ultra-thin profile and highly uniform light. Back-lit panels have LEDs behind the diffuser. Back-lit models are slightly thicker but are often more energy-efficient and less prone to yellowing over time.
A: Yes. The geometric shape and beam angles of square fixtures create distinct light edges. To prevent harsh shadows on 3D objects like cars, square lights require carefully calculated overlapping beam angles and high-quality diffusers to soften the light transitions.

