


Views: 0 Author: Site Editor Publish Time: 2026-09-30 Origin: Site


The transition of modular lighting from niche gaming setups to mainstream architectural feature walls, professional studio backdrops, and high-end utility spaces marks a significant shift in interior design. The market is currently saturated with white-label imports and high-markup premium brands. Buyers face challenges in identifying systems with reliable app ecosystems, adequate color diffusion, smooth dynamic transitions, and secure mounting mechanisms that will not damage surfaces or fail over time. This guide provides a technical evaluation framework for selecting, planning, and installing modular hexagon lighting systems based on hardware specifications, software reliability, and long-term maintenance realities. We evaluate panel-to-power ratios, mounting strategies for various wall textures, and the differences between proprietary and open-source control ecosystems. You will learn how to avoid common pitfalls like voltage drop, adhesive failure, and hot-spotting, ensuring your lighting installation remains secure, visually consistent, and fully integrated into your space.
Evaluating your installation environment is the mandatory first step before purchasing any modular lighting hardware. Wall texture, paint finish, and structural integrity directly dictate your mounting options. Smooth, freshly painted drywall with a level five finish provides an ideal surface for standard adhesive pads. However, heavily textured surfaces like popcorn walls, raw brick, or matte finishes with high dust retention will actively repel standard double-sided tape over time. Humidity also plays a massive role; installations in unconditioned garages or basements experience temperature swings that degrade acrylic adhesives rapidly.
Different surfaces require entirely different preparation and hardware. Standard drywall installations allow for lightweight adhesive mounting if the surface is properly prepped. Drop ceilings present a unique challenge, often requiring specialized clips that attach directly to the metal grid framework. When planning overhead installations, such as mounting RGB hexagon ceiling lights, you must abandon adhesive entirely. Gravity and ambient heat will inevitably cause tape to fail, making mechanical fastening with drywall anchors or toggle bolts an absolute safety requirement to prevent hardware from falling.
Lighting systems are engineered for specific applications. Understanding your primary use case prevents you from installing a system that underperforms or overwhelms the space. You need to match the hardware specifications to the daily function of the room.
| Use Case Environment | Primary Lighting Goal | Lumen Requirement | Hardware Priority |
|---|---|---|---|
| Ambient (Living Rooms, Bedrooms) | Mood setting, aesthetic accents | Low to Medium | High color accuracy, smooth diffusion, dimming capability |
| Task (Garages, Workshops, Gyms) | Visibility, safety, detailed work | Very High | Raw white brightness, rigid aluminum frames, high CRI |
| Reactive (Studios, Gaming Rooms) | Entertainment, audio/visual sync | Medium | Low-latency controllers, desktop software integration |
Ambient environments require low lumen output but place a massive premium on color accuracy. The focus here is on smooth transitions, custom scenes, and the ability to dim the panels significantly without introducing flicker. Task and utility spaces demand high lumen requirements. The priority shifts from deep color saturation to raw white-light brightness. These installations often utilize larger aluminum-frame kits designed to illuminate workstations or vehicle detailing bays. Entertainment setups prioritize low-latency synchronization. The hardware must sync seamlessly with PC monitors or local audio inputs, requiring dedicated desktop software capable of processing audio frequencies into dynamic transitions without noticeable lag.
Every modular lighting system operates within strict electrical boundaries. Understanding the maximum number of panels supported per controller and per power adapter is critical. A standard 42W power supply might support up to 20 standard panels at full white brightness. Pushing beyond this limit without injecting additional power leads to immediate hardware stress and potential failure of the controller unit.
When you daisy-chain too many panels, you encounter voltage drop. This manifests visually as panels at the end of the chain appearing dimmer or shifting toward a red hue, as blue and green diodes require higher voltage to operate. For massive feature walls utilizing customizable RGB hexagon lights, you must plan for power injection. This involves routing supplementary power adapters into the middle or end of the panel matrix. You run a parallel 18 AWG wire from a secondary power supply directly to the power rails of the distant panels, ensuring uniform brightness and color accuracy across the entire installation.
The control protocol dictates how you interact with your lighting wall daily. Bluetooth controllers offer local, offline control but suffer from limited range and an inability to integrate with broader smart home routines. Conversely, 2.4GHz Wi-Fi controllers allow for remote access, voice commands, and complex scheduling. A common installation hurdle is router configuration; many IoT lighting controllers fail to connect to combined 2.4GHz/5GHz mesh networks, requiring you to temporarily disable the 5GHz band during initial setup.
Animation smoothness separates premium controllers from generic alternatives. High-end processors handle hundreds of pre-set color modes and flowing transitions without stuttering. They interpolate the color data smoothly between individual diodes. Furthermore, Matter and Thread compatibility represents the current standard for future-proofing smart home ecosystems. These protocols ensure your lights communicate locally with other smart devices, reducing latency and reliance on external servers. You must also assess the software ecosystem. Proprietary lighting apps often suffer from bloatware, requiring mandatory account creation and constant cloud connectivity just to change a color scene.
The physical construction of the panel determines the visual quality of the light. Edge-lit panels position the LEDs around the perimeter, firing light inward across a diffuser plate. This creates a highly uniform, flat look. Back-lit panels place the LEDs directly behind the front face. If the diffusion layer is too thin or made of cheap acrylic, you will see individual harsh LED diodes, commonly known as hot spots.
Plastic thickness and opacity directly affect the visual quality of color changing hexagon lights. A denser polycarbonate diffuser reduces raw brightness but vastly improves the blending of color gradients. Additionally, evaluate the color rendering index (CRI) and the panel's ability to produce pure white light. Standard panels mix red, green, and blue to simulate white, often resulting in a muddy, bluish tint. Panels with a dedicated white diode allow for crisp, accurate white light suitable for reading or detailed task work.
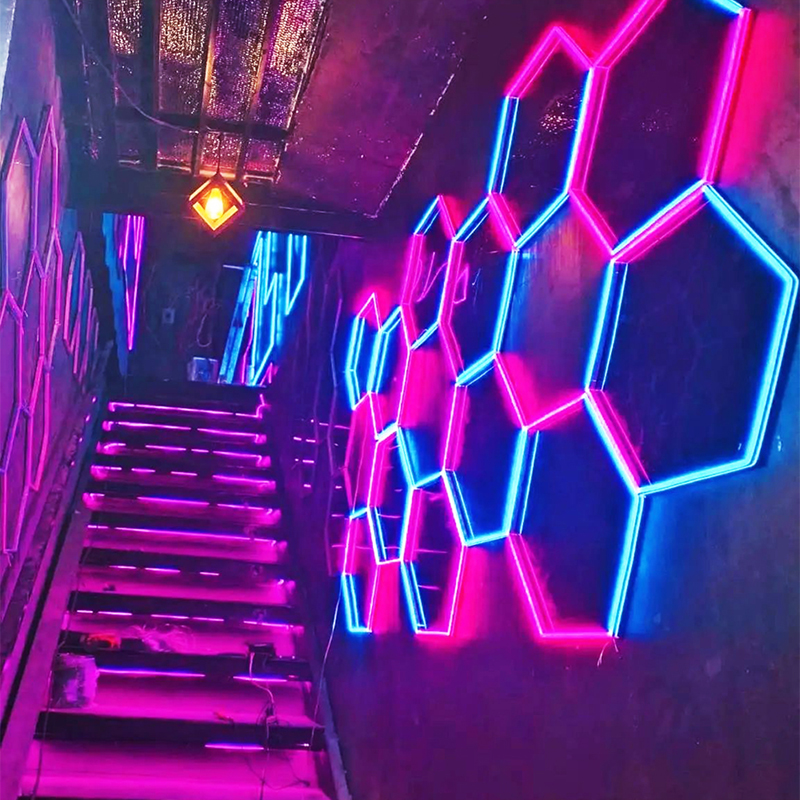
Premium brands dominate the consumer market through sheer convenience. These systems feature high initial costs but deliver seamless app integration out of the box. They offer robust warranties, massive libraries of community-shared dynamic scenes, and superior low-latency music synchronization. The hardware tolerances are tight, meaning the panels snap together securely without sagging.
The trade-offs involve strict vendor lock-in. Expansion packs remain expensive, and the hardware utilizes proprietary connectors, preventing you from mixing brands. Furthermore, many of their advanced smart features rely entirely on company servers. If the manufacturer experiences an outage or discontinues the product line, your smart home integrations temporarily break or become permanently obsolete.
Budget kits cater heavily to large-scale utility spaces. They offer a significantly lower cost per panel. These systems are often controlled via generic applications or basic infrared remotes. They are highly popular for sprawling garage setups or gym ceilings where raw brightness trumps complex animation. The aluminum frames provide excellent heat dissipation, which extends the lifespan of the LEDs when run at maximum brightness for hours.
However, quality control varies wildly. You may encounter inconsistent color matching between different batches of panels. Generic Wi-Fi apps can introduce security vulnerabilities to your home network, and the included adhesive tape is notoriously unreliable. You are trading software refinement and color accuracy for sheer coverage area and raw lumen output.
Advanced users often bypass proprietary ecosystems entirely. This route involves utilizing generic RGB hexagon lights paired with custom ESP32 microcontrollers running WLED software. WLED is an open-source platform that provides absolute, granular control over every single LED node without any cloud dependency. You maintain complete local control over your network.
This approach requires technical skill. You must understand basic soldering, power supply calculation, and network configuration. You often need to wire a logic level shifter to boost the 3.3V data signal from the ESP32 to the 5V required by standard WS2812B LED strips. However, it unlocks limitless aesthetic modifications. Builders frequently modify budget panels by applying black vinyl tape to the edges to prevent light bleed or cutting custom acrylic diffusers. This elevates standard hardware into premium-looking custom installations, achieving bespoke results that off-the-shelf kits cannot replicate.
Never start sticking panels to a wall without a finalized plan. Source design inspiration from community forums or architectural galleries to plan popular geometric patterns. You must commit to a shape that complements the room's dimensions rather than cluttering it. Measure the wall space and mark the boundaries using blue painter's tape.
Many premium apps offer augmented reality features to preview designs on your wall. If this is unavailable, use physical paper templates. Tape these templates to the wall to gauge the scale and balance of the design. Crucially, calculate your power routing during this phase. Ensure the very first panel connected to the controller can physically reach your nearest wall outlet without stretching the cable. Always perform a dry-fit on the floor. Connect all panels and power them on to verify every single diode works before you begin the mounting process.
Mounting failures are the most common issue in modular lighting. If you choose adhesive tape, surface preparation is non-negotiable. Wipe the wall down with 90% isopropyl alcohol to remove invisible grease and dust. Wait ten minutes for the alcohol to flash off completely. Apply firm pressure to the tape for at least 30 seconds to activate the acrylic adhesive, and allow it to cure before attaching the heavy panel. When removing panels later, pull the command strip straight down parallel to the wall to avoid tearing the drywall paper.
Mechanical mounting provides permanent peace of mind. This requires specific toolkits and a methodical approach.
A stunning light matrix is instantly ruined by a dangling black power cord. Strategies for hiding the power cable vary by commitment level. In-wall routing provides the cleanest look but requires strict compliance with local electrical codes. You cannot simply drop a standard power cord behind drywall; you must use code-compliant bridge kits to safely route low-voltage cables. This involves cutting two holes in the drywall, installing low-voltage brackets, and using a fish tape to pull the rated cable through the stud bay.
For a less invasive approach, utilize paintable surface raceways. These plastic channels adhere to the wall, housing the cable securely. Cut the raceway to length using a fine-tooth hacksaw, snap the cover over the cable, and paint it to match your wall color. They blend seamlessly into the background, maintaining the professional aesthetic of the installation without requiring drywall repair.
Hardware outlasts software. The greatest risk with budget manufacturers is the abandonment of app updates. As smartphone operating systems evolve, older, unsupported lighting apps frequently crash or lose compatibility. This renders the smart features useless, reducing the system to whatever basic functions the physical controller buttons provide. Prioritizing brands with a track record of software maintenance, or utilizing open-source controllers that run locally on your network, mitigates this risk entirely.
Modular matrices are interlinked. If a single panel in the dead center of your design suffers a diode failure, replacing it is a logistical challenge. You cannot simply pull it straight off the wall if it is physically clipped to six surrounding panels. You must design your layout with maintenance in mind, understanding how the interlocking tabs function. In some systems, replacing a central panel requires dismantling half of the feature wall. Using magnetic mounting systems or leaving a slight gap at the edges of your design can provide the necessary leverage to pop a single panel out using a plastic pry tool without damaging the surrounding units.
Large-scale installations draw significant power. You must calculate the active wattage of massive RGB hexagon wall lights running at 100% brightness to ensure you do not overload a standard household circuit. A single panel might draw 18 watts at full white brightness. A 30-panel matrix will draw over 500 watts, requiring a dedicated power strategy. Additionally, Wi-Fi connected controllers constantly draw standby power to maintain their network connection. While the individual draw is small, multiple large matrices left in standby mode 24/7 will contribute to your baseline electrical consumption. Installing a smart plug allows you to cut power to the transformers completely when the lights are not in use.
A: Standard adhesive tape has a high failure rate on textured walls due to limited surface contact. For textured surfaces, you must use mechanical mounting. Screw the panels directly into the wall using drywall anchors, or mount the panels to a flat, painted wooden backing board first, and then secure that board to the wall studs.
A: Limits vary strictly by brand and panel wattage, typically ranging from 10 to 25 panels per standard adapter. Exceeding this limit causes voltage drop and dimming. For larger designs, you must integrate supplementary power adapters into the layout to inject fresh power along the chain.
A: Yes. Most systems include a physical controller with buttons to cycle through basic colors and built-in animations. Bluetooth-enabled apps also work locally without internet. However, Wi-Fi is strictly required for voice control, remote access, smart home integration, and downloading complex custom scenes from community servers.
A: They are only safe if mechanically mounted. You must strictly use screws and drywall anchors or toggle bolts for hollow ceilings. Adhesive tape will inevitably fail under the constant stress of gravity and ambient heat, posing a serious falling hazard over beds or desks.
A: Audio sync requires a controller with a built-in microphone to process ambient sound into reactive lighting. For low-latency screen-mirroring with a PC monitor, you must use a premium system that offers dedicated desktop software. This software captures screen data and transmits it locally to the lights over your network.
A: Standard RGB panels mix red, green, and blue diodes to simulate white light, which often looks muddy or bluish. RGBW panels feature a dedicated white LED diode. This provides accurate, bright, and clean white light, making them vastly superior for task lighting and reading.


