


Views: 0 Author: Site Editor Publish Time: 2026-09-09 Origin: Site


Open-concept commercial spaces and workshops often struggle to define functional work areas without erecting physical barriers. Relying on ambient, omnidirectional lighting creates overlapping shadows, light bleed, and inconsistent lux levels. This hurts precision-based service areas where visual accuracy is non-negotiable. Establishing "light zoning" using targeted fixtures is a proven architectural strategy. You can segment a large floor plan purely through illumination control. This guide evaluates whether deploying a square LED ceiling light system provides the necessary edge-to-edge uniformity and beam control to effectively segment service zones without physical walls. We will examine layout mathematics, structural realities, and specific application requirements to help you execute a flawless installation.
A true service zone is a localized area maintaining a significantly higher lux level than the surrounding ambient space. You cannot simply install brighter bulbs and expect a defined workspace. Light behaves predictably. Without proper beam control, high-intensity light spills into adjacent areas. This uncontrolled light bleed degrades the clarity of your defined workspace. It washes out the visual boundaries you are trying to create.
Contrast ratios establish these boundaries. The human eye perceives a distinct zone when the contrast ratio between the task area and the ambient area reaches at least 3:1. For high-precision tasks, a 10:1 ratio is often necessary. This stark difference in illumination creates a psychological and functional barrier. Workers step into the zone and immediately experience heightened visual acuity. Customers outside the zone remain in a softer, more comfortable ambient environment.
Beam angles dictate this contrast. Wide beam angles scatter light outward. Narrow beam angles punch light downward. Creating a sharp drop-off in lux levels requires fixtures designed for directional control. You must calculate the exact throw distance from the ceiling to the work surface. If the beam angle is too wide for your ceiling height, the light bleeds. The zone loses its edge. The service area blends back into the general floor plan. On the job site, we use a digital light meter to measure the floor-level lux directly under the fixture and compare it to a reading taken three feet outside the intended zone. If the drop-off isn't sharp, the zoning fails.
Traditional round recessed cans project light in overlapping circular patterns. When you arrange circles in a grid, you inevitably create gaps. You also create areas of intense overlap. This uneven distribution causes light pooling on the floor and scalloping on the walls. Scalloping refers to those arched shadows that distract the eye and make a space look poorly planned.
A square fixture changes the photometric distribution. Square and rectangular shapes naturally mimic the footprint of most service bays, workstations, and equipment. When you project a square beam onto a square floor plan, the geometry aligns. You eliminate the awkward gaps inherent to circular beam spreads. The light coverage becomes highly efficient.
Consider the structural advantages of linear alignment. Square fixtures allow for edge-to-edge uniformity. You can position them parallel to walls, vehicle lifts, or inspection tables. This alignment provides consistent illumination across the entire work surface. The reduction of scalloping effects on walls creates a cleaner, more professional aesthetic. The geometry works with the architecture rather than fighting it.
| Feature | Square LED Fixtures | Round Recessed Cans |
|---|---|---|
| Beam Projection | Linear edges, matches room geometry | Circular, creates overlapping arcs |
| Grid Coverage | Seamless edge-to-edge uniformity | Prone to dark gaps between fixtures |
| Wall Interaction | Clean, straight cutoff lines | Heavy scalloping and arched shadows |
| Alignment | Parallel to architectural features | Omnidirectional, harder to visually align |
Automotive detailing demands flawless lighting. You cannot correct what you cannot see. Paint correction requires identifying micro-scratches, swirl marks, and holograms. Standard garage lighting fails here. It creates harsh glares or leaves critical areas in shadow. High-precision environments require fixtures with a Color Rendering Index (CRI) of 90 or higher. High CRI ensures you see the true color of the paint, exactly as it will appear in natural sunlight.
Deploying an LED detailing light panel transforms a standard bay into a dedicated correction zone. These panels provide multi-angle illumination. They diffuse the light just enough to reduce blinding glare while maintaining the intensity needed to spot defects. When you cluster these panels over a vehicle, you create a localized light tunnel. The ambient light in the rest of the shop remains lower, drawing focus entirely to the vehicle.
A grid of square panels is superior for this application. Round lights cast directional shadows. A tightly spaced grid of car detailing shop lights eliminates the micro-shadows that hide paint defects. The linear edges of the square panels reflect cleanly off the clear coat. Detailers use these straight reflection lines to gauge the smoothness of the paint. A wavy reflection indicates orange peel or remaining defects. You cannot achieve this level of visual feedback with round fixtures or scattered ambient lighting. We regularly see detailing shops rip out standard linear tubes because the single-direction light hides lateral scratches.
The zoning concept scales across multiple environments. In an open retail showroom, you can use a ceiling panel light to highlight specific product displays. By clustering square fixtures over a consultation desk, you create a private, focused area within a massive floor plan. The sharp geometric lines of the fixtures signal to customers that this is a distinct service area.
This scalability extends to high-end residential garages and heavy industrial zones. In a residential workshop, a localized grid of square lights defines the workbench area. The rest of the garage can remain dimly lit for parking. In heavy industrial settings, square lighting configurations highlight machinery inspection zones. The modular nature of square panels allows facility managers to scale the zone size simply by adding or removing fixtures from the grid.
Color temperature (CCT) shifts further enhance this zoning. You can manipulate human psychology through CCT. Use 4000K (neutral white) for general ambient areas. Shift to 5000K (daylight) for active service zones. The 5000K light mimics daylight, increasing alertness and visual acuity. When a technician steps from a 4000K zone into a 5000K zone, their brain registers the transition. The workspace feels distinct, active, and purpose-built. Wiring these zones on separate dimmer circuits gives you complete control over the contrast ratio throughout the day.
Guesswork ruins lighting design. Effective zoning requires strict mathematical layout. The industry standard baseline is one fixture per 4–6 square feet. However, high-intensity service zones often require tighter spacing. You must adapt this rule based on your specific foot-candle targets. A general walkway might need 20 foot-candles. A paint correction bay might require 100 foot-candles or more.
Ceiling height directly alters your required spacing. This is governed by the inverse square law of light. As the distance from the light source doubles, the light intensity drops to one-quarter of its original value. A fixture that provides adequate lux at an 8-foot ceiling will fail completely at a 16-foot ceiling. You must select fixtures with tighter beam angles for high ceilings to force the light down into the zone.
Calculating total lumens prevents under-lighting. Determine the square footage of your specific service zone. Multiply that by your target foot-candles to find the total required lumens. Divide that number by the lumen output of your chosen fixture. This gives you the exact number of fixtures needed. Once you have the count, determine the placement pattern. A uniform grid works best for general tasks. A perimeter-weighted layout works better for vehicle inspection, pushing light inward from the sides.
| Application Type | Recommended Lux Target | Foot-Candle Equivalent | Ideal Contrast Ratio (Zone vs Ambient) |
|---|---|---|---|
| General Ambient Space | 200 - 300 Lux | 20 - 30 FC | Baseline (1:1) |
| Retail Consultation Desk | 500 - 750 Lux | 50 - 75 FC | 3:1 |
| Mechanical Repair Bay | 750 - 1000 Lux | 75 - 100 FC | 5:1 |
| Paint Correction / Detailing | 1000 - 1500+ Lux | 100 - 150+ FC | 10:1 |
Square fixtures demand perfect alignment. A misaligned round light is virtually invisible. A misaligned square light is an immediate eyesore. The straight edges of the fixture highlight any deviation from parallel architectural lines. Laser-guided layout planning is an absolute necessity. You must snap chalk lines and use laser levels to ensure every fixture sits perfectly square to the walls and to each other. On commercial sites, we always square off the longest continuous wall before marking the first ceiling cutout.
Clustering an LED ceiling panel light configuration for a zone requires different logic than ambient lighting. Ambient lighting prioritizes even distribution across the entire room. Zoning prioritizes intense concentration. You will group the fixtures tightly over the work area. The spacing between fixtures within the zone might be as little as two feet, while the distance to the next ambient light could be ten feet.
Aligning tight little LED ceiling light boxes creates a seamless, professional aesthetic. When clustered correctly, they look like a single, cohesive architectural feature rather than a random assortment of lights. Pay close attention to the orientation of the driver boxes and wiring paths above the ceiling to ensure they do not interfere with the tight spacing required for the grid. Keep your Romex or MC cable runs organized so they don't bunch up and push down on the drywall.
Recessed lighting provides the cleanest look but carries the highest structural risk. You must evaluate the joist spacing before committing to a layout. If your calculated grid places a fixture directly on a ceiling joist, you have a problem. You also need adequate plenum depth. Traditional deep recessed cans require significant vertical space above the drywall. Hitting a plumbing line or HVAC duct during installation will instantly derail your project.
Check insulation contact (IC) ratings. If your ceiling contains insulation, you must use IC-rated fixtures. Non-IC fixtures will overheat and pose a severe fire hazard if buried in fiberglass or cellulose. Space-saving solutions exist for restricted clearances. Ultra-thin square LED wafer disks connect to small, detached square junction boxes. These wafers are often less than an inch thick. They fit directly under joists, eliminating layout conflicts. The remote junction box can be tucked away in a nearby cavity.
Surface-mount alternatives are necessary for concrete ceilings or exposed decking. Retrofitting recessed lights into an existing drywall ceiling can be cost-prohibitive due to the patching and painting required. Surface-mounted square panels deliver the exact same photometric performance. The difference is purely aesthetic and structural. They attach directly to standard junction boxes, making installation significantly faster.
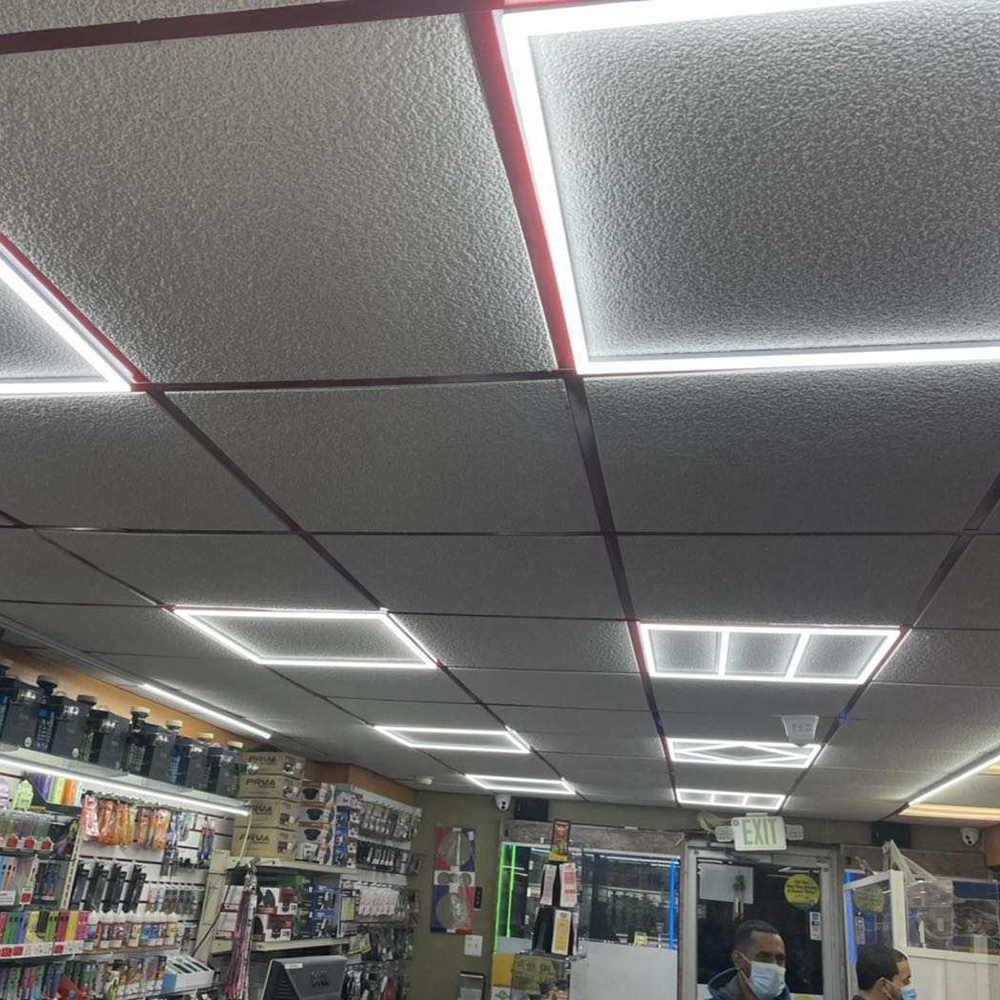
Commercial spaces rely heavily on suspended drop ceilings. Integrating square panels into these systems is generally straightforward, provided you understand the grid constraints. Standard commercial panels come in 2x2 or 2x4 dimensions. They drop directly into the T-grid, replacing the acoustic tiles. This makes creating a service zone incredibly fast. You simply swap tiles for lights where you need the zone.
You must respect structural load limits. LED panels are lighter than old fluorescent troffers, but clustering them tightly adds concentrated weight to the T-grid. The grid must be properly supported. Seismic wire requirements mandate that each light fixture be independently tied to the true ceiling above. You cannot rely solely on the T-grid to hold the weight of the fixtures. We always tie off to the red iron or concrete deck above using dedicated support wire.
Driver accessibility is another critical factor. The LED drivers sit on top of the panels. In a tightly clustered zone, accessing a faulty driver in the middle of the grid can be difficult. Plan your installation so that adjacent acoustic tiles remain removable. Do not lock the grid together in a way that prevents future maintenance access.
Measure your exact service bay dimensions and record the ceiling height before buying any materials.
Calculate your total lumen requirement based on the specific foot-candle target for your daily tasks.
Draft a photometric layout using a laser grid to ensure fixtures align perfectly with architectural lines.
Verify ceiling clearance and joist locations to determine if ultra-thin wafers or standard recessed panels are required.
Consult a structural engineer if clustering heavy fixtures in an existing suspended T-grid ceiling.
A: Apply the baseline rule of one fixture per 4–6 square feet, then adjust for your task. A standard 12x20 foot bay (240 sq ft) might need 6 to 8 lights for general work. For high-precision tasks requiring 100+ foot-candles, you may need 12 to 15 tightly clustered fixtures depending on their lumen output and your ceiling height.
A: Yes. Linear high-bays cast directional shadows and create uneven reflection lines on vehicle paint. A grid of square LED panels provides multi-angle, shadowless illumination. The straight geometric edges of the square panels also provide clean reflection lines, which detailers use to accurately spot paint defects and gauge surface smoothness.
A: Yes, standard commercial square panels are designed specifically for T-grid drop ceilings, typically in 2x2 or 2x4 foot dimensions. They drop in to replace acoustic tiles. Ensure you follow local building codes by attaching independent seismic support wires from the fixture to the true structural ceiling above.
A: Use ultra-thin square LED wafer lights. These fixtures are often less than an inch thick and require virtually no plenum space. They can be installed directly under ceiling joists. The wiring connects to a small, remote junction box that can be placed in an adjacent, more spacious ceiling cavity.
A: The ideal range is 4000K to 5000K. 4000K provides a clean, neutral white suitable for general mechanical work. 5000K mimics daylight and is optimal for high-precision visual tasks like paint correction. It increases alertness and visual acuity without introducing the excessive blue-light glare found in 6000K+ fixtures.
A: Select fixtures with narrow beam angles to push light directly downward. Utilize recessed baffles to cut off the peripheral light spread. Maintain adequate physical distance between the clustered service zone lights and the waiting area, and keep the ambient lighting in the waiting area at a lower intensity to maintain a sharp contrast ratio.
A: Yes. The photometric performance, beam spread, and lumen output are identical if the internal LED components match. The difference is purely aesthetic and structural. Surface-mounted fixtures are ideal for concrete ceilings or retrofits where cutting into the existing drywall is structurally impossible or cost-prohibitive.


