


Views: 0 Author: Site Editor Publish Time: 2026-05-29 Origin: Site


Look up at your office ceiling. You probably notice dust accumulating on the lighting fixtures. Ignoring this buildup harms illumination quality. It also damages hardware longevity over time. Accumulated particulate matter degrades lumen output significantly. Layers of dust, grease, and insect debris act as thermal insulators. They trap heat around delicate LED drivers. This trapped heat accelerates hardware failure and wastes energy. Proper maintenance serves as a vital component of smart facility management. We will explore how you can protect your lighting assets safely. You will learn standard cleaning protocols for daily use. We also cover specialized commercial strategies for tough environments. Finally, we share expert criteria to help you decide when a fixture requires replacement rather than another scrub.
Routine cleaning prevents thermal buildup, effectively extending the lifespan of internal LED drivers.
Strict safety protocols (power disconnection, anti-static handling) are non-negotiable to prevent injury and fixture damage.
Standard cleaning requires only mild, non-abrasive solutions; harsh chemicals permanently degrade anti-glare and acrylic diffusion coatings.
Extreme commercial environments (like heavy grease) require specialized degreasing protocols without voiding manufacturer warranties.
Persistent yellowing often indicates irreversible UV/thermal degradation of the acrylic, signaling it is time to evaluate replacement options.
Cleanliness directly dictates lighting performance. Facility managers often overlook overhead lighting until a fixture fails completely. However, proactive cleaning delivers immediate returns on energy use. You restore the baseline illumination intended for your space. This reduces the need to turn up dimmers or install supplemental lighting.
Dust layers operate as highly effective thermal insulators. This presents a massive problem for light-emitting diodes. LEDs are highly sensitive to heat. They require efficient heat sinks to dissipate thermal energy. A thick layer of dirt traps this heat inside the housing. Poor heat dissipation accelerates internal driver failure. It also speeds up diode degradation. Heat stress burns out the components long before their rated lifespan ends.
Industry standards rely on L70 lumen maintenance metrics. The L70 metric indicates when a light depreciates to 70% of its initial output. Dirt accumulation creates a secondary layer of depreciation. A visibly dirty Ceiling Panel Light can lose 10% to 20% of its effective light output. This loss happens independently of actual diode decay. You end up paying full electricity rates for severely restricted illumination. Regular cleaning reclaims this lost light. It maximizes your energy investment and improves workspace visibility.
Lumen Depreciation Chart: Clean vs. Dirty Fixtures | |||
Fixture State | Operating Temperature | Estimated Lumen Loss | Impact on L70 Lifespan |
|---|---|---|---|
Brand New / Clean | Normal (Design Spec) | 0% | Maximum rated hours |
Light Dust Accumulation | Slightly Elevated | 5% - 10% | Minor reduction |
Heavy Grime / Grease | Critically High | 15% - 20%+ | Severe premature failure |
Cleaning live electrical fixtures introduces severe implementation risks. Water and electricity create a lethal combination. You must prioritize safety before touching any overhead fixture. Bypassing safety steps can result in electrocution or permanent hardware damage.
Always begin with complete power isolation. You should never rely solely on a wall switch. Wall switches can be bumped or flipped by unaware colleagues. In commercial spaces, you must employ strict lock-out/tag-out (LOTO) principles. Padlock the breaker box and tag the circuit. For residential environments, locate the main breaker panel. Switch off the specific breaker controlling your lighting circuit.
Next, allow for an adequate thermal cool-down period. LEDs run much cooler than legacy halogen or incandescent bulbs. However, the internal components still generate substantial heat. The LED drivers and metal heat sinks require time to cool. Wait at least fifteen minutes after turning off the power. Handling hot fixtures can cause burns or warp plastic components during removal.
Finally, prepare your drop-zone carefully. Overhead cleaning inevitably releases trapped dust into the air. Gravity will pull loose particulates, dead insects, and stray cleaning drips downward. Lay down heavy-duty drop cloths. Cover all flooring, desks, and sensitive equipment directly below the fixture. This preparation prevents secondary cleaning chores and protects valuable office assets.
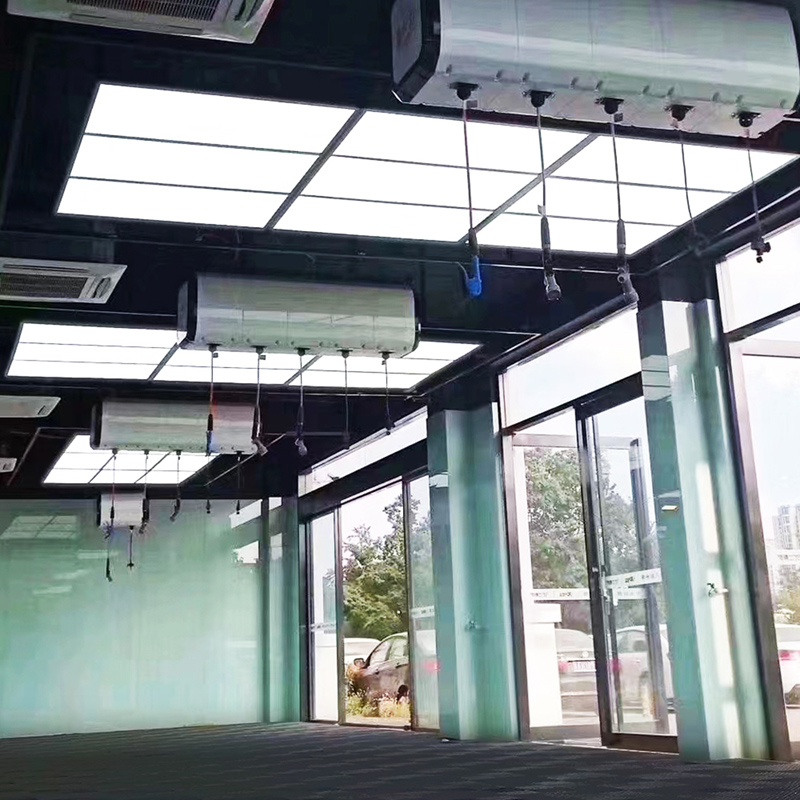
Implementing a standardized workflow minimizes risks to both personnel and equipment. A low-risk methodology protects delicate lenses and internal electronics. You should follow a strict two-phase approach for standard maintenance.
Start with the dry cleaning phase. Your goal is to remove loose particulates first. Use clean microfiber cloths or anti-static dusters. Microfiber traps dust effectively without generating a static charge. Static charges attract more dust immediately after cleaning. You must avoid using standard vacuums with brush attachments. Vacuum bristles are often stiff and abrasive. They will easily scratch delicate acrylic diffusion panels. These micro-scratches scatter light poorly and ruin the fixture's aesthetic.
Move to the wet cleaning phase only if dry dusting proves insufficient. Create a highly diluted solution. Mix warm water and a few drops of mild dish soap. The soap must be pH neutral. Dampen your microfiber cloth lightly. You must wring it out until it is barely moist. Never spray liquid directly onto the fixture. Spraying causes liquid to pool in the metal frame. The moisture will eventually seep into the driver housing and cause electrical shorts.
You must also address the surrounding architecture carefully. Lights usually intersect with acoustic ceiling tiles or metal grid ceilings. Acoustic tiles absorb water rapidly. Water contact leaves permanent, unsightly brown water stains. Wipe the outer bezel of the light fixture very slowly. Keep your damp cloth away from the adjacent ceiling materials. Use a dry cloth to shield the junction line if necessary.
High-end lighting configurations demand nuanced maintenance approaches. Standard cleaning rules do not always apply to advanced fixtures. You must understand the specific components you are handling to avoid costly damage.
Handling Dimmable panel light fixtures requires extreme caution. Dimming drivers rely on complex circuitry. They use 0-10V, DALI, or smart control nodes to regulate voltage. These internal components are highly sensitive to moisture ingress. A single drop of water can short out the dimming node. This leaves the light stuck at a single brightness level or causes aggressive flickering. Emphasize strict dry-cleaning protocols around the fixture housing. Keep wet cloths far away from the control nodes and wiring harnesses.
Optical coatings require equally strict protection protocols. Premium panels feature anti-glare (UGR <19) and anti-static surface treatments. These microscopic layers ensure visual comfort in office environments.
Avoid Ammonia: You must never use ammonia-based glass cleaners like standard Windex.
Avoid Solvents: Keep alcohol and harsh chemical solvents away from plastic lenses.
Prevent Crazing: Harsh chemicals strip protective coatings instantly. They also cause micro-crazing. Crazing creates thousands of tiny surface cracks in the acrylic.
Stop Dust Adhesion: Stripped coatings accelerate future dust adhesion. Your lights will get dirtier much faster.
Facility management realities often involve extreme scenarios. Standard office dust is easy to manage. However, industrial and food-service environments present severe cleaning challenges. You need real-world troubleshooting tactics to restore these fixtures safely.
Heavy grease creates the toughest maintenance hurdle. Quick-service restaurants (QSR) and commercial kitchens deal with vaporized oils daily. This airborne oil settles on overhead lighting. It eventually turns into polymerized grease. Polymerized grease forms a sticky, hard resin on the acrylic lens. Normal soapy water will not remove it. You should use heavy-duty, enzyme-based degreasers. Ensure the degreaser is non-corrosive and safe for plastics. If the fixture design allows, remove the acrylic panel entirely. Place it flat on a sturdy work surface. Cleaning the panel flat prevents aggressive scrubbing pressure from breaking the frame overhead.
Pest debris poses another common commercial challenge. Backlit and edge-lit panels often attract insects. The warmth of the LED diodes draws them in. Dead insects create dark, unsightly silhouettes against the illuminated lens. You must clear out these dust traps carefully. Outline a safe unlatching process. Open the panel frame slowly. Support the lens weight with your free hand. You must avoid damaging the internal Light Guide Plate (LGP). The LGP is a highly engineered optical component. Scratching or bending the LGP will cause permanent dark spots and uneven light distribution.
Chemical Compatibility Guide for Lens Cleaning | ||
Cleaning Agent | Suitability | Potential Reaction on Acrylic/Polycarbonate |
|---|---|---|
pH-Neutral Dish Soap | Highly Recommended | Safe. Cleans surface grime without degrading plastics. |
Enzyme-Based Degreasers | Situational (Kitchens) | Safe. Breaks down polymerized grease effectively. |
Ammonia (Glass Cleaners) | Strictly Prohibited | Causes clouding, yellowing, and micro-crazing. |
Rubbing Alcohol (Isopropyl) | Strictly Prohibited | Causes immediate structural crazing and brittleness. |
Every facility manager faces a crucial decision stage. You must determine when maintenance efforts no longer yield viable results. Cleaning cannot fix fundamental hardware degradation. Guide your evaluation using a few simple, reliable tests.
You need to know exactly when to stop cleaning. The yellowing test provides the clearest indicator. Scrub a small section of the lens with a safe degreaser. If the panel remains yellow after degreasing, the discoloration is permanent. Polystyrene and acrylic plastics suffer from chemical degradation over time. Continuous UV exposure and trapped heat alter the polymer structure. This phenomenon is called photo-oxidation. You cannot wash away photo-oxidation. It signals that the physical material has failed.
Flickering or unresponsiveness highlights internal issues. Sometimes a thorough cleaning fails to restore consistent light quality. The fixture may still hum, flicker, or drop in brightness. These symptoms indicate a failing driver or decaying diodes. Cleaning the exterior lens will not resolve electrical death.
Take action based on your evaluation. Stop pouring labor hours into failing infrastructure. Frame your transition strategy around modern hardware. Move away from high-maintenance legacy fixtures. Upgrade to modern, sealed, IP54+ rated panels. An IP54 rating means the fixture resists dust accumulation and stops insect ingress completely. These advanced designs require significantly less cleaning. They offer superior long-term efficiency and structural durability.
Proper and consistent maintenance maximizes your lighting ROI and preserves overall illumination quality.
Following strict LOTO and cool-down procedures prevents dangerous accidents and hardware shorts.
Using pH-neutral cleaners protects expensive anti-glare coatings and prevents permanent acrylic crazing.
While regular cleaning extends driver lifespan, proactive replacement remains inevitable for aging infrastructure.
Stop ignoring the hidden drain on your facility's efficiency. Audit your current lighting fixtures this week. Identify which panels need routine dusting and which require immediate replacement. Consult with your maintenance team to establish a standardized cleaning schedule. If you discover widespread yellowing or failing drivers, explore energy-efficient, low-maintenance upgrades today.
A: Standard office environments require cleaning every 6 to 12 months. This interval manages normal dust accumulation. Industrial spaces, manufacturing floors, and commercial kitchens demand quarterly cleaning schedules. High-grease environments may even require monthly degreasing to maintain safe operating temperatures.
A: Emphasize a strict no. You must never use standard glass cleaners. Most glass cleaners contain ammonia and harsh solvents. These chemicals strip anti-glare coatings immediately. They also cause micro-crazing, which clouds the acrylic or polycarbonate lenses permanently.
A: Persistent yellowing indicates chemical degradation, not surface dirt. Long-term exposure to UV radiation and internal heat causes photo-oxidation in plastics like polystyrene. This permanently alters the molecular structure of the lens. You cannot clean photo-oxidation; the hardware requires full replacement.


