


Views: 0 Author: Site Editor Publish Time: 2026-08-24 Origin: Site


Dynamic lighting has shifted from a novelty to a core component of spatial design. Utilizing the wrong color scenes actively detracts from a display’s visual authority and purpose. Buyers frequently struggle to balance aesthetic impact with functional illumination. Selecting incorrect color temperatures, poorly mapped dynamic scenes, or inadequate hardware leads to washed-out products, eye strain, or disjointed brand presentations. You need lighting that works for the space, not against it.
This guide breaks down how to evaluate, select, and implement the exact color scenes and hardware configurations required to maximize the return on investment of an RGB hexagon lights installation across various professional environments. We cover the technical limitations of color mixing, the psychological impact of specific hues in commercial spaces, and the structural requirements for scaling these lighting arrays safely and effectively.
Purpose-Driven Color Selection: High-contrast, cool white scenes (5000K–6500K) are mandatory for detail-oriented tasks, while dynamic RGB scenes drive engagement in retail, entertainment, and fitness spaces.
Hardware Dictates Scene Quality: The ability to execute complex color scenes depends entirely on the controller ecosystem (Smart App, IR/RF Remote, or DMX) and the color rendering index (CRI) of the panels.
Scalability Requires Planning: Large-scale displays utilizing customizable RGB hexagon lights must account for voltage drop, wiring diagrams, power supply limits, and structural mounting constraints before finalizing a layout.
Placement Impacts Perception: The choice between wall-mounted and ceiling-mounted arrays fundamentally changes how color scenes interact with the subject below or in front of them.
Every lighting installation must serve a primary function before it serves an aesthetic one. Differentiating between task lighting and ambient lighting dictates the entire hardware selection process. Task lighting requires high lumen output and strict color accuracy. Spaces like detailing bays, inspection floors, or assembly lines need intense, uniform light to reveal surface defects. Ambient or accent lighting prioritizes color saturation and dynamic movement. Spaces designed for entertainment, hospitality, or retail focus on drawing the eye and setting a specific mood. Attempting to force an ambient lighting setup to perform task lighting duties usually results in poor visibility and user fatigue.
To properly assess a room's lighting needs, follow these evaluation steps:
Identify the primary visual task performed in the space (e.g., reading, inspecting, relaxing, or filming).
Determine the required lux levels for that specific task based on industry standards.
Evaluate the natural light available during peak operating hours to understand how much artificial fill is necessary.
Map out the primary viewing angles of the audience or customers entering the space.
Understanding how diodes mix light is required for setting accurate color scenes. Standard RGB diodes mix red, green, and blue light to create millions of custom colors through additive color mixing. However, this mixing process has severe limitations when generating pure white light. When an RGB panel attempts to output white, it fires all three colors at maximum intensity. This often creates a muddy, blue or purple-tinted white that distorts the actual color of the objects below it.
Utilizing dedicated cool white diodes alongside RGB diodes provides crisp, practical illumination. This hybrid approach ensures you get deep, saturated colors for dynamic scenes and accurate, high-CRI white light for functional tasks. If your space requires actual work to be done under the lights, relying solely on mixed RGB white will lead to eye strain and poor color rendering.
Color scenes must interact intentionally with the physical products, vehicles, or digital content being displayed. Establishing baseline requirements prevents lighting from overpowering the subject. If you display a red sports car, casting a heavy green ambient light will neutralize the red paint, making it look brown and dull. Lighting should complement the brand's primary colors or provide a neutral, high-contrast backdrop that allows the subject to stand out. The lighting array serves as a framing device. Its movement, intensity, and hue must align with the energy of the environment.
Automotive spaces require strict control over reflections and color accuracy. The paint correction process demands flawless visibility. Optimal scenes rely on static daylight settings ranging from 5500K to 6500K. This temperature mimics natural sunlight, making swirl marks, scratches, and clear coat defects immediately visible on the vehicle's surface. During showroom idle states, slow-pulsing brand colors create a premium atmosphere without distracting from the vehicle's lines.
Configuration focuses heavily on overhead RGB hexagon ceiling lights. These arrays create uniform, geometric reflections on glossy surfaces. You must avoid casting harsh, multi-colored shadows during active work hours. Zoned control allows the perimeter to hold a static brand color while the center grid provides pure white task lighting directly over the vehicle.
Retail environments use light to guide customer attention and highlight product value. Optimal scenes include color-blocked static configurations that match seasonal branding. Subtle gradient shifts draw the eye naturally without overpowering the merchandise. Fast, erratic flashing scenes often trigger visual fatigue and drive customers away from the display area.
Strategic placement of color changing hexagon lights acts as a powerful backdrop. These panels create depth and help silhouette high-ticket items. When mounted behind glass shelving or mannequins, the diffused glow separates the product from the background, increasing perceived value and drawing foot traffic toward specific zones.
On-camera environments require lighting that interacts well with digital sensors. Optimal scenes utilize high-contrast complementary colors. Combinations like teal and orange or purple and cyan provide excellent visual depth on camera. Audio-reactive or screen-syncing dynamic modes add production value to live broadcasts, keeping the audience engaged during long streams.
The configuration focus shifts to RGB hexagon wall lights positioned directly within the camera frame. You must utilize panels with high-quality diffused covers. Bare diodes or cheap diffusers cause glare and sensor blooming, ruining the video feed. Brightness levels are typically dialed down to 30-50% to balance with key lights illuminating the talent.
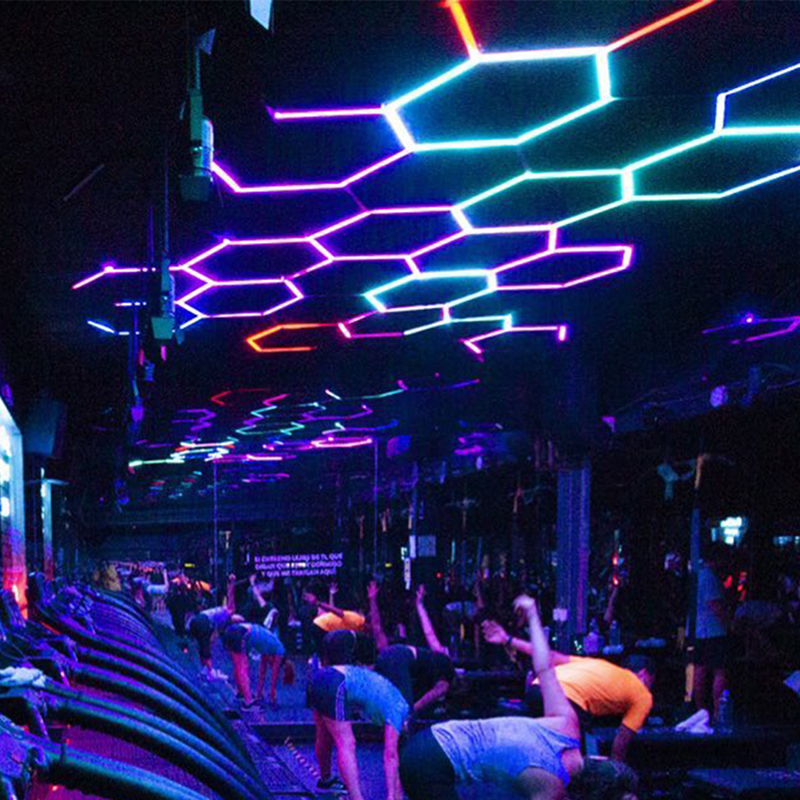
Fitness spaces benefit from lighting that alters the psychological state of the user. Optimal scenes feature high-energy dynamic effects. Fast-pulsing or audio-reactive scenes elevate workout intensity during cardio or heavy lifting sessions. However, the system must easily switch to crisp 5000K-6500K cool white for form-checking, safety, and equipment maintenance.
Hybrid wall and ceiling installations work best here. They provide both motivational ambient color on the walls and practical overhead illumination. This dual-zone approach ensures the space remains functional regardless of the workout type, allowing trainers to see their clients clearly while maintaining a high-energy atmosphere.
Hospitality venues require lighting that transitions smoothly throughout the day. Optimal scenes start with warm amber or gold tones for early evening ambiance. As the night progresses, the system shifts to high-BPM reactive scenes to match the late-night energy and music.
These environments demand large, continuous arrays of customizable RGB hexagon lights. Central hardware must control these expansive grids, allowing staff to trigger pre-programmed scenes instantly without navigating complex software during a live event. Reliability and ease of use are paramount when untrained staff need to operate the lighting system.
Optimal Color Scene Configurations by Environment
Environment Type | Optimal Color Temperature / Scene | Primary Hardware Focus | Key Visual Objective |
|---|---|---|---|
Automotive Showrooms | 5500K-6500K Static / Slow Brand Pulse | Ceiling Grids | Defect visibility and uniform paint reflection |
Retail Displays | Seasonal Color Blocks / Subtle Gradients | Wall Backdrops | Product silhouetting and attention routing |
Streaming Studios | Teal & Orange / Audio-Reactive | Wall Accents | Camera depth and background engagement |
Training Facilities | High-BPM Pulse / 5000K Task White | Hybrid Wall & Ceiling | Energy elevation and safety illumination |
Event Spaces | Warm Amber / High-Energy Sync | Large Continuous Arrays | Atmosphere transition and crowd stimulation |
The controller acts as the brain of your lighting display. Evaluating Wi-Fi and Bluetooth reliability is the first step when looking at app-based control. Proprietary app ecosystems offer extensive customization but often suffer from latency issues or complex scene mapping limitations. If the Wi-Fi drops, you lose control of the display. You must ensure the controller has onboard memory to retain the last known state if the network fails.
Traditional IR/RF remote controls provide a necessary fail-safe. They offer a low-latency alternative to app-based systems for quick, reliable scene changes. Staff can switch from an active RGB scene to pure white instantly without unlocking a tablet or waiting for an app to sync. RF remotes are superior to IR remotes because they do not require a direct line of sight to the receiver.
For large-scale commercial displays, DMX and hardware controllers are mandatory. Integrating hexagon panels into professional AV setups allows for frame-accurate scene syncing. This ensures the lighting perfectly matches video walls, stage audio, and other environmental effects without any visible delay. DMX controllers require assigning specific addresses to each panel or zone, allowing a central lighting desk to manipulate the entire array seamlessly.
The physical quality of the LED chips dictates the final output. The Color Rendering Index (CRI) measures how accurately a light source reveals the true colors of an object on a scale from 0 to 100. A CRI of 90 or higher is non-negotiable for retail and detailing environments. Even when utilizing color scenes, the underlying diode quality prevents objects from looking washed out or unnatural.
You must understand the trade-off between peak brightness and the depth of primary RGB colors. Pushing a diode to its maximum lumen output often desaturates the color. High-quality panels maintain deep, rich reds, greens, and blues even at 80% brightness. Cheaper panels will shift toward pastel tones as brightness increases. Always request photometric data from the manufacturer before purchasing panels for a color-critical environment.
Mounting location fundamentally changes the hardware requirements. Ceiling installations are best for ambient fill and overhead reflection. However, they require significantly higher structural integrity. You must plan for careful cable management, as gravity will constantly pull on connectors and wires. Using unistrut or suspended aluminum framing is standard practice for commercial ceiling grids.
Wall installations are best for direct visual engagement and camera backgrounds. They are easier to access for maintenance or layout changes. Because they sit directly in the viewer's line of sight, they are highly susceptible to dead-pixel visibility. A single failing diode on a wall panel is immediately obvious, requiring strict quality control during the purchasing phase. Wall panels also require careful routing of power cables to maintain a clean, wire-free aesthetic.
Designing a layout requires balancing visual impact with infrastructure limits. Dense honeycomb grids provide massive light output. They serve as complex canvases for sweeping dynamic scenes. However, this density drastically increases power requirements, heat generation, and installation time. Every connection point is a potential point of failure. You must ensure the structural mounting surface can handle the combined weight of dozens of panels.
Minimalist layouts utilize abstract, broken-grid designs. These configurations reduce hardware costs and overall power draw. They still provide striking color accents and modern aesthetics. The trade-off is a reduction in the effectiveness of sweeping dynamic scenes, as the light has fewer panels to travel across. Minimalist designs work exceptionally well in modern office spaces or as subtle backdrops in retail windows.
Scaling a lighting array requires precise mathematical planning. You must calculate the load to determine the number of power supplies needed. This calculation is based on the total diode count and the maximum draw of full-white scenes. Full-white draws the most amperage because all RGB channels fire simultaneously. If you under-calculate the power supply wattage, the system will overheat and shut down.
Balancing the high visual impact of dynamic effects with energy efficiency is a core benefit of LED technology. Compared to traditional display lighting, LED panels consume a fraction of the wattage. However, large arrays still require dedicated circuits to prevent breaker trips. Always consult with a licensed electrician when wiring arrays that exceed standard wall outlet capacities.
Zone management solves many operational challenges. Grouping panels allows the simultaneous display of task lighting and accent lighting within the same physical array. You can wire the outer ring of a ceiling grid to an RGB controller while the inner panels connect to a dedicated white light switch. This physical separation of power and data ensures maximum flexibility.
Controller Ecosystem Capabilities
Control Method | Latency Level | Scalability | Best Use Case |
|---|---|---|---|
Smart App (Wi-Fi) | Medium | Moderate | Home gyms, small retail displays |
IR/RF Remote | Low | Low | Fail-safe operation, basic showrooms |
DMX512 Hardware | Zero | Extremely High | Event spaces, professional studios |
The most common point of failure occurs before the lights are even mounted. Miscalculating connector angles or power flow during installation leads to dead zones. If the directional flow of the data signal is reversed, dynamic scenes will stutter or fail to trigger entirely. LED data signals are directional; they must flow from the controller outward.
Follow these steps to mitigate layout errors:
Utilize pre-installation layout templates provided by the manufacturer.
Map out power injection points and signal flow on paper before mounting the first panel.
Identify the directional arrows on the connectors and ensure they all point away from the controller.
Test the entire array on the floor to verify the data direction matches your intended scene animations.
Voltage drop is a physical limitation of low-voltage lighting. As power travels further from the source, the voltage decreases due to the resistance in the wire and the panels. This results in color degradation. Panels at the end of a long run will look yellow or pink when set to white, and their overall brightness will drop significantly.
Implementing power injection points is the only way to solve this. You must strictly adhere to the manufacturer's maximum-panels-per-run guidelines. If a power supply is rated for 20 panels, do not attach 25 in a single daisy chain. Run a secondary power line (typically 16AWG or 18AWG wire) from the power supply directly to the 21st panel. This injects fresh voltage into the middle of the run, ensuring uniform brightness and color accuracy across the entire display.
Physical installation risks threaten both the hardware and the space. Adhesive failure on drywall is a major issue. The heat generated by the LEDs slowly degrades double-sided tape, causing panels to peel away and fall. Thermal throttling also occurs if panels are mounted in tight, enclosed spaces without ventilation, leading to premature diode failure.
Follow these mounting protocols:
Utilize hard-mounting hardware for any permanent installation.
Use toggle bolts or heavy-duty drywall anchors for wall arrays exceeding 10 panels.
Secure ceiling grids directly to joists or use a suspended unistrut system.
Ensure at least a half-inch of clearance behind the panels for adequate airflow, especially for high-density arrays running continuously.
Dynamic scenes lose their impact if they do not sync properly. Disjointed scenes where panels lag behind the audio or central command look unprofessional. This usually stems from weak Wi-Fi signals, overloaded Bluetooth receivers, or processors that cannot handle the data load of complex animations.
Hardwire your controllers wherever possible using ethernet connections. If wireless control is necessary, utilize dedicated 2.4GHz networks specifically for the lighting hardware. Keep this network free of other heavy traffic like guest Wi-Fi or video streaming. Test scene complexity limits prior to final installation to ensure the controller's processor can handle the data load without stuttering.
Measure your exact installation footprint and draft a precise wiring diagram to identify where power injection points will be required.
Calculate the total maximum wattage of your intended layout to ensure your facility's electrical circuits can handle the load without tripping breakers.
Request documented CRI ratings and diode specifications from shortlisted manufacturers to verify the panels can produce accurate task lighting alongside dynamic effects.
Hard-mount all ceiling and large-scale wall arrays using mechanical fasteners rather than relying solely on adhesive backings.
Test your chosen control ecosystem locally to confirm latency and scene-syncing capabilities meet your operational standards before committing to a permanent installation.
A: Standard RGB panels mix red, green, and blue to simulate white, which often results in a blue or purple tint. For true cool white (5000K-6500K), look for RGB+IC or dedicated RGBW panels that include a separate white diode.
A: This depends on the wattage of the power supply and the draw of the specific panels. Most standard kits support 10-20 panels per standard adapter, but large displays require multiple power injection points mapped out via a wiring diagram to prevent voltage drop.
A: Yes, but adhesive strips are prone to failure over time due to the heat generated by the LEDs. For permanent or large installations, mechanical fastening using screws and drywall anchors is highly recommended to prevent panels from falling.
A: Most high-quality smart controllers feature onboard memory that defaults to the last used color scene or a pre-programmed default state when power is restored. Budget controllers may reset to a factory default, requiring manual adjustment.
A: Yes, provided the controller supports integrations like standard Zigbee, Matter, or specific APIs for gaming setups. Always verify compatibility with your specific smart home hub before purchase to ensure seamless integration.


